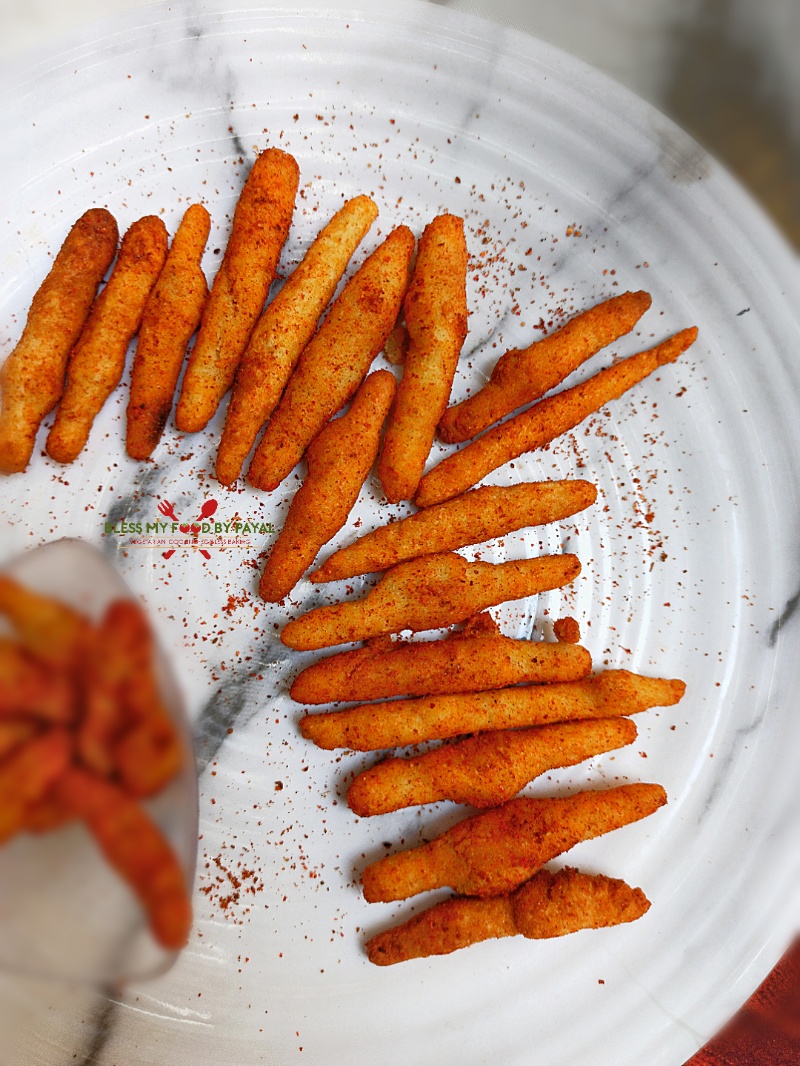
14 Jul Homemade kurkure recipe | how to make kurkure at home | baked/fried kurkure recipe
Last Updated on May 23, 2021 by blessmyfoodbypayal
Homemade kurkure recipe | how to make kurkure at home | baked/fried kurkure recipe with step wise pictorial and video method.
WHAT IS KURKURE?
Kurkure is a brand of corn puffs produced and developed in india. Available in almost 21 flavours in india & different shapes, kurkure is one of the favourite snack of children.
Even a youngest kid, who can’t even pronounce the words properly, must be knowing about this leading snack after chips.
METHODS OF MAKING KURKURE AT HOME
If you surf on internet, you will find variety of methods and ingredients used in making kurkure.
Undoubtly they all are fabolous but some of the recipes are bit complicated for us, because they used the ingredients not easily available in our city.
In addition, few were supposed to be dried first under the sun. This too wasn’t feasiable to us for certain reasons.
PRESENT RECIPE & SOURCE
Recently we get to see the recipe of kurkure shared by famous chef Ms. Nisha Madhulika.
She made it using so regular ingredients and in such a simple way that one can make kurkure on daily basis. Hence, this recipe is inspired from the youtube channel of Ms. Nisha Madhulika.
DIFFERENCE BETWEEN PRESENT RECIPE & SOURCED RECIPE
Not even an iota of change is made in making this recipe. Right from ingredients to measurements to method, everything is same.
Yes, we have done one thing additional. We baked few of the pieces of kurkure which is not done in original recipe.
In original recipe, kurkure are made by only deep frying. We too have deep fried kurkure but a portion is baked too.
DIFFERENCE BETWEEN BAKED & FRIED KURKURE
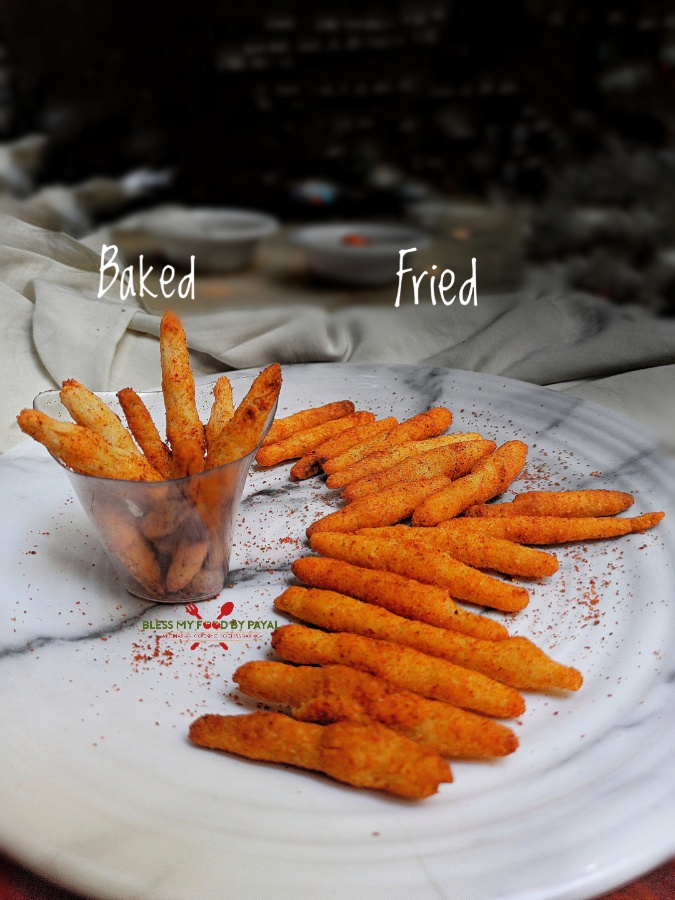
This is hard to reply because kurkure made by both ways were so fantastic that difference can’t be identified. But still we will try to find out few :
- Fried kurkure took less time in getting ready than the baked one. Where one batch of fried kurkure gets ready in 10 – 12 minutes, baking took almost 40 minutes.
- This is obvious that fried kurkure had lots of oil whereas baked kurkure asked for only few drops of oil.
- Frying kurkure needs little care and precautions. Moisture present in the dough causes hot oil to splitter. You need to take proper precautions. the details of which is given further in the recipe. But do keep in mind, don’t allow the children to be around while you are frying kurkure. On the other hand, there’s no such issues with the baking process.
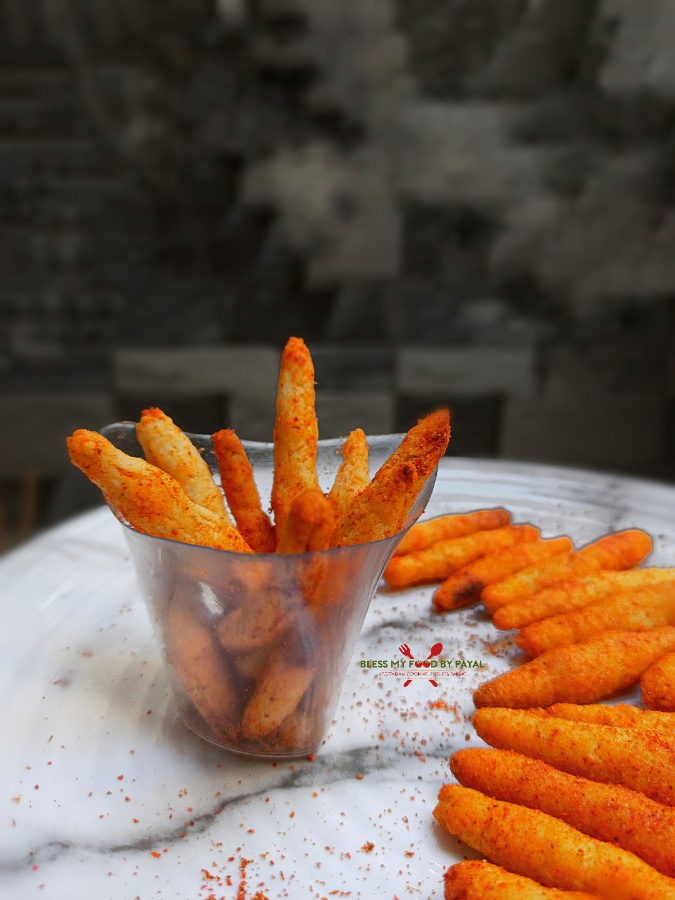
- If we talk in terms of taste & texture, then we must say that it was hard to identity which are the fried and which are the baked one. No difference at all.
Hence we are left with only 3 differences & 4th point above can’t be read as part of difference.
Choice is yours. Choose the mode most suitable to you.
STORAGE OF KURKURE
Homemade Kurkure can be stored for up to a month in an airtight container. But transfer them into container only once they turn completely cool otherwise they will turn soggy.
Also see other snacks recipes :
- whole wheat papdi
- besan papdi
- Besan masala sev
- Nacho chips recipe
- Soya sticks namkeen
- moong dal namkeen
- farsi puri recipe
- chorafali fafda recipe
- methi puri recipe
- suji rusk
- Karela Mathri
- Duck Shaped Namak Paare
- Namak Pare and
- French Fries
Step wise pictorial method of Homemade kurkure recipe
MAKING OF KURKURE
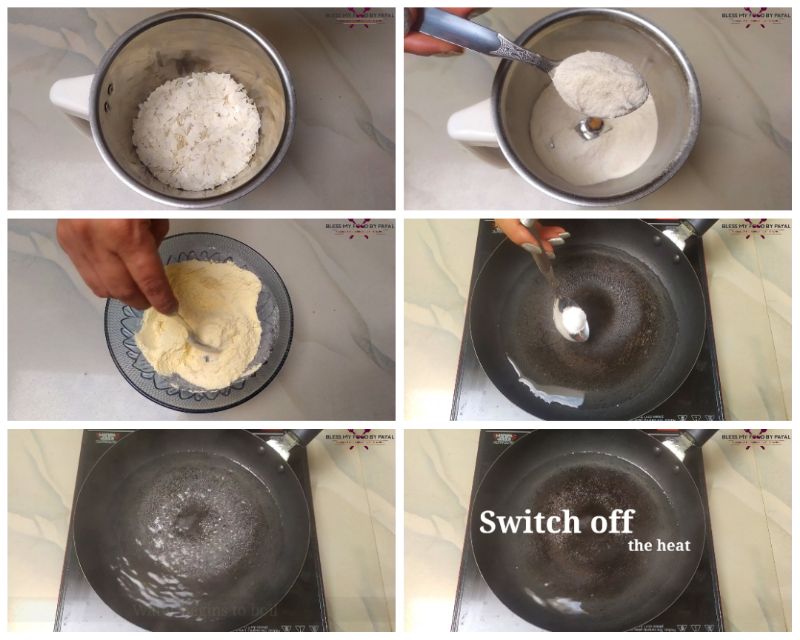
- Grind poha into a very fine powder and take out in a bowl.
- Mix besan with powdered poha.
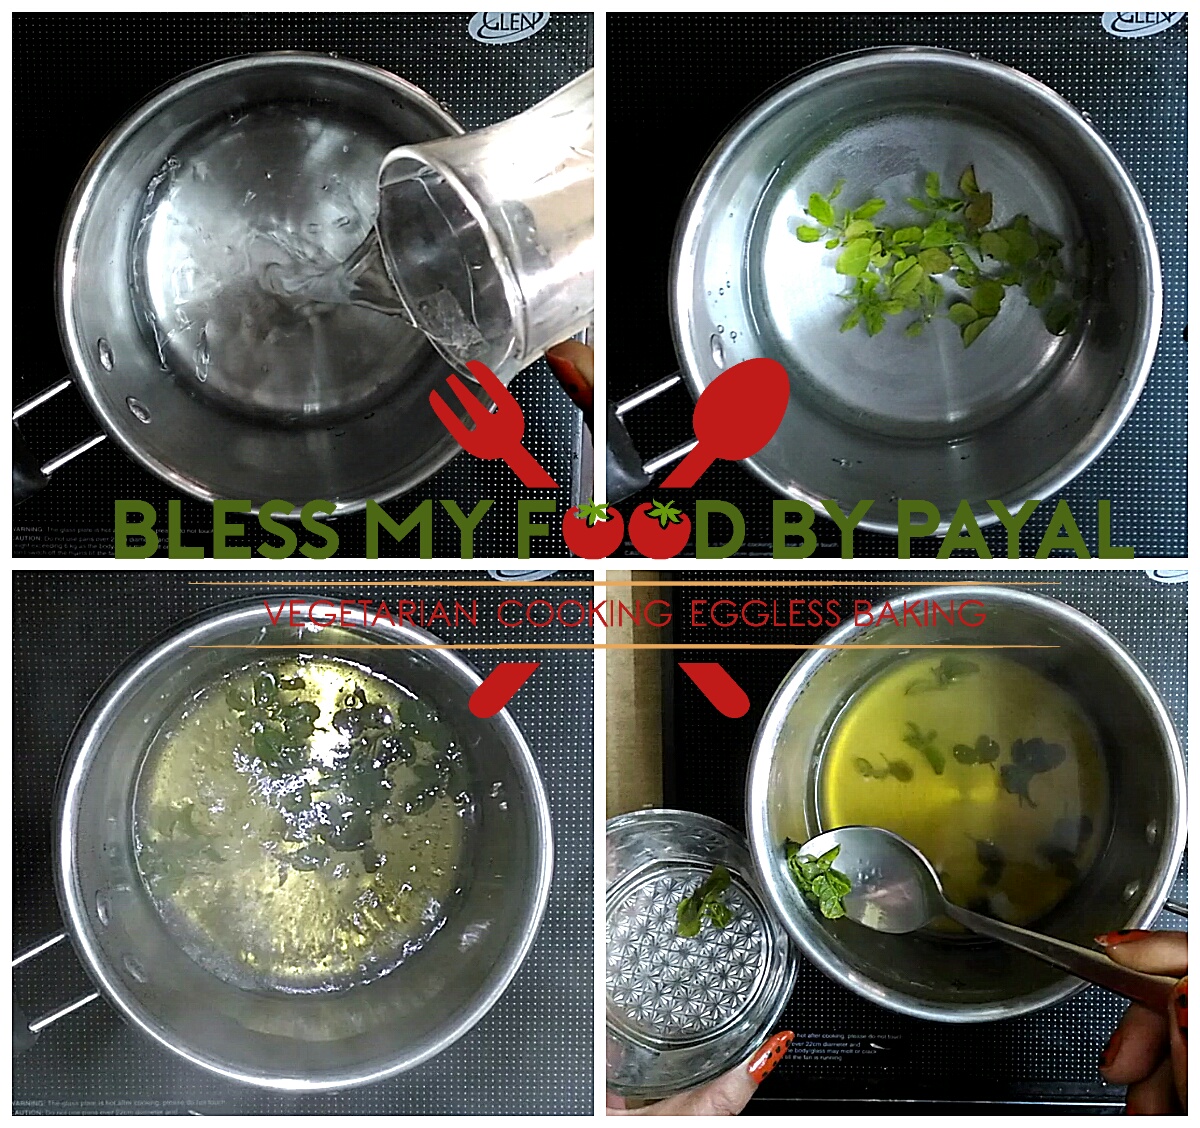
- Pour water in a pan and also add salt in it.
- When water begins to boil, switch off the heat.
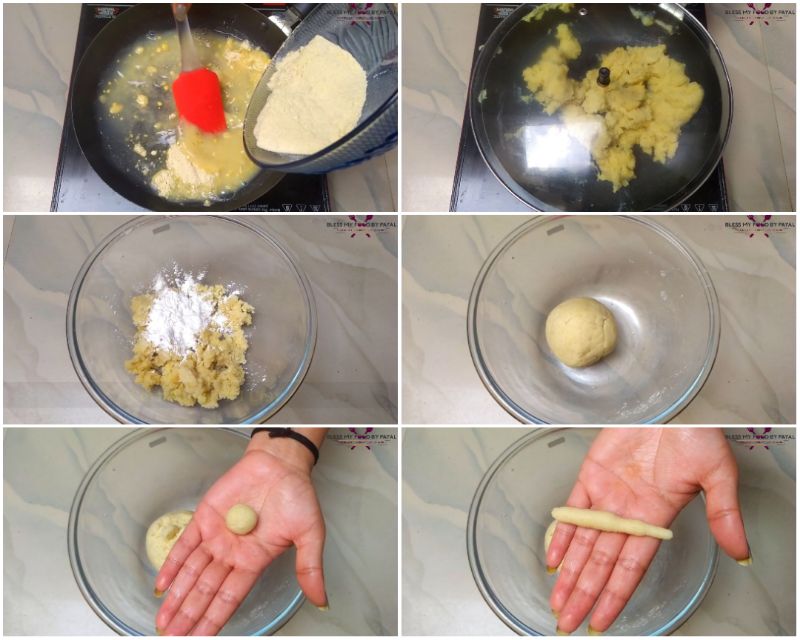
- Add besan poha mixture in water gradually and keep mixing. It will look like a lumpsy dough.
- Cover the pan with a lid just for 5 minutes.
- After the said time, take out the lumpsy dough in a bowl.
- Add corn flour in it and knead into a normal dough. Do grease your hands before kneading the dough. Remember, don’t add additional water for kneading. If finding difficulty in binding the dough, again grease your hands with oil and it works.
- Now take a small pinch of dough and roll it round between your palms.
- Further roll it again into a long string giving it a shape of kurkure as shown in picture below.
- Likewise make such shape out of the entire dough.
METHOD 1 : DEEP FRYING
- Put the kurkure shaped dough pieces into oil for frying. Keep the heat to medium and oil should also be medium hot.
- Only put as much pieces as much the pan can accommodate.
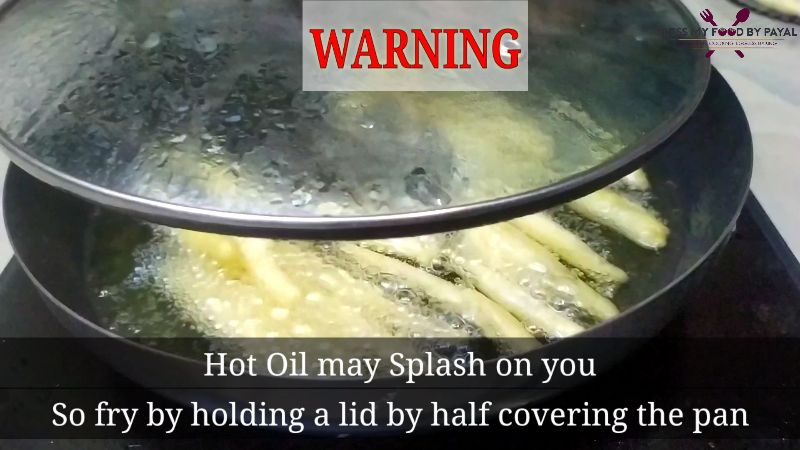
- THIS IS VERY IMPORTANT TO KNOW that the hot oil may splash forcebly while frying kurkure pieces, so precautions are mandatory. Do keep the children away.
- While frying, hold a lid like a shield and cover the pan partially so that oil splashes shouldn’t jump over towards your side. If the oil splits, it will hit the lid only and go back to pan itself. To understand it in a proper way, do watch the video given in this post.
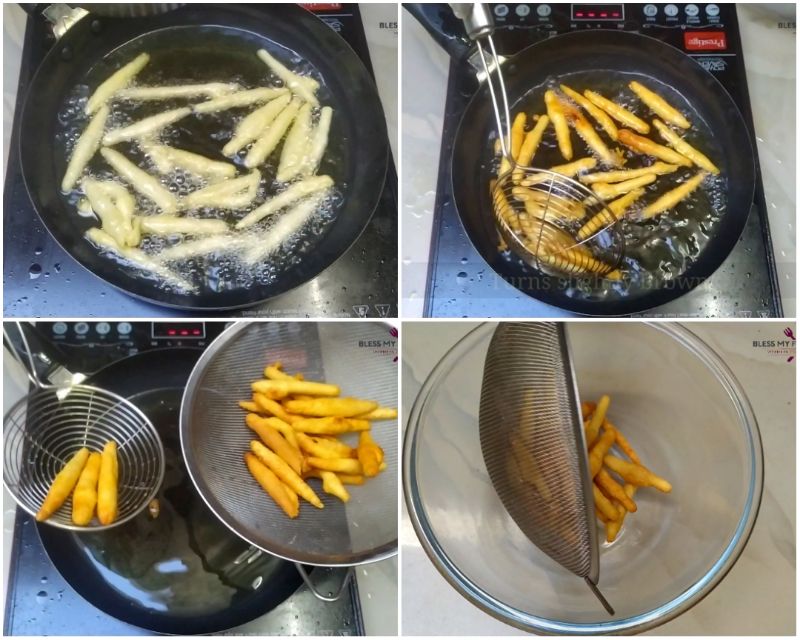
- After couple of minutes, when you realise that oil has settled down & is not splitting around, you can proceed ahead without the shield of lid.
- Once pieces turn slightly golden, take them out in a sieve so that extra oil releases.
- Your deep fried kurkure are ready.
METHOD 2 : BAKING
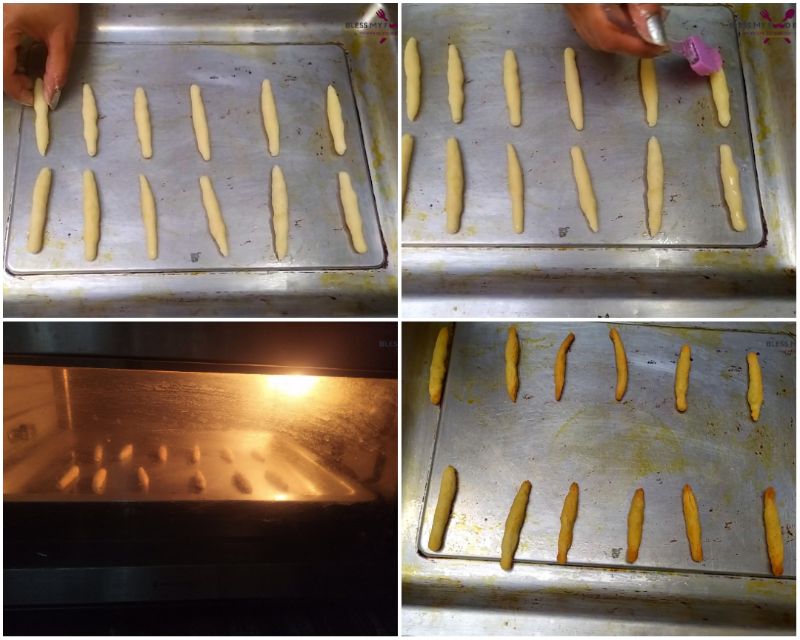
- Switch on the oven for pre-heating @160℃ for 10 minutes with both the rods on.
- Grease a baking tin and arrange kurkure pieces on it.
- Brush the pieces too with oil.
- Put the tray in the middle rack of oven and bake @160℃ for 30-35 minutes with both the rods on.
- After 35 minutes, shift the tray to top rack of oven and bake @230℃ for 3 to 4 minutes with only top rod on. This is very important to keep eyes inside oven during this time otherwise kurkure may burn.
- Take them out of oven and let them cool.
- Your baked kurkure are ready.
SEASONING OF KURKURE
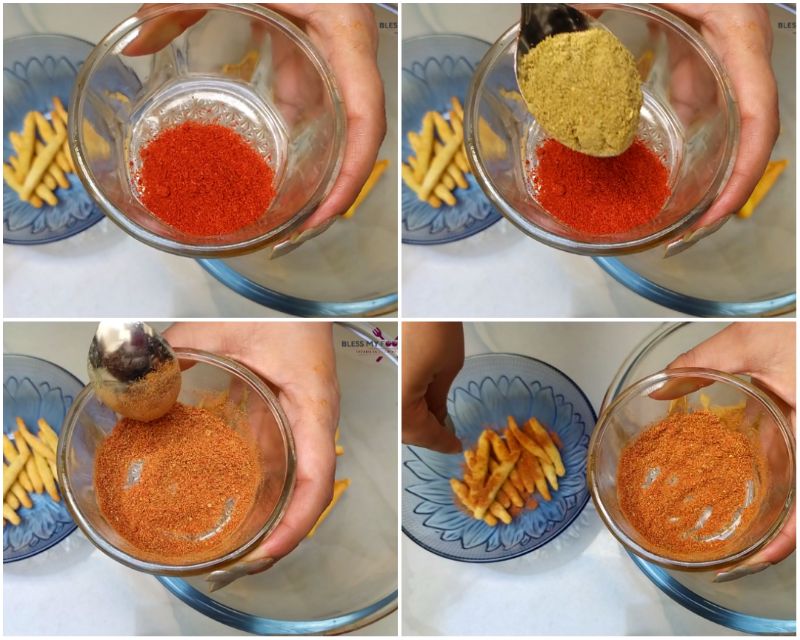
- Mix red chilli powder and chaat masala together.
- Sprinkle it on kurkure and mix well.
- Kurkure are finally and completely ready.
Enjoy.
NOTES
- As kurkure are kids favourite, how much red chilli needs to be added is at your own choice.
- Prefer to use kashmiri red chilli powder only because it is less spicy and more colourful.
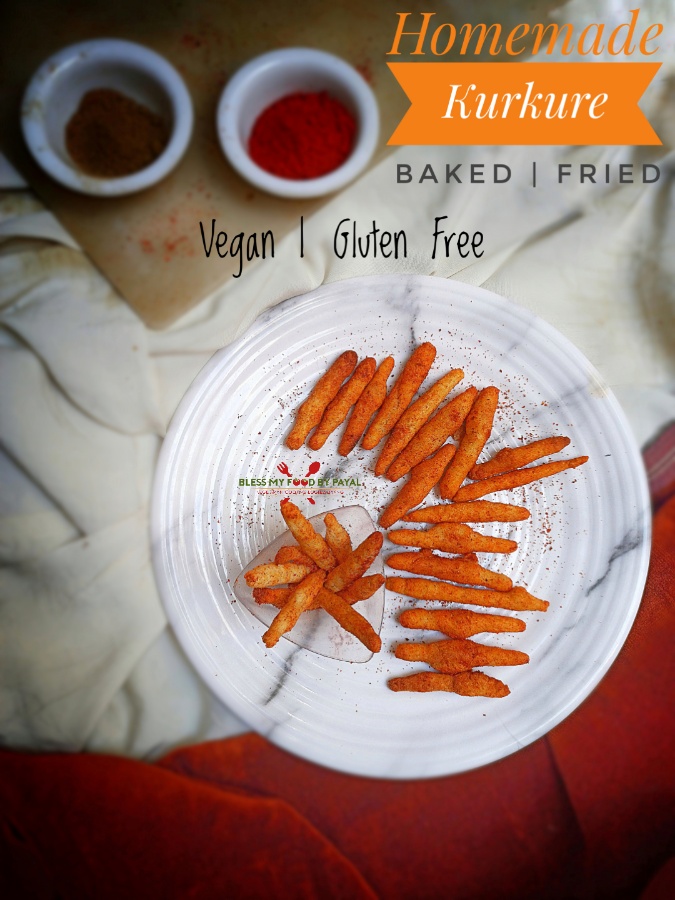
Homemade kurkure recipe – Recipe Card
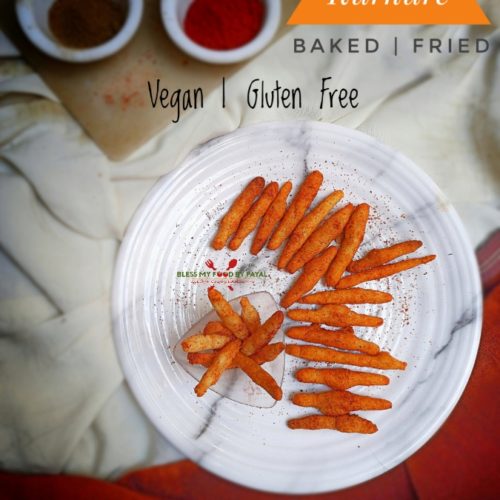
Homemade kurkure recipe | how to make kurkure at home | baked/fried kurkure recipe
Ingredients
FOR MAKING KURKURE
- 1 cup poha/flattened rice
- 1/4 cup besan/chickpea flour
- 1/4 cup corn flour or ararot
- 1/2 tsp salt
- 1 cup water
- Oil as per need
FOR SEASONING
- 1 tsp chaat masala
- 1 tsp kashmiri red chilli powder
Instructions
MAKING OF KURKURE
- Grind poha into a very fine powder and take out in a bowl.
- Mix besan with powdered poha.
- Pour water in a pan and also add salt in it.
- When water begins to boil, switch off the heat.
- Add besan poha mixture in water gradually and keep mixing. It will look like a lumpsy dough.
- Cover the pan with a lid just for 5 minutes.
- After the said time, take out the lumpsy dough in a bowl.
- Add corn flour in it and knead into a normal dough. Do grease your hands before kneading the dough. Remember, don't add additional water for kneading. If finding difficulty in binding the dough, again grease your hands with oil and it works.
- Now take a small pinch of dough and roll it round between your palms.
- Further roll it again into a long string giving it a shape of kurkure as shown in picture below.
- Likewise make such shape out of the entire dough.
METHOD 1 : DEEP FRYING
- Put the kurkure shaped dough pieces into oil for frying. Keep the heat to medium and oil should also be medium hot.
- Only put as much pieces as much the pan can accommodate.
- THIS IS VERY IMPORTANT TO KNOW that the hot oil may splash forcebly while frying kurkure pieces, so precautions are mandatory. Do keep the children away.
- While frying, hold a lid like a shield and cover the pan partially so that oil splashes shouldn't jump over towards your side. If the oil splits, it will hit the lid only and go back to pan itself. To understand it in a proper way, do watch the video given in this post.
- After couple of minutes, when you realise that oil has settled down & is not splitting around, you can proceed ahead without the shield of lid.
- Once pieces turn slightly golden, take them out in a sieve so that extra oil releases.
- Your deep fried kurkure are ready.
METHOD 2 : BAKING
- Switch on the oven for pre-heating @160℃ for 10 minutes with both the rods on.
- Grease a baking tin and arrange kurkure pieces on it.
- Brush the pieces too with oil.
- Put the tray in the middle rack of oven and bake @160℃ for 30-35 minutes with both the rods on.
- After 35 minutes, shift the tray to top rack of oven and bake @230℃ for 3 to 4 minutes with only top rod on. This is very important to keep eyes inside oven during this time otherwise kurkure may burn.
- Take them out of oven and let them cool.
- Your baked kurkure are ready.
SEASONING OF KURKURE
- Mix red chilli powder and chaat masala together.
- Sprinkle it on kurkure and mix well.
- Kurkure are finally and completely ready.
- Enjoy.
Notes
YOUTUBE
For more easy and interesting recipes, please do visit our YouTube Channel and do subscribe it and also hit the bell icon. It’s free. Gratitude for subscribing.




Roasted poha namkeen recipe | poha namkeen mixture
Posted at 23:23h, 05 November[…] Homemade kurkure recipe […]
bhakerwadi recipe | How to make bhakerwadi
Posted at 13:58h, 27 October[…] Homemade kurkure recipe […]
sapana
Posted at 09:50h, 30 JulyWow never knew you could make them at home. Definitely a healthy and chemical-free idea.
blessmyfoodbypayal
Posted at 19:36h, 31 JulyThank you.
Jagruti's Cooking Odyssey
Posted at 06:52h, 25 JulyWe have not tried this hugely popular Kurkure snack yet, but looking at your detailed recipe and pictures, I am definitely going to try once I get little more time on my hands. Homemade is always rewarding!
blessmyfoodbypayal
Posted at 07:28h, 27 JulyYou are gonna love them. Thanks a bunch
Padma Veeranki
Posted at 21:50h, 24 JulyKurkure used to be my favourite travel snack back in India…It’s been so many years I had it…Now, you have tempted me again…Looks awesome!!
blessmyfoodbypayal
Posted at 07:29h, 27 JulyThanks a Lot
Lathiya
Posted at 20:18h, 24 JulyWow, this is really a genius idea. I didn’t know that we could make Kurkurae at home. Looks yum.
blessmyfoodbypayal
Posted at 07:29h, 27 JulyYeah, very easy to make. Thank you
Mayuri Patel
Posted at 12:07h, 24 JulyFirst of all I’m left speechless, making the most liked and famous Indian snack at home, that is like wow. What I even like more is that you can bake the kurkure. Fantastic recipe with equally tantalizing clicks.
blessmyfoodbypayal
Posted at 13:57h, 24 JulyGlad you liked them to the core. Thanks a bunch.
Seema Sriram
Posted at 11:15h, 24 JulyBeing away from India, it is these namkeens that we miss a lot. I am so glad to see the two versions and the details about each one. Will try it some time
blessmyfoodbypayal
Posted at 13:58h, 24 JulyMaking the food of your land is somewhat a great way to relive old memories when you are away. Thank you for writing in.
Sandhya Ramakrishnan
Posted at 22:36h, 23 JulyI would love to try this recipe. I have eaten kurkure in India and was not too keen to give kids because of lot of artificial coloring and flavoring. It has some interesting recipes and they are easily available in our kitchens. Looks delicious.
blessmyfoodbypayal
Posted at 14:05h, 24 JulyIt is something kids are fan of and nothing like if you can give them happily. Only way is to make at home and let kiddos enjoy the bowls. Thanks for writing in.
NARMADHA
Posted at 10:06h, 23 JulyWow. This looks similar to store bought ones and so crispy and crunchy. Wish to pick a few and eat now. I like the fact the ingredients are easily available and not too complicated.
blessmyfoodbypayal
Posted at 14:48h, 23 JulyThey truly were like the store brought one. Thank you.
Archana Potdar
Posted at 09:37h, 23 JulyWow! not just kids even adults will love these kurkure. Absolutely innovative.
blessmyfoodbypayal
Posted at 14:49h, 23 JulyThanks
Vanitha Bhat
Posted at 09:30h, 23 JulyKurkure is my son’s favorite snack; he used to make me buy this when he was little and I was not happy as it did not look like it was nutritious at all but with so many chemicals! Not any more! This homemade kurkure recipe is brilliant dear! Looks perfect and almost like store bought but with healthy ingredients.
My son will be pleased; awesome share!
blessmyfoodbypayal
Posted at 14:52h, 23 JulyVery right. No one feels good buying the chemicals for kids. And kurkure is something for which kids can not be controlled. Hope you try the try and male your son happy. Thank you for writing in.
Vandana
Posted at 13:25h, 22 JulyWow, I never even imagined that kurkere could be made at home too. It’s one of my favorite snacks. They look so crisp and perfect. Great recipe.
blessmyfoodbypayal
Posted at 18:22h, 22 JulyThank you so much.
Sandhya Nadkarni
Posted at 21:18h, 21 JulyKurkure are my daughter’s favorite and I am so happy to see this yummy recipe! Thanks for sharing Shailender.
blessmyfoodbypayal
Posted at 18:23h, 22 JulyThank you. Would love to see your daughter smiling when you make it for her.
Lata Lala
Posted at 16:56h, 21 JulyKurkure and made at home, nothing could be more satisfying than this. Not only kids but we all love Kurkure. I loved how you have made 2 versions of it. Awesome share.
blessmyfoodbypayal
Posted at 18:24h, 22 July2 versions will help to choose the one more suitable to you. Thanks for writing in.
amrita
Posted at 11:12h, 21 JulyWow… Kids as well as adults everyone love this snack and homemade are the best… I was going through the ingredient list and I found all available ingredients and outcome is this superb snack… Thanks for sharing
blessmyfoodbypayal
Posted at 18:25h, 22 JulyThis is the beauty of this recipe. All ingredients are basic and easily available in every indian kitchen. Thanks a bunch.
Uma Srinivas
Posted at 22:26h, 20 Julywow, such a lip-smacking snack recipe! Thank you for showing us how to make kids’ favorite kurkure snacks!
blessmyfoodbypayal
Posted at 05:35h, 21 JulyThanks a bunch
blessmyfoodbypayal
Posted at 18:25h, 22 JulyThanks you so much
Ruchi
Posted at 14:52h, 16 JulyMy mouth is literally watering looking at the pics… Kurkure use to.be my favourites but then slowly gradually i have totally stopped eating this snack. Now feeling so tempting to try it. Looks amazing. Lovely share
blessmyfoodbypayal
Posted at 16:56h, 17 JulyGlad you loved it. Thank you bunches.