02 Oct Homemade authentic Amul butter recipe


Last Updated on June 14, 2025 by blessmyfoodbypayal
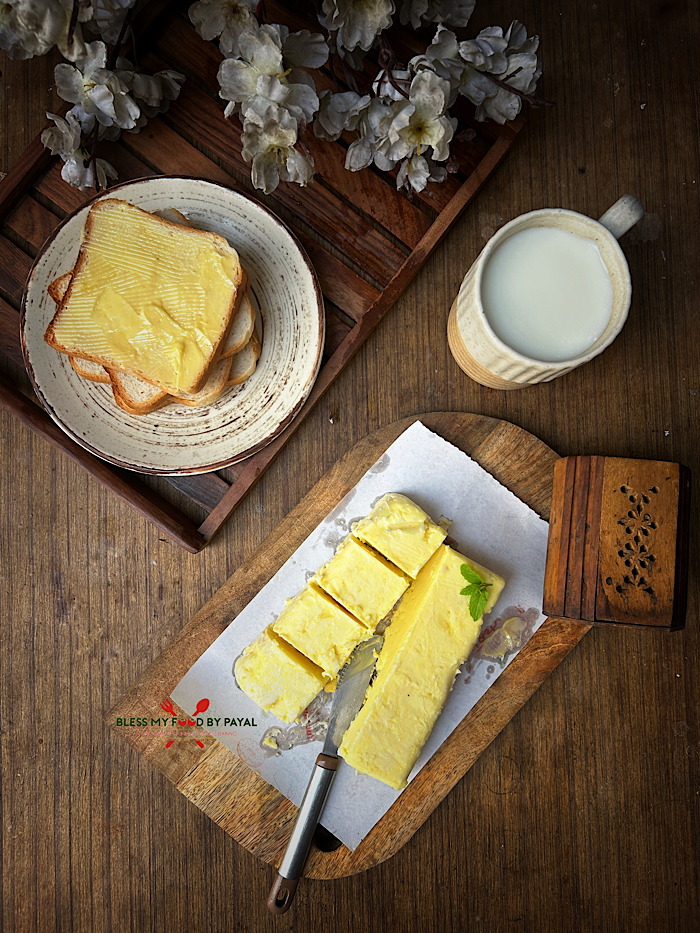
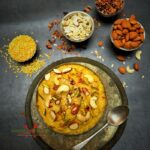
Homemade authentic Amul butter recipe with step wise pictorial and video method.
Amul is the most popular Indian brand who deals in various dairy products and their butter is one of the popular food item.
Popularly called by the name “Amul Butter”, it has a distinct smack. Pale yellow in colour, this butter is salted in taste.
As this recipe is nowhere on internet, so it was really hard to develop the right recipe and as such it took us about a week in developing the exact taste.
And please, don’t think that just by adding salt and yellow colour in white butter makes it Amul. You have to go extra miles to get the exact taste.
Although we were sure that butter will come out after churning malai, and that’s obvious, but unsure about its taste like Amul but luckily here it was our first successful attempt.
FAQ’s
WHICH MILK TO USE TO COLLECT MALAI ?
No strick answer to this query. You can either use Cow’s milk or Buffalo’s milk or mix of both to collect malai.
Although Amul itself doesn’t use malai but pasteurised, cultured cream derived from cow’s or buffalo’s milk but this is not possible at home.
So, we can only rely on malai collected from these two differently sourced milks.
WHAT IS MALAI ?
Most of the Indian houses make butter at home so this is not something to talk about at length but still we would like to tell that malai is a thick layer of cream collected after boiling milk.
Initially this malai is very thin and light when the milk is hot but it turns thick and heavy once milk cool down completely, especially on refrigeration.
So that thin layer of cream is taken out of milk and collected separately in daily basis.
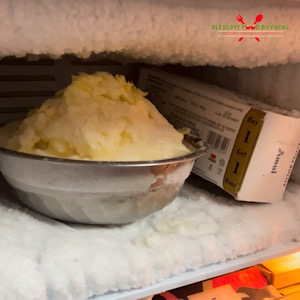
HOW TO STORE MALAI?
Keep collecting malai on daily basis, put it in a clean bowl and place in the freezer.
Some people put the malai in refrigerator but not freezer. Even that is not wrong but freezer enhances the life of malai much more than refrigerator.
It is also said that malai should be collected and stored in air tight container but we never did so. Our malai remains open in freezer and never came across any issues.
HOW OLD THE MALAI SHOULD BE?
It varies depending on whether conditions.
In summers, its better to use malai within 2 to 3 weeks and in winters, one month should be the ideal time.
Probably malai may survive even after the above mentioned duration but to be on a safer side, use it on time to maintain freshness and avoid off smell.
WHY TO SHIFT MALAI FROM FREEZER TO REFRIGERATOR A NIGHT BEFORE?
Malai in the freezer will be in a frozen form and shifting it to refrigerator will help in bringing it to unfrozen state.
WHY TO BRING MALAI TO ROOM TEMPERATURE?
Bringing Malai to room temperature is essential to stir it gently and also important to begin the fermentation process.
WHY FERMENTATION PROCESS ?
Curd is added to ferment Malai because curd has live lactic acid bacteria which develops a tangy and rich flavour to the butter turning it into cultured butter, just like Amul.
Although Amul itself doesn’t use curd to develop bacteria but Starter Culture Strains (pure bacteria cultures) which are naturally available in curd.
So the basic thing is that Malai is being fermented by different core ingredient but the purpose and effect are the same.
But during the fermentation process, do not airtight the malai. Just cover the bowl loosely putting a lid or just a plate over the bowl.
FERMENTATION PERIOD DURING DIFFERENT WHETHER CONDITIONS
We live in Jammu (Jammu and Kashmir – India), running month is June and the temperature is 43°C on average.
So in such a heat, we kept the Malai for fermentation for 8 long hours.
The point to make here is that temperature has a great role to play in fermentation process so is of the duration.
Hence this is for you to see for how long to ferment Malai.
Please do keep in mind that if the Malai has started giving off a mildly sour aroma (similar to fresh curd), and the texture turns slightly loose, airy and bubbly, your Malai is ready.
So higher the temperature, lower is the time for fermentation. In winters due to the extreme cold whether, you may need to wait for 12 to 24 hours.
WHY TO FERMENT MALAI ONLY DURING DAY TIME?
Although Malai takes long in fermentation, still it is recommended to do the process in the day time so that you can keep an eye on it. Because over fermentation may cause your Malai spoil.
In our case, although Malai was fermented for 8 hours, but we were keep on checking it at reasonable durations.
But in case of winters when you are sure that malai is going to take longer, you can conveniently place it out for overnight fermentation.
CAN I FERMENT MALAI INSIDE FRIDGE ?
Absolutely yes, but that’s a very very long process in terms of time duration.
Cold slows down the fermentation process so if you are doing it inside refrigerator, it may take 24 to 36 hours in winters and 36 to 48 hours in summers.
But this is obvious that someone will do like this only in exception circumstances otherwise outside fermentation is much convenient.
WHAT IF I DON’T FERMENT MALAI?
If you don’t ferment Malai, you will not be able to mimic Amul salted butter.
The butter will definitely come out but that will be normal white butter commonly made in almost every house.
WHY TO REFRIGERATE AGAIN AFTER FERMENTATION?
After remaining outside, malai will turn too thin and as a result the butter will come out to be very greasy and soft.
One hour refrigeration will chill the malai again and as such solidify the fat content of malai making butter easier to separate from buttermilk.
WHY TO ADD SALT AND COLOUR TO BUTTER AFTER MIXING IN WATER?
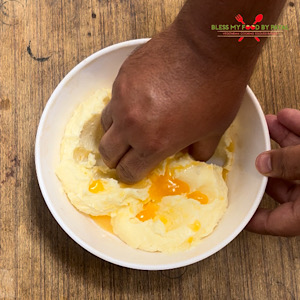
Butter (recently churned) is almost in the form of a paste hence it is difficult to mix any powdered ingredients as it is. That is why salt and turmeric are dissolved first to make their reach possible to each but of the butter.
Salt will give an authentic taste of Amul to the butter but as far as turmeric is concerned, that’s only for colour.
Original Amul uses Natural Colour (annatto) which is derived from Achiote tree.
As the purpose of the colour is only to give a look to the butter and it has nothing to do with taste and texture, then it hardly matters you add turmeric, yellow food colour or originally Annatto. Although, that’s a different matter if you get Annatto easily.
HOW TO UTILIZE LEFTOVER BUTTERMILK?
The leftover buttermilk is full of proteins and it should not be discarded.
Look what we did to it :
Heat buttermilk on low to medium heat.
Once it is very hot, add a pinch of citric acid or squeeze half lemon or add a tsp of vinegar.
Let the boil come.
Buttermilk will be seen curdling. Off the heat and let it rest for 5-7 minutes.

Sieve.
The white solid you can see is paneer.
The whey left after curdling the buttermilk can be used in kneading the dough or cooking rice or dal or soup or in anything as a water substitute in cooking.
HOW TO AND FOR HOW LONG TO STORE HOMEMADE AMUL BUTTER?
Place the butter in air tight container and store in the fridge.
In WINTERS, it stays good upto 2-3 weeks in refrigerator and upto 3 months in freezer.
In SUMMERS, it will remain good for 3-4 weeks in refrigerator and more than 3 months in freezer.
STEP WISE PICTORIAL RECIPE OF HOMEMADE AUTHENTIC AMUL BUTTER RECIPE
Now it’s Summers and the temperature in our city is 43°C. Set the time frame in such a way that fermentation should take place during the day time so that you can keep an eye on it. Hence begin the process from night.
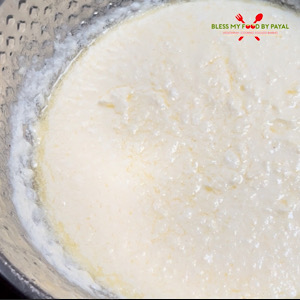
THAW THE MALAI
Usually malai is kept in the freezer so it will be freezed and as such hard right now.
Before you sleep at night, take the malai out of freezer and place in the top rack of refrigerator. Leave it there overnight to thaw.

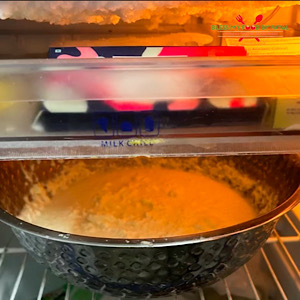
BRINGING TO ROOM TEMPERATURE
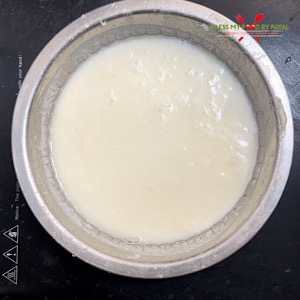
In the morning (better do it early by 6 to 7 AM), bring the Malai out of refrigerator and if it is loose enough to leave the bowl, transfer it in a big bowl for easy handling.
Keep it at any place in the kitchen. The purpose is to bring the Malai at room temperature, which may take 4 to 5 hours. In 4 to 5 hours, the Malai will come to room temperature and turns soft.
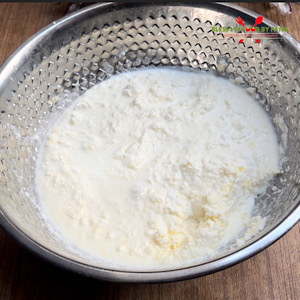
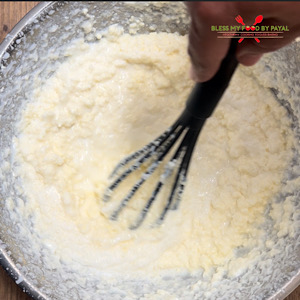
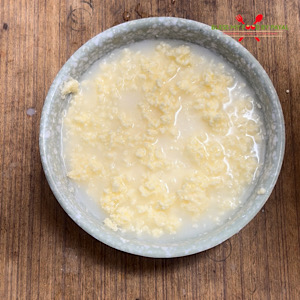
FERMENTATION OF MALAI
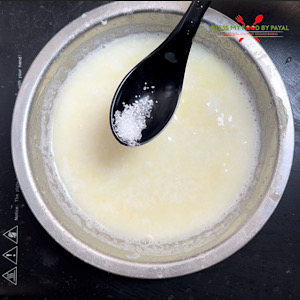
Add a tbsp of fresh Curd in Malai. The quantity of curd will vary depending on the quantity of Malai. 1 tbsp curd is enough for 1 kg Malai. And remember very important point, Malai has to be at room temperature.
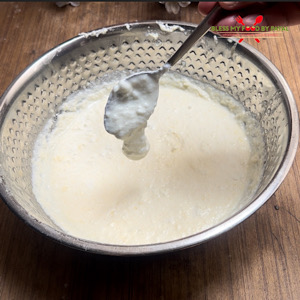
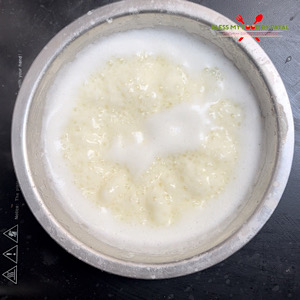
Stir the malai so that curd mixes very well.
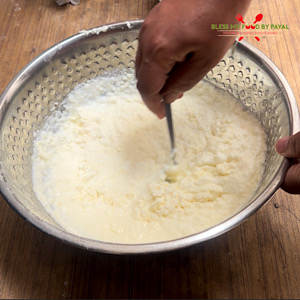
Put a lid on the bowl. The lid shouldn’t be airtight. The bowl should just be loosely covered. Again leave the malai bowl on kitchen shelf for atleast 8 hours.
NOTE : Fermentation timings may vary depending on the temperature of your city. To know more in detail, read the FAQ’s in the body of this post from top.
After couple of hours (around 4 to 5), start checking your malai. What we need is that Malai should give off a mildly sour aroma (similar to fresh curd). The texture will be slightly loose, airy and bubbly.

We got this status of malai after 8 hours of fermentation in 43°C temperature of the city.
PRE-CHURN COOLING
When the malai is properly fermented, place the bowl in refrigerator just for an hour. Chilling will improve butter separation during churning.
CHURNING
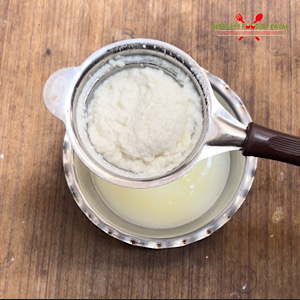
After 1 hour is over, take the bowl out of refrigerator and add 8-10 ice cubes in it.

Start churning with a hand whisk or electric beater.

In 4-5 minutes (with electric beater) and 10-12 minutes, butter will be seen separated from liquid (buttermilk).
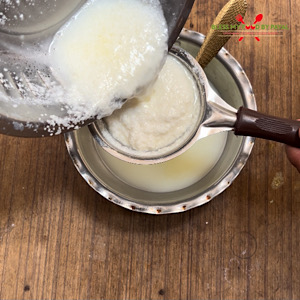
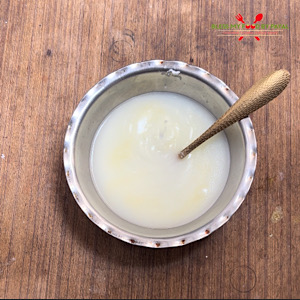
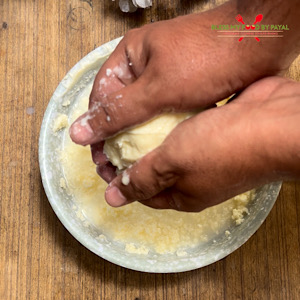
Gather the butter and shift in another bowl carrying chilled water. It will wash the butter and also solidify it. You can wash the butter 2-3 times to remove the traces of buttermilk. Leave the butter in chilled water for 5-7 minutes.
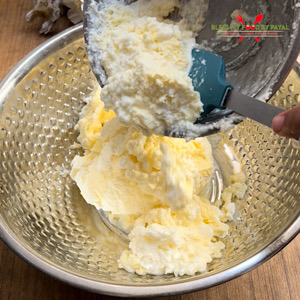
Again squeeze the butter with both hands and shift in another bowl.
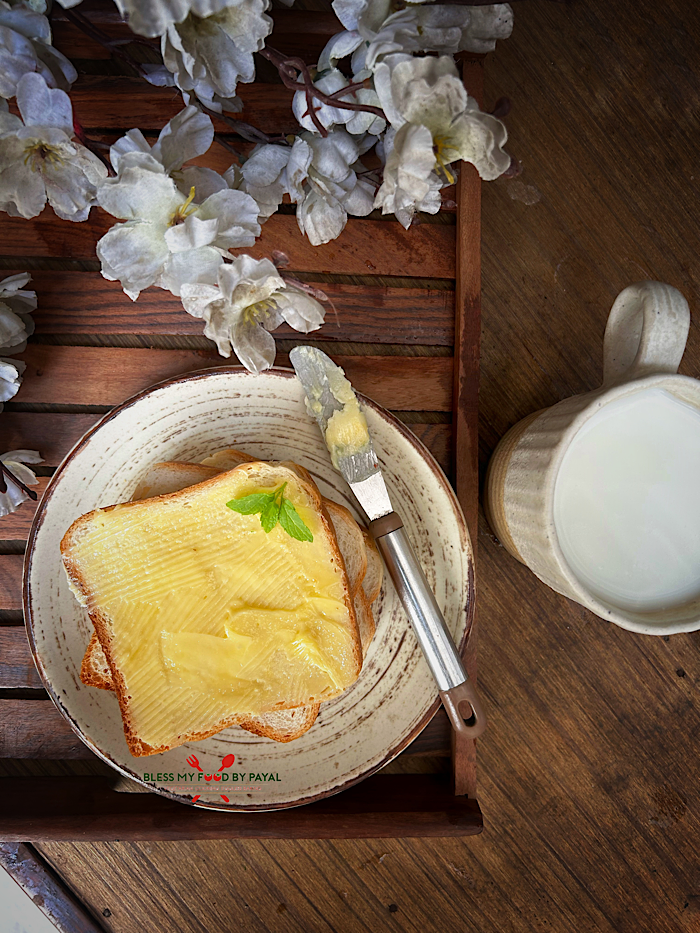
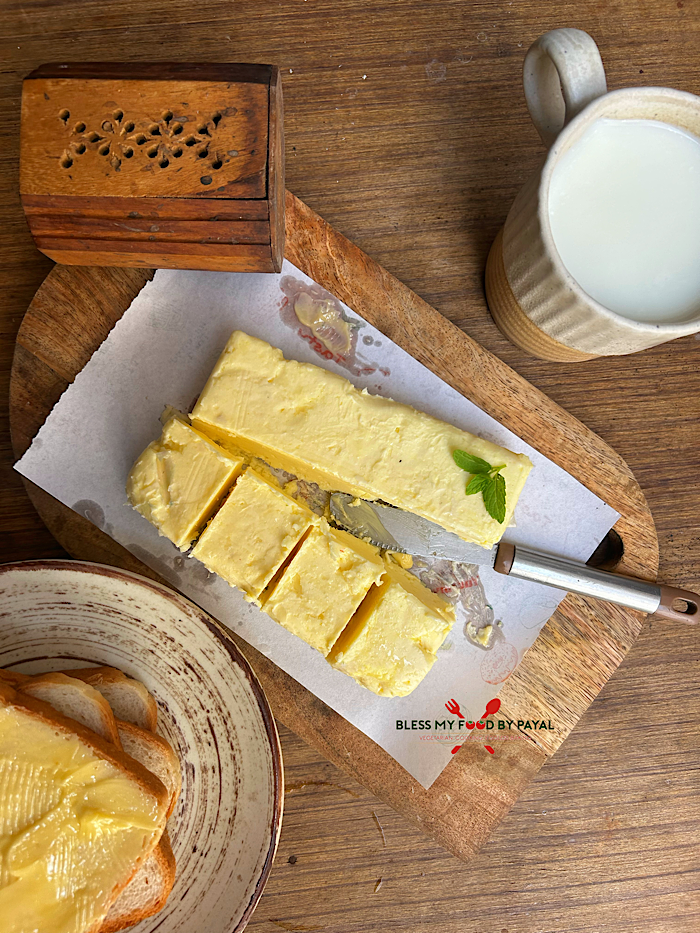
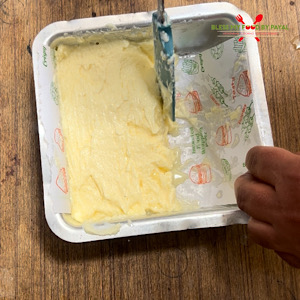
To give it a complete Amul like look and taste, mix salt and turmeric powder in water.
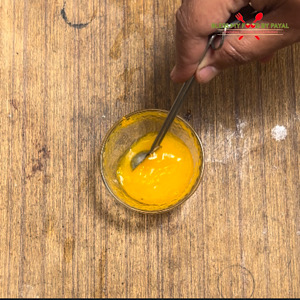
Add this salted yellow water to butter and mix thoroughly.
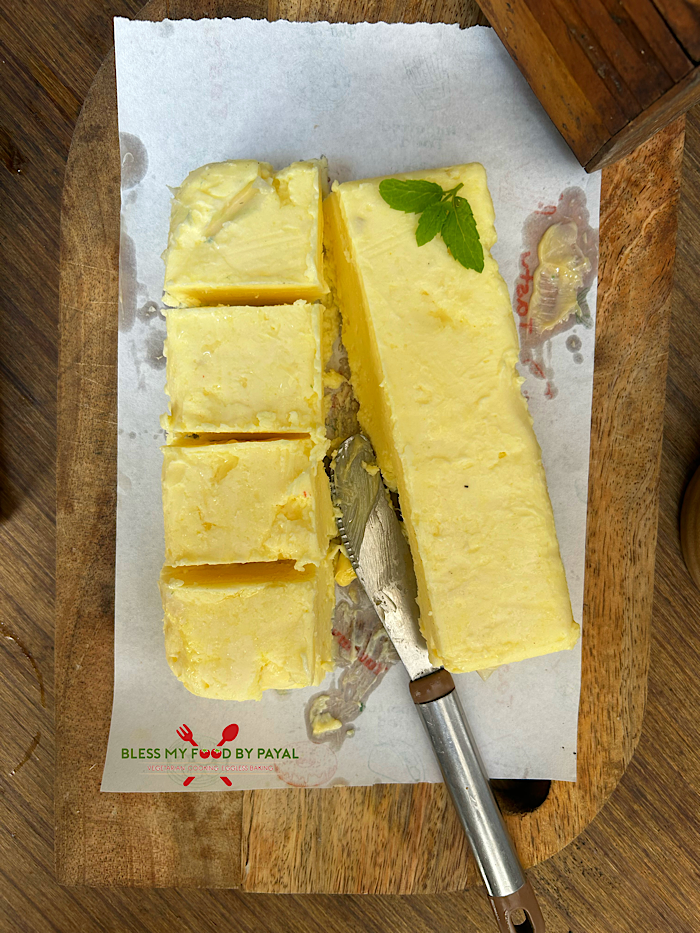
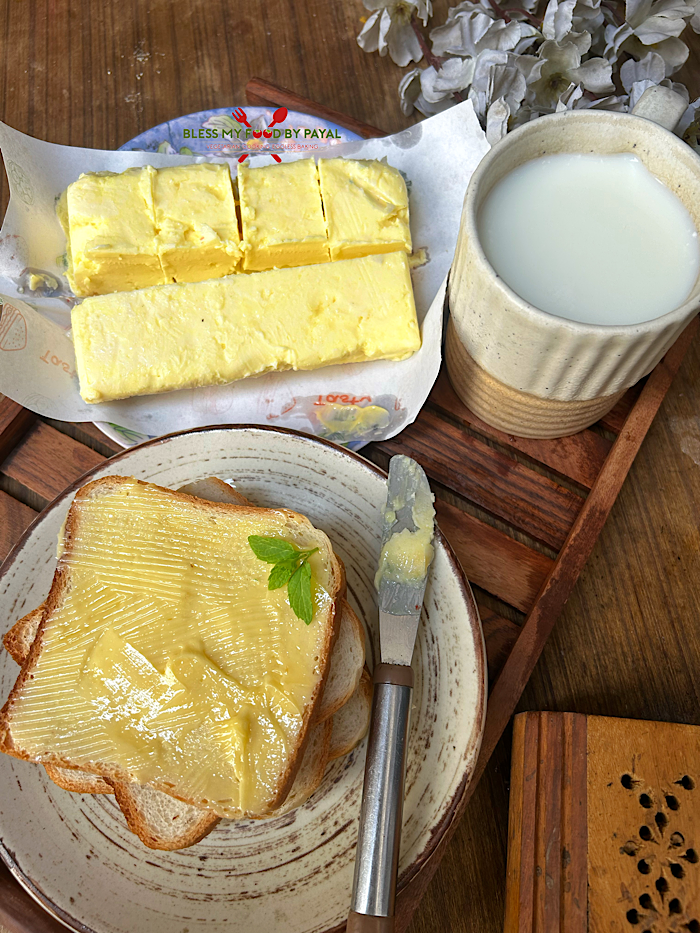
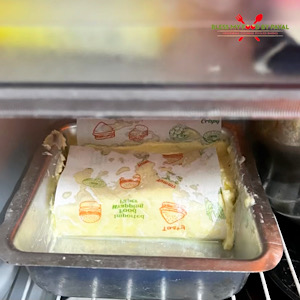
Transfer the butter in a square tin or box lined with greased butter paper and level it into a brick shape, much like Amul butter.
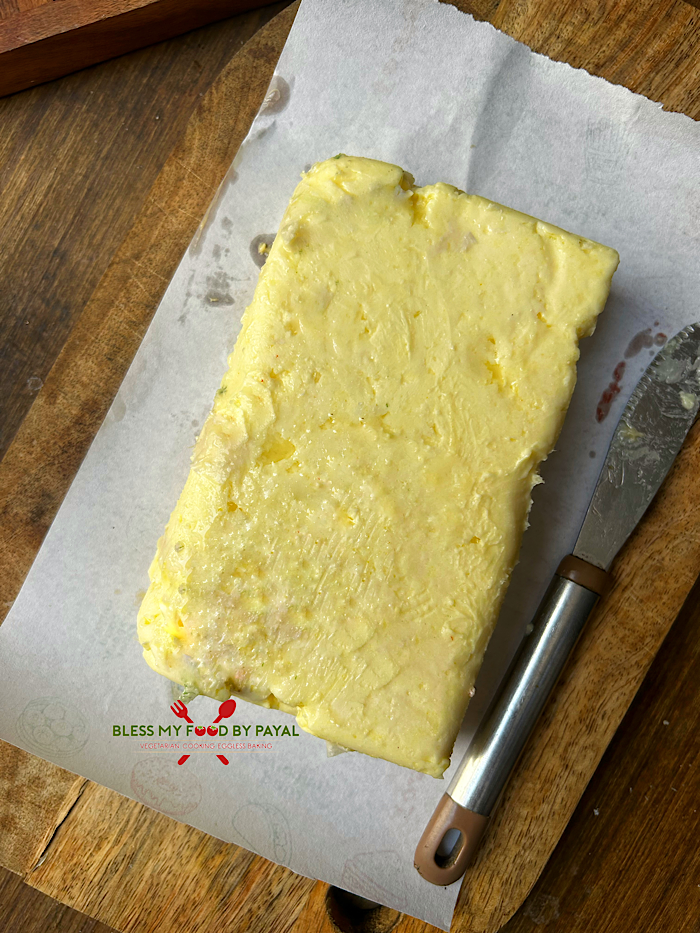
Refrigerate till firm.
Homemade Amul butter is ready.
NOTES
- This recipe is less about ingredients and more about process. So it is HIGHLY RECOMMENDED to read it carefully including FAQ’s given in the body of the post over the top.
- The buttermilk left after butter is made is very useful in many ways. Details to it with step wise pictures are also given in FAQ’s.
HOMEMADE AUTHENTIC AMUL BUTTER RECIPE – RECIPE CARD

Homemade authentic Amul butter recipe
Ingredients
- Malai collected for 15-20 days (we were having 1 kg malai)
- 1 tbsp fresh Curd
- 3/4 tsp salt
- 2 pinches turmeric powder or yellow food colour
- 1 tsp water
- Ice cubes
- Ice cold water
Instructions
- Now it's Summers and the temperature in our city is 43°C. Set the time frame in such a way that fermentation should take place during the day time so that you can keep an eye on it. Hence begin the process from night.
THAW THE MALAI
- Usually malai is kept in the freezer so it will be freezed and as such hard right now.
- Before you sleep at night, take the malai out of freezer and place in the top rack of refrigerator. Leave it there overnight to thaw.
BRINGING TO ROOM TEMPERATURE
- In the morning (better do it early by 6 to 7 AM), bring the Malai out of refrigerator and if it is loose enough to leave the bowl, transfer it in a big bowl for easy handling.
- Keep it at any place in the kitchen. The purpose is to bring the Malai at room temperature, which may take 4 to 5 hours.
- In 4 to 5 hours, the Malai will come to room temperature and turns soft.
FERMENTATION OF MALAI
- Add a tbsp of fresh Curd in Malai. The quantity of curd will vary depending on the quantity of Malai. 1 tbsp curd is enough for 1 kg Malai. And remember very important point, Malai has to be at room temperature.
- Stir the malai so that curd mixes very well.
- Put a lid on the bowl. The lid shouldn't be airtight. The bowl should just be loosely covered.
- Again leave the malai bowl on kitchen shelf for atleast 8 hours.
- NOTE : Fermentation timings may vary depending on the temperature of your city. To know more in detail, read the FAQ's in the body of this post from top.
- After couple of hours (around 4 to 5), start checking your malai. What we need is that Malai should give off a mildly sour aroma (similar to fresh curd). The texture will be slightly loose, airy and bubbly.
- We got this status of malai after 8 hours of fermentation in 43°C temperature of the city.
PRE-CHURN COOLING
- When the malai is properly fermented, place the bowl in refrigerator just for an hour. Chilling will improve butter separation during churning.
CHURNING
- After 1 hour is over, take the bowl out of refrigerator and add 8-10 ice cubes in it.
- Start churning with a hand whisk or electric beater.
- In 4-5 minutes (with electric beater) and 10-12 minutes, butter will be seen separated from liquid (buttermilk).
- Gather the butter and shift in another bowl carrying chilled water. It will wash the butter and also solidify it. You can wash the butter 2-3 times to remove the traces of buttermilk. Leave the butter in chilled water for 5-7 minutes.
- Again squeeze the butter with both hands and shift in another bowl.
- To give it a complete Amul like look and taste, mix salt and turmeric powder in water.
- Add this salted yellow water to butter and mix thoroughly.
- Transfer the butter in a square tin or box lined with greased butter paper and level it into a brick shape, much like Amul butter.
- Refrigerate till firm.
- Homemade Amul butter is ready.
Notes
More from the site
 Aloo Bukhara Chutney | Plum Chutney Recipe
- Dahi Ke Kebab Recipe in Air Fryer
- Mushroom Seekh kebab recipe in air fryer
- Kadak Sohan halwa Recipe (with Wheat flour)
- Konkani Taushya Rava Bhakri Recipe | Cucumber Semolina Roti
- Jammu special Kadam ka achaar recipe | Kholrabi pickle recipe
- Salted Caramel Kulfi Recipe
- Homemade Chocolate syrup with cocoa powder | How to make Chocolate sauce with cocoa powder
- Moong Dal Halwa recipe with less ghee
- Roasted chickpeas in Air Fryer


mukesh Gupta
Posted at 07:33h, 29 MayIn place of desi ghee, olive oil wont be acceptable, in order to save cost in commercial establishment ??
blessmyfoodbypayal
Posted at 02:39h, 30 MayNever tried that way. But I don’t think it will work. Thanks
Alpa Desai
Posted at 13:59h, 19 JanuaryHave tried butter rcp
Its just marvellous dear
Thanx for sharing
blessmyfoodbypayal
Posted at 16:31h, 19 JanuaryThanks a bunch for stepping into our blog with your words of appreciation.
Sumith Babu
Posted at 23:23h, 11 OctoberDelicious!!
Payal Bali Sharma
Posted at 06:11h, 12 OctoberThanks alot
Rashmi Gopal Rao
Posted at 05:27h, 07 OctoberVery nice Payal; looks yummy!
Payal Bali Sharma
Posted at 10:43h, 07 OctoberThank you so much Rashmi.
Smita pandey
Posted at 05:47h, 06 OctoberDo u mean churn ghee or homemade butter?
Isn’t ghee what we get after we heat the butter?
Payal Bali Sharma
Posted at 05:52h, 06 OctoberYes Smita, i mean DESI GHEE. You have to churn the desi ghee only to make this butter whose taste is similar to Amul Butter.
theyellowdaal
Posted at 03:32h, 03 OctoberNice recipe.
Payal Bali Sharma
Posted at 03:37h, 03 OctoberThanks alot