04 Mar Layered and Baked Gujia recipe without mould
Last Updated on August 14, 2025 by blessmyfoodbypayal
Layered Gujia recipe | baked Gujia recipe | how to make mawa gujia without mould with step wise pictorial and video method.
WHAT IS GUJIA?
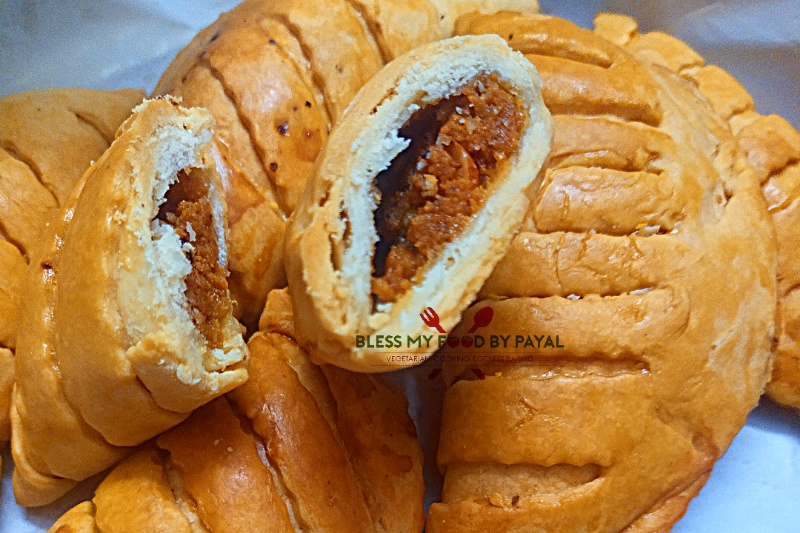
Gujiya or gujhia is a deep fried sweet dumpling traditionally made with maida (all purpose flour) as it’s outer crust and a mixture of khoya/mawa (milk solids) with sugar and dry fruits as a stuffing.
FESTIVE TREAT
Don’t know why, but Gujia is strictly visualises as Holi recipe and is made widespread for this occasion. In addition to Holi, gujia is considered as a must sweet on Diwali too.
ORIGIN
Especially made during the two prominent festivals of India i.e. Holi & Diwali, as already said, gujia is commonly made in North part of country , most particularly in Bihar, Rajasthan, Uttar Pradesh & Madhya Pradesh.
SIMILAR DISHES
Gujia exactly resembles a spanish savoury pastry named “Empanada”, which too look like a half moon but generally baked.
With a bit change in ingredients for stuffing and fluctuating use of maida, atta or suji or mix of maida & suji for outer crust, gujia is made in several regions of India with different names.
In Bihar, it is called “Purukiya” or “Perukiya”, “Karanji” in Maharashtra & Odisha, “Ghughra” in Gujarat, “Garijalu” in Telangana, “Somas” in Tamil Nadu, “Nevri” or “Neuri” in Goa & “Kajjikaya” in Andhra Pradesh and Karnataka.
TYPE OF DOUGH
Dough is needed to make outer crust of gujia and it is made of maida (all purpose flour) mainly. But few mix whole wheat flour too in the ratio of 50:50.
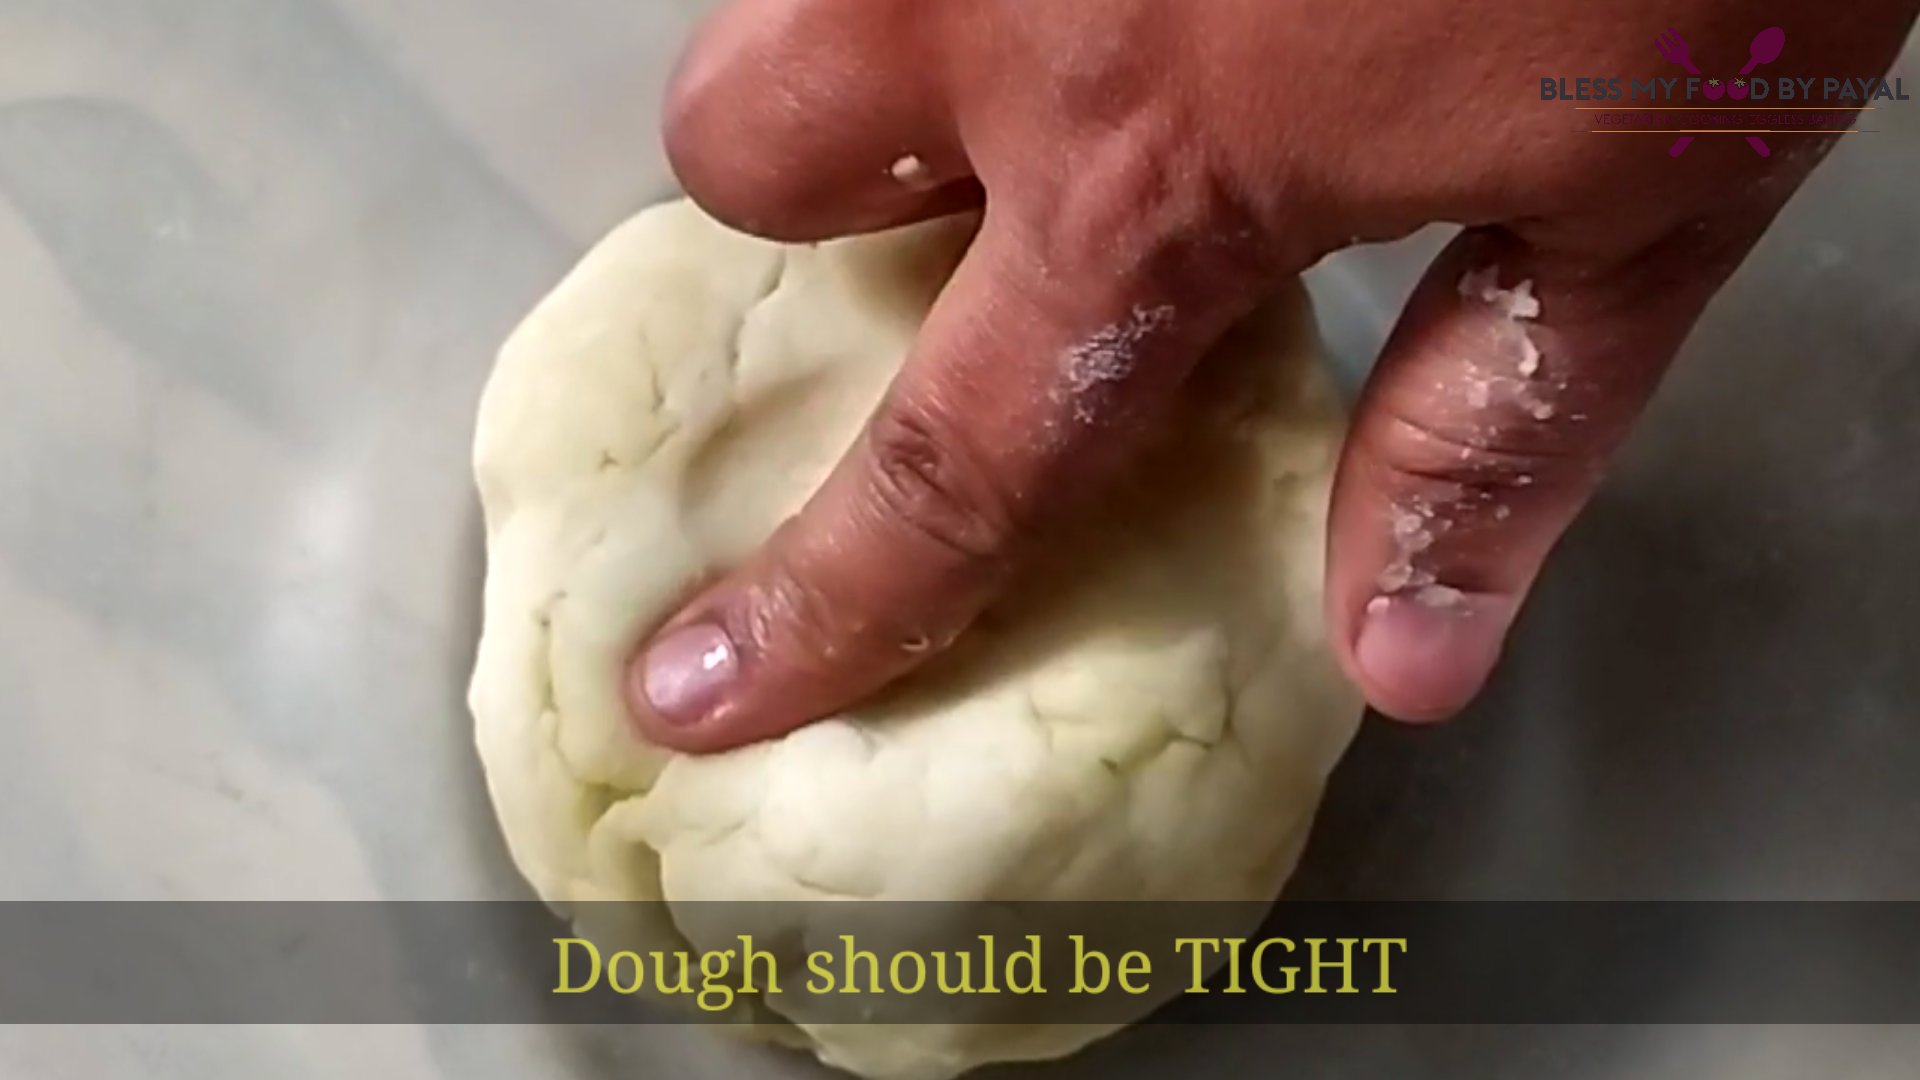
Secondly, this is very important that dough should be tight, which means it must neither be hard nor soft. The consistency of dough is like of dough you knead for Puri’s.
It needs to be tight because of 2 reasons. One, tight dough will create a stiff shape and design. Second, you will not need to dust flour while rolling the dough which is must. Yes, don’t dust flour while rolling dough otherwise when you fry gujia, the dusted flour stuck to the dough will turn black, which will hamper gujia’s appearance.
STUFFING FOR GUJIA
You can take little liberty with the stuffing and add whatever you like. We have seen people making gujia with chocolate filling too.
Which dry fruits to use is a choice of one. Some people add bit of roasted suji (semolina) to bring grainy texture to gujia. Few avoid mawa and make the filling purely with ghee roasted suji along with other ingredients. You may play with your choice.
It is germane to mention that you cannot balance complete compatibility between dough and stuffing. Means your stuffing may finish first and very little dough is still left or vice versa. In case you couldn’t manage to finish your stuffing and all needed gujia is ready, use stuffing in making paratha or samosa or it tastes good as it is too.
COOKING METHOD
If following strictly traditional method, gujia is made only by deep frying in oil or desi ghee but in today’s life when most of the people are looking forward to cut short the fats in one way or the other, Baking is the best alternative which ask for ghee just a tablespoon or two.
Though fried gujia is more tasty than the baked one, but when it comes to health, nothing else carry more priority. Choice is yours.
MOULD
As Gujia has a typical specific shape and are made in bulk during festival season, moulds are available in market which shortens the time and labor in making it.
Though moulds are available in very moderate prices but it is not available at every place. At the same time, if gujia is not made frequently at your place and you just wanna try it for once, spending on mould is not a gentle idea.
So no need to look for mould as gujia can be shaped by hands also. Simply fold, seal and design flat outer edge using fork or creating pleates.
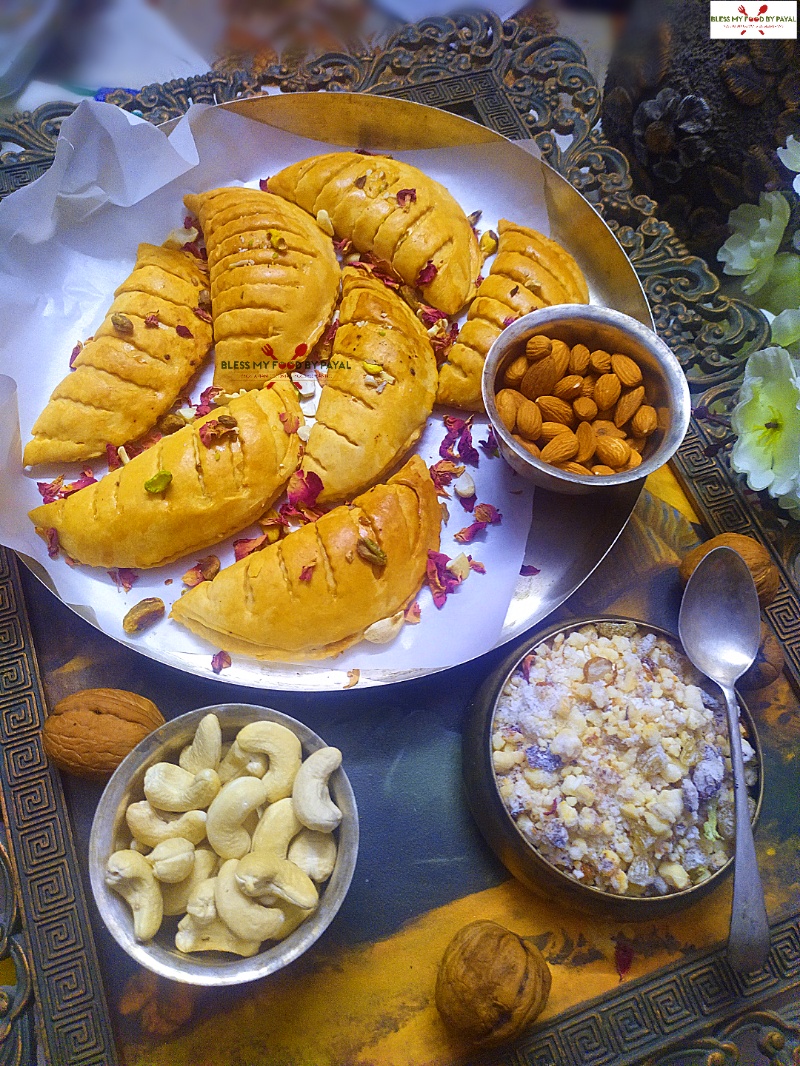
WHY LAYERED GUJIA?
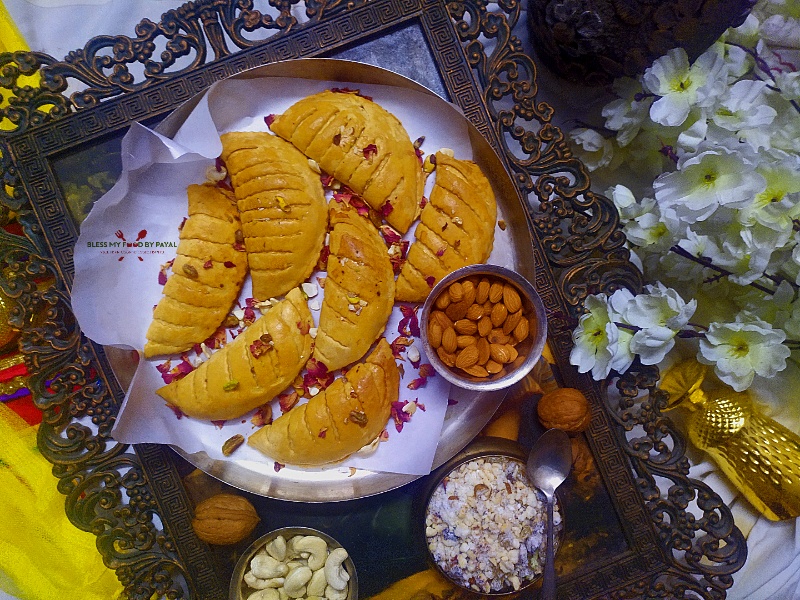
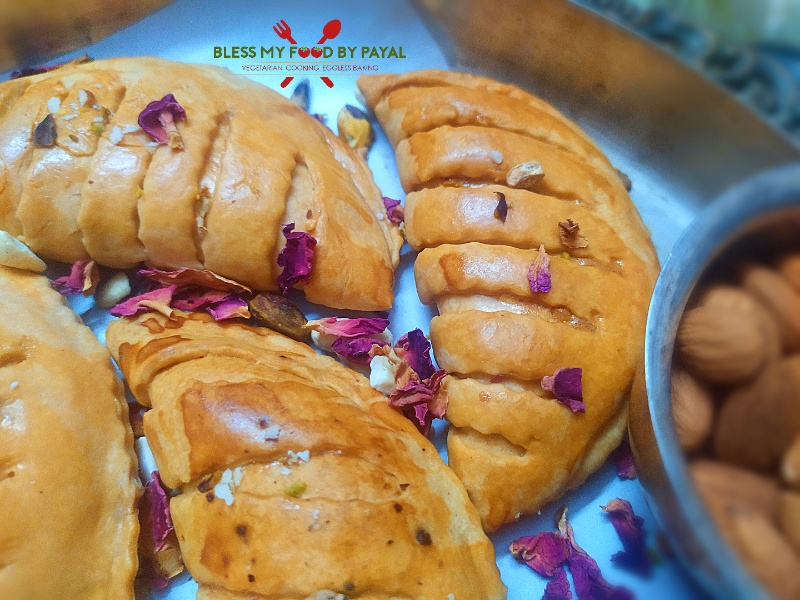
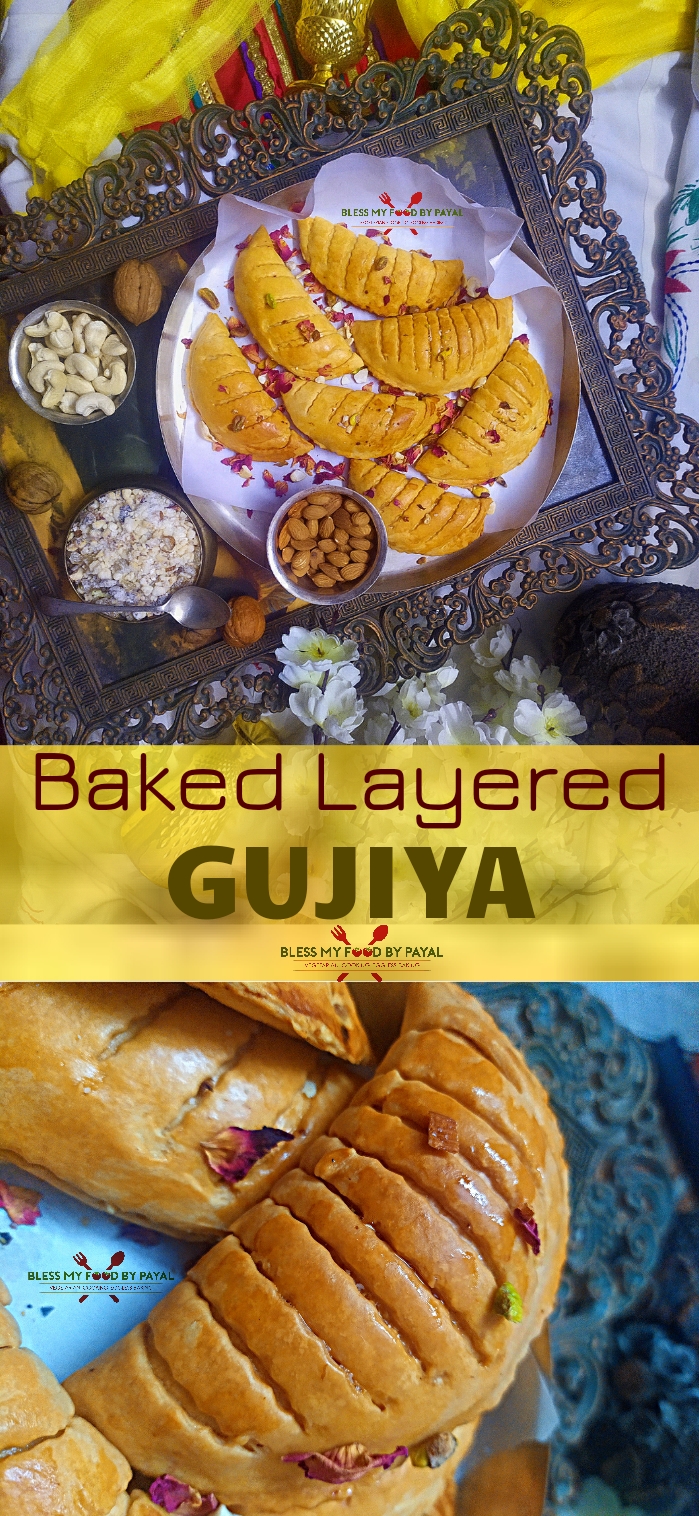
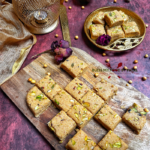
In making layered gujia, you need almost double the dough for one gujia which otherwise makes 2 plain gujias. Inner layer works as a shield to the stuffing and outer layer, on which zig zag cut marks are seen, makes the gujia beautiful.
If one has a doubt that layered gujia stands at other footing in taste than the regular plain gujia, then it is not so. Layering a gujia just make it more beautiful, attractive, stylish and presentable, which doesn’t mean at all that plain gujia is ugly. That is beautiful but little less.
HOW TO DESIGN OUTER CRUST?
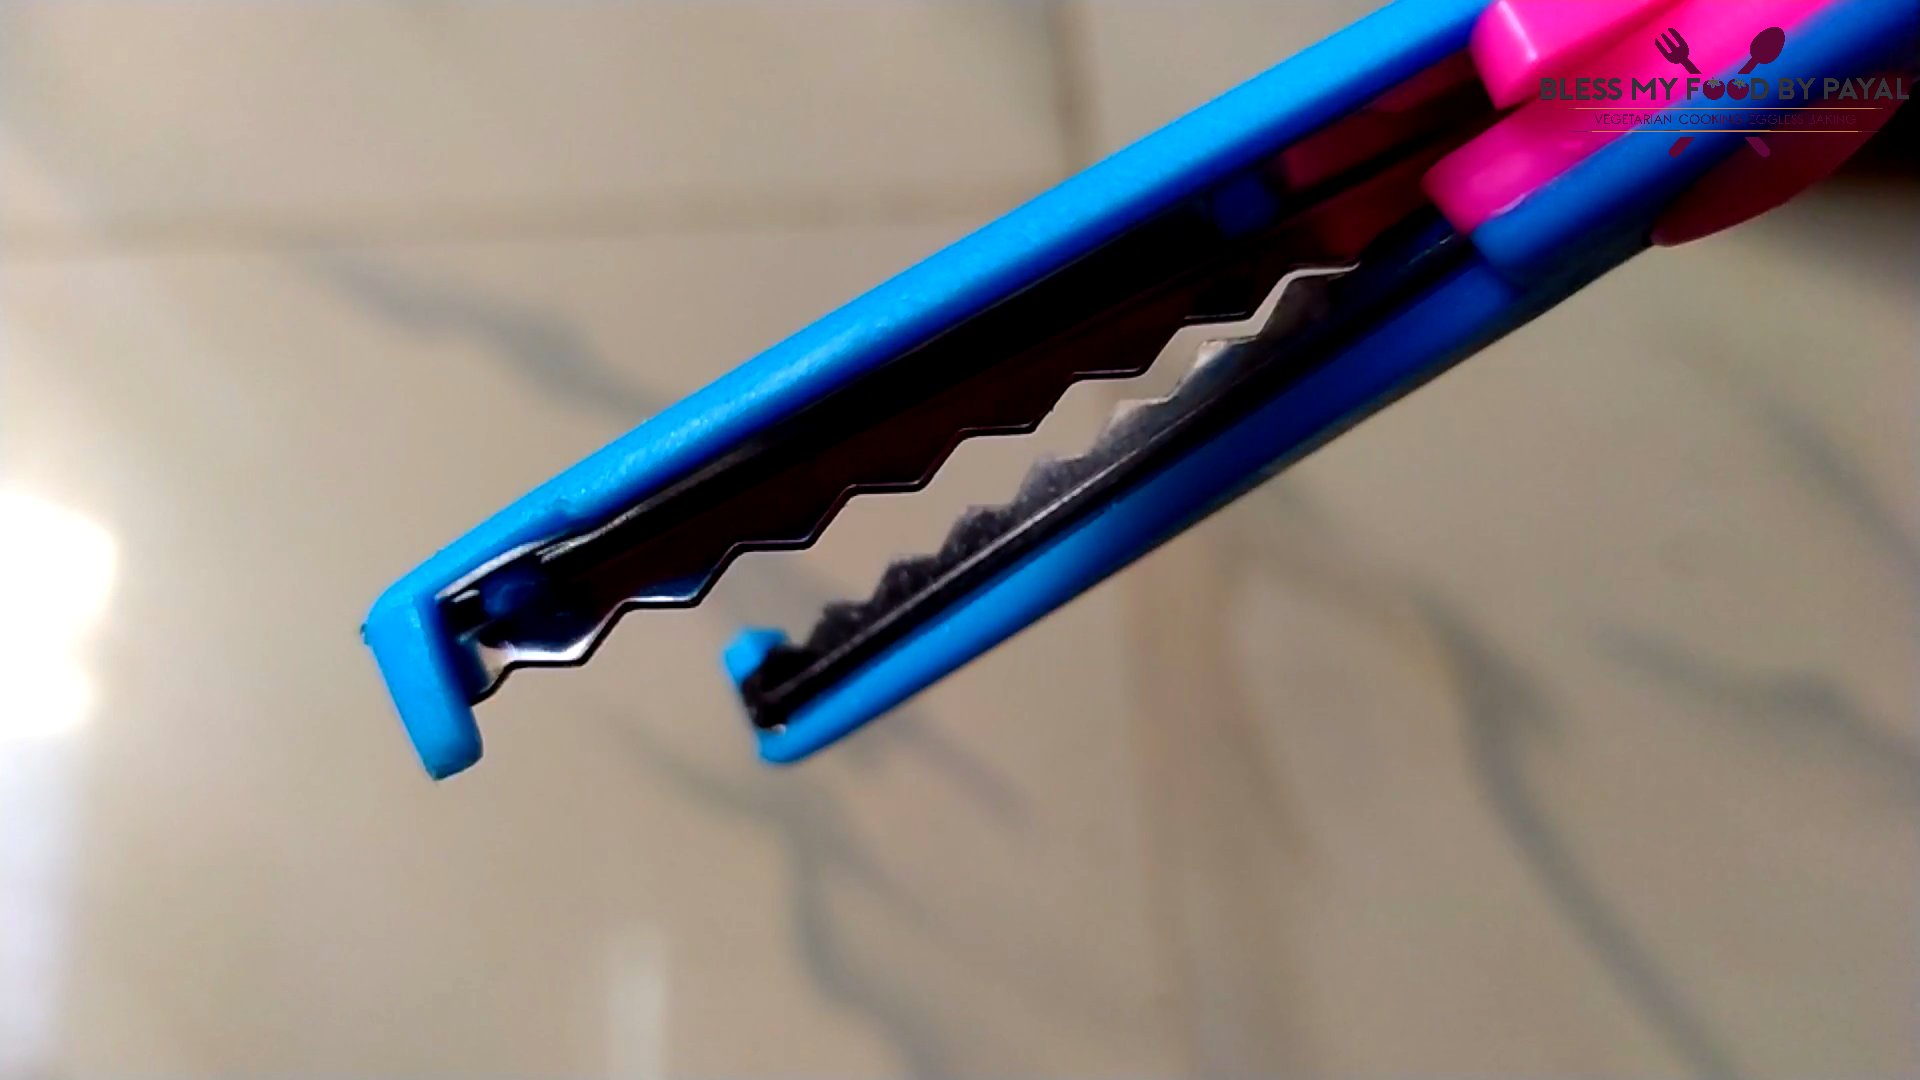
We planned to give a zig zag cutting pattern for the outer crust and were looking for pizza cutter in market which comes with zig zag blade but couldn’t find.
Then thought of sessior which cuts in zig-zag pattern and found it conveniently.
If you are truly interested in giving a zig-zag pattern cutting to gujia & don’t have such sessior, it is easily available in stationary shops especially selling decorative items for school projects. We bought it just for ₹30. Or you may find the pizza cutter.
STORAGE
Gujia can be cherished for 10-12 days. Better store them in airtight jar. Put them in jar only when they are completely cool otherwise they may turn soggy.
For more of the sweet recipes in this blog, click here.
Step wise pictorial recipe of layered gujia recipe
PREPARATION OF DOUGH
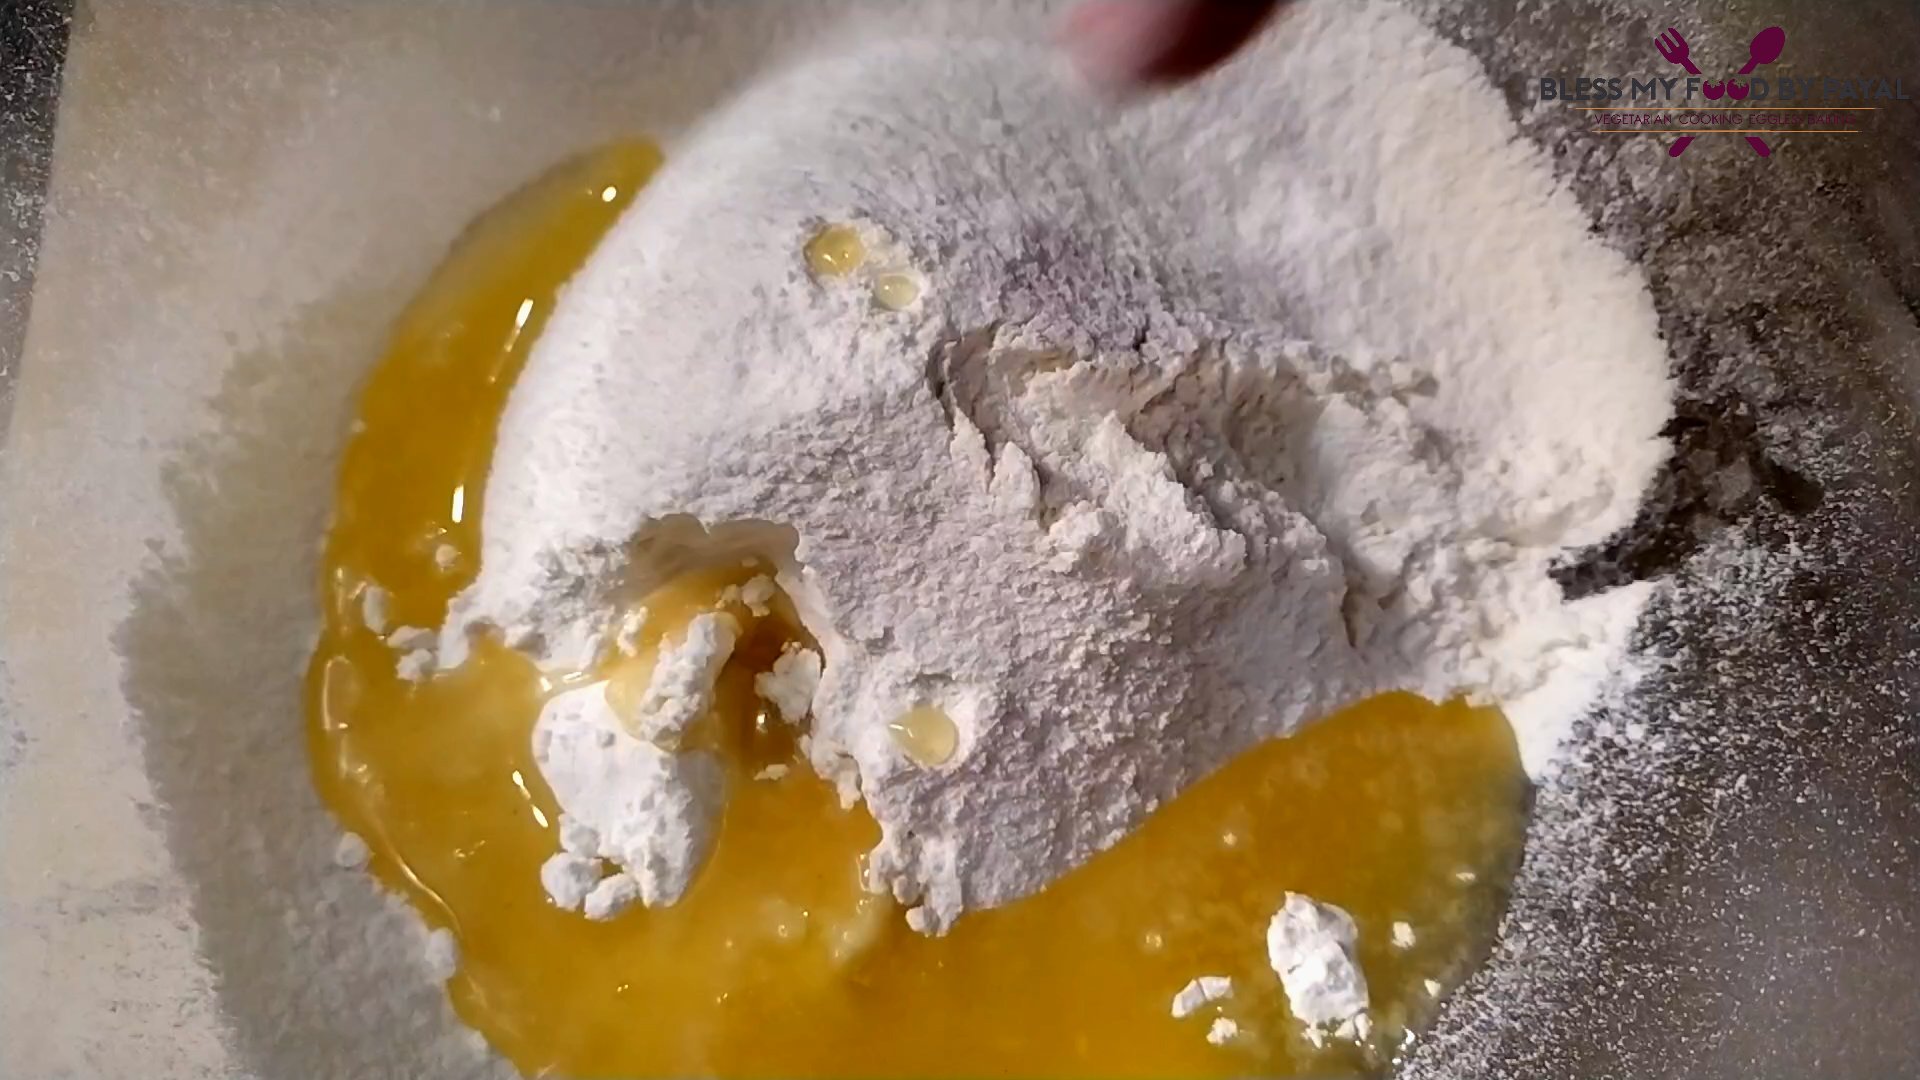
- Sieve maida in a bowl and add desi ghee in it.

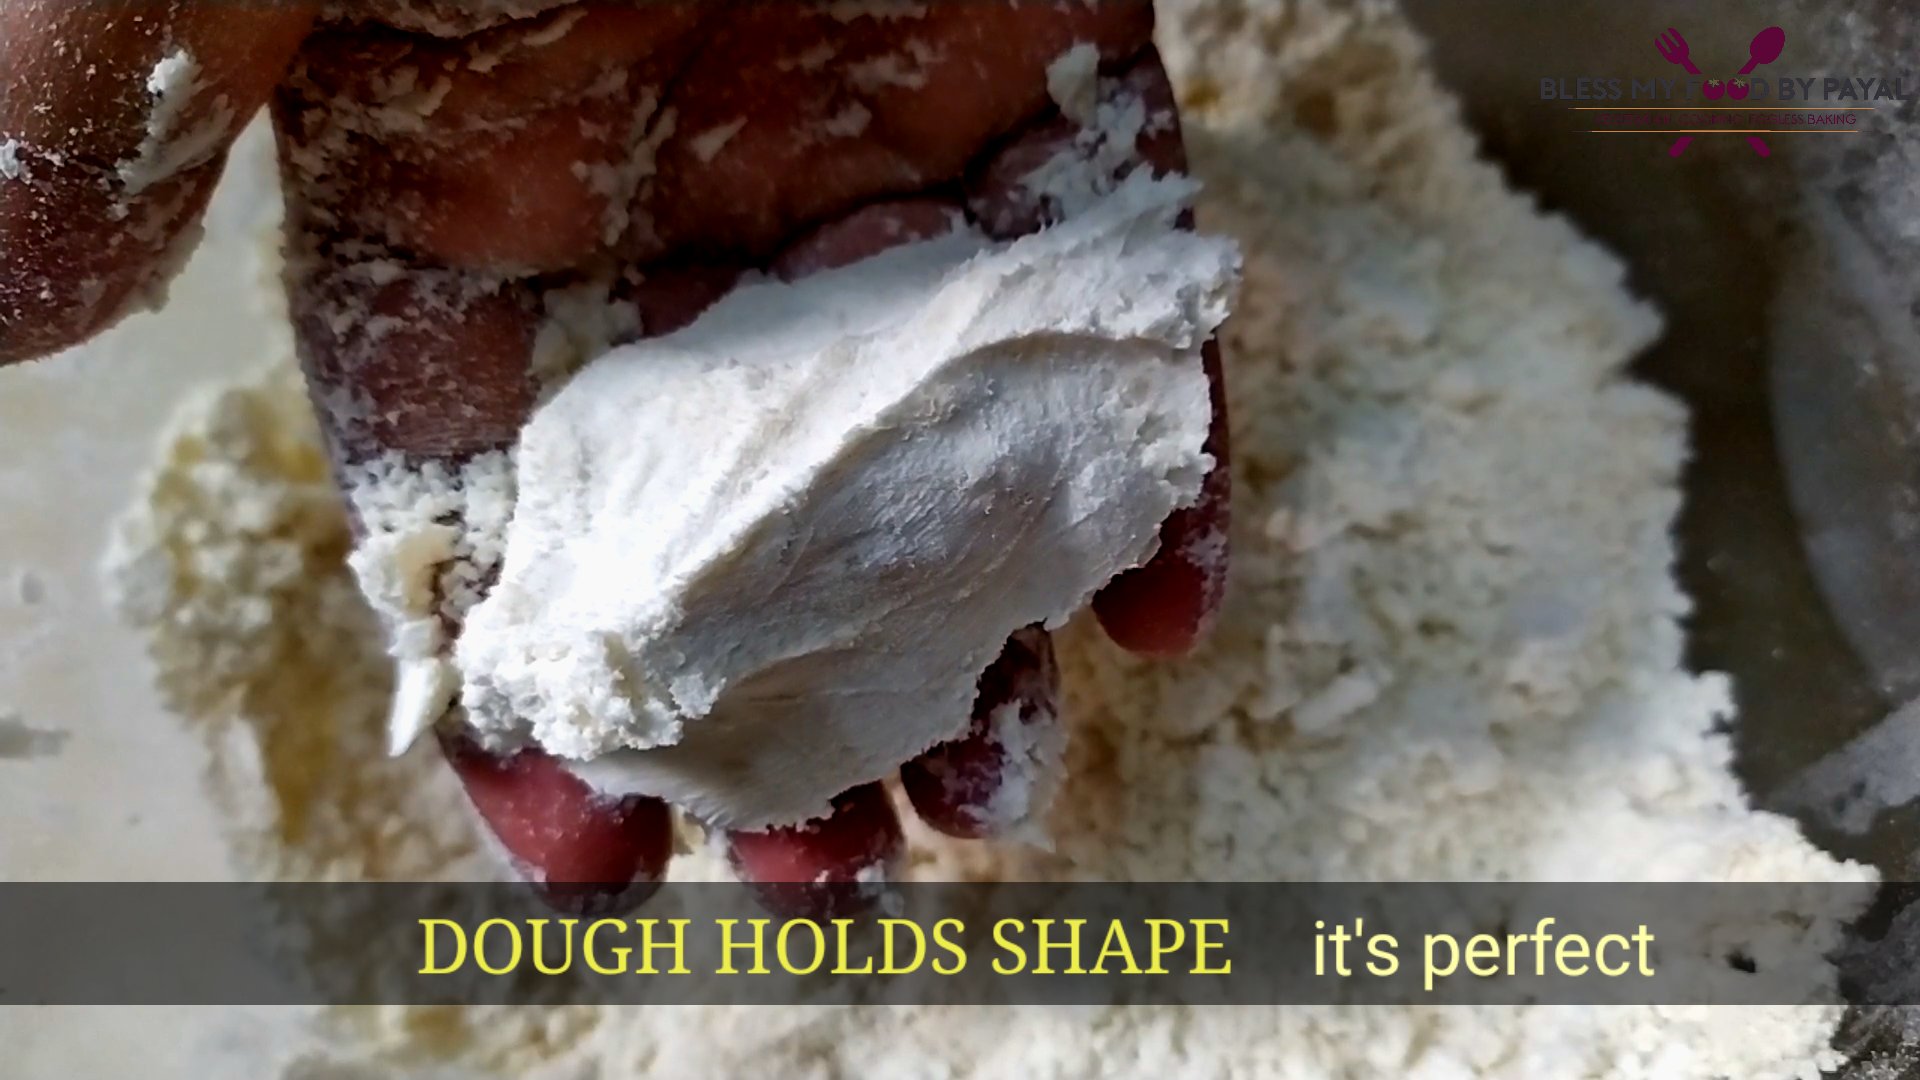
- Start mixing it without adding milk. Dough should hold a shape.
- Slowly add milk and knead a tight dough.
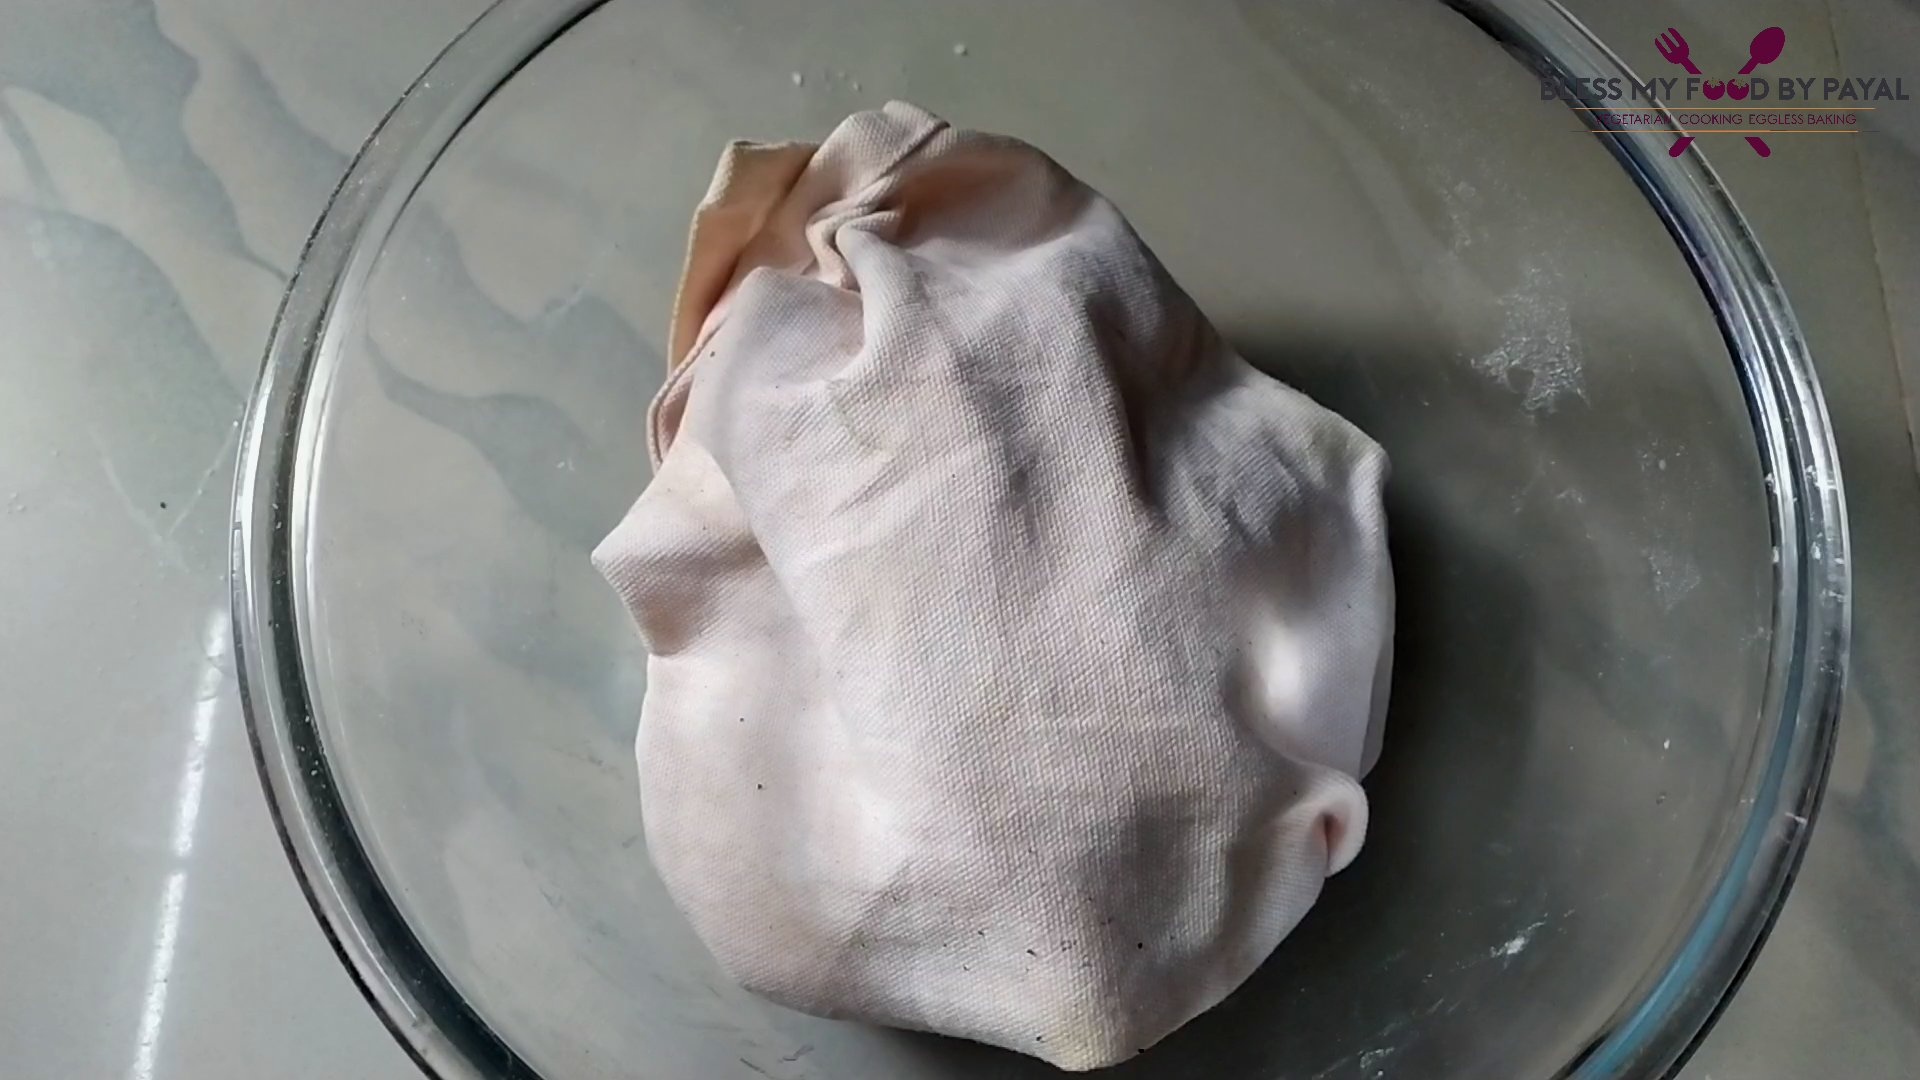
- Cover the dough with a moist kitchen towel and keep aside for 20 minutes.
PREPARATION OF STUFFING
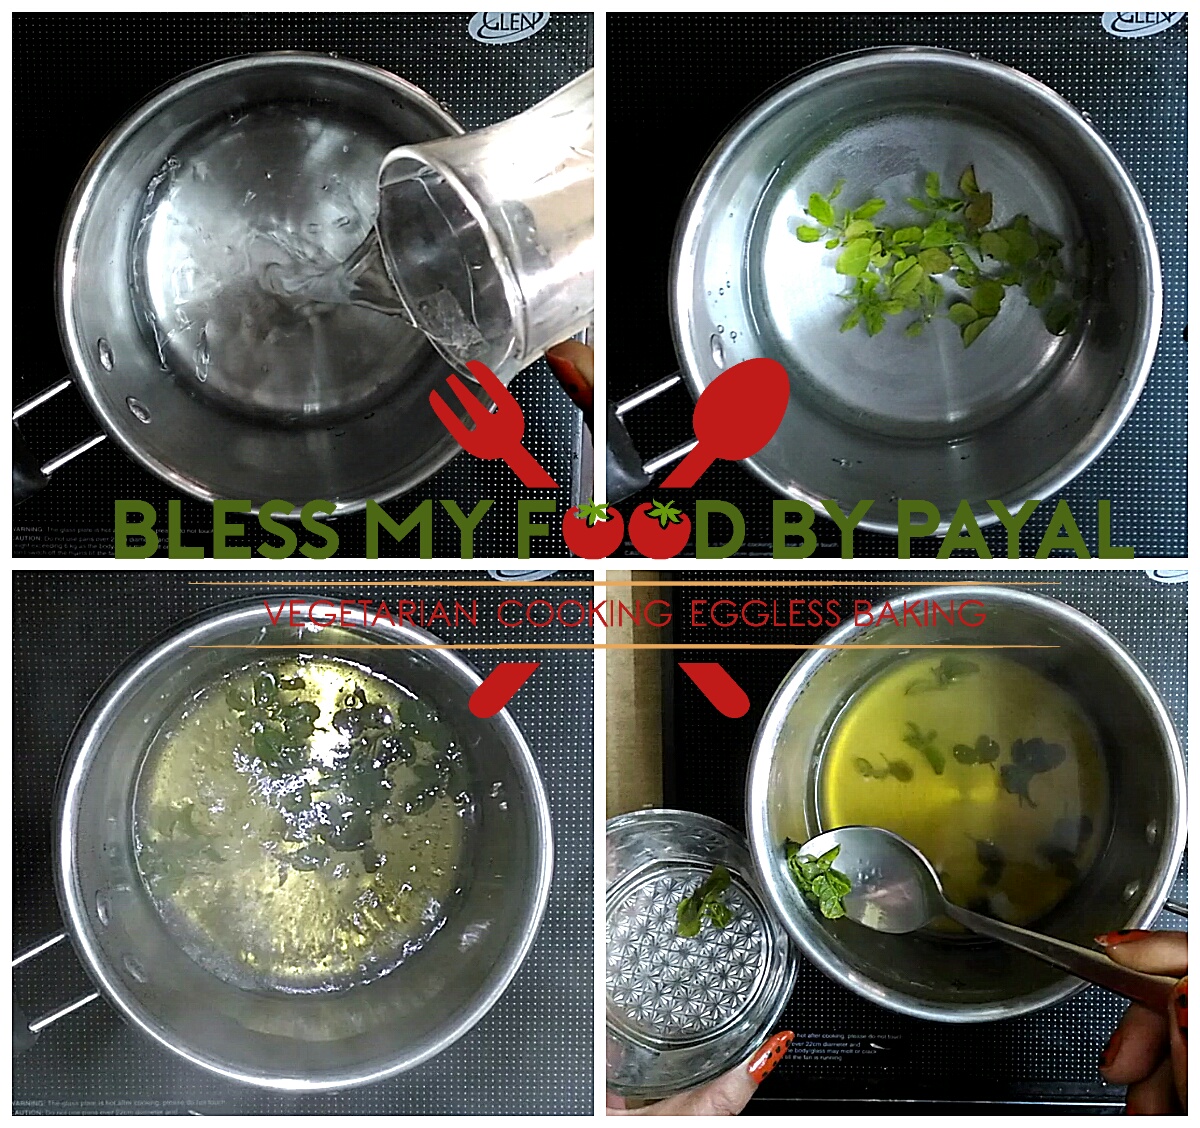
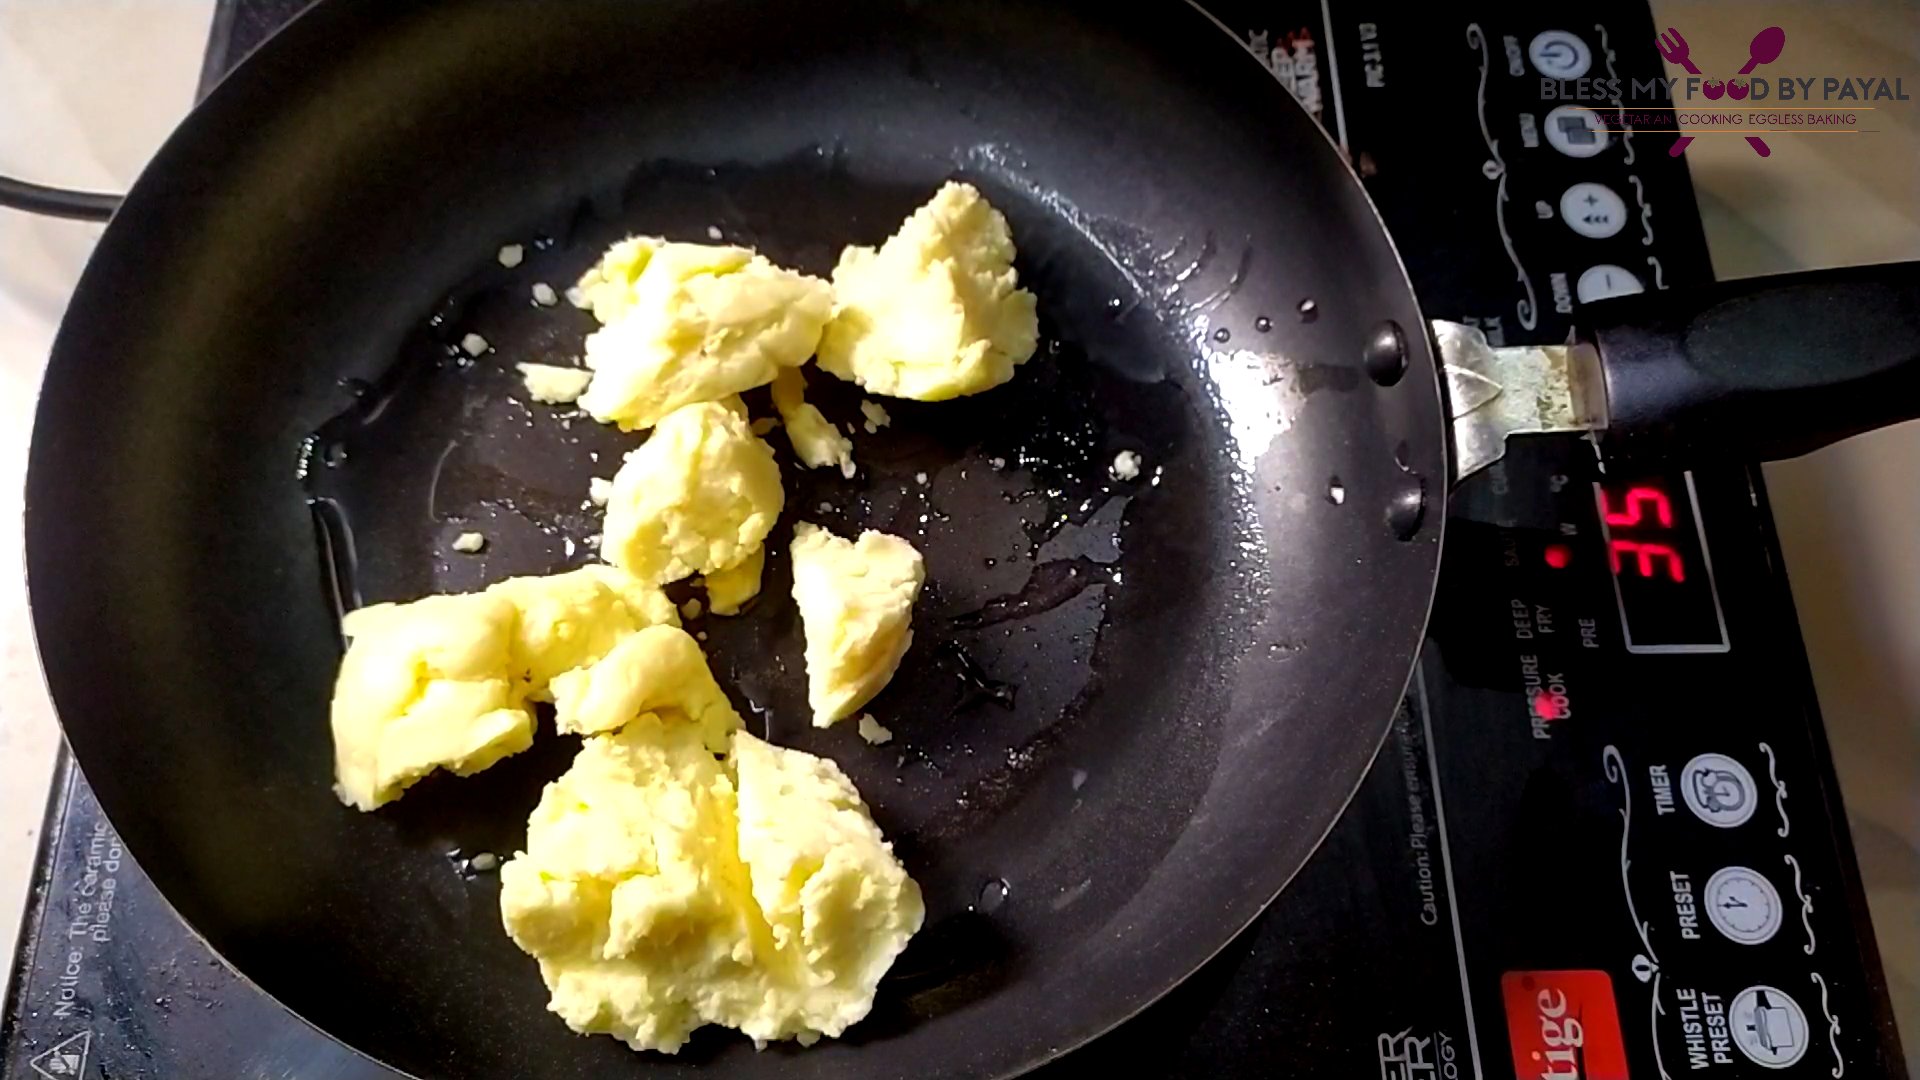
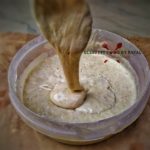
- Put desi ghee in a pan & add mawa in it. We are using the instant mawa which gets ready in less than 5 minutes.
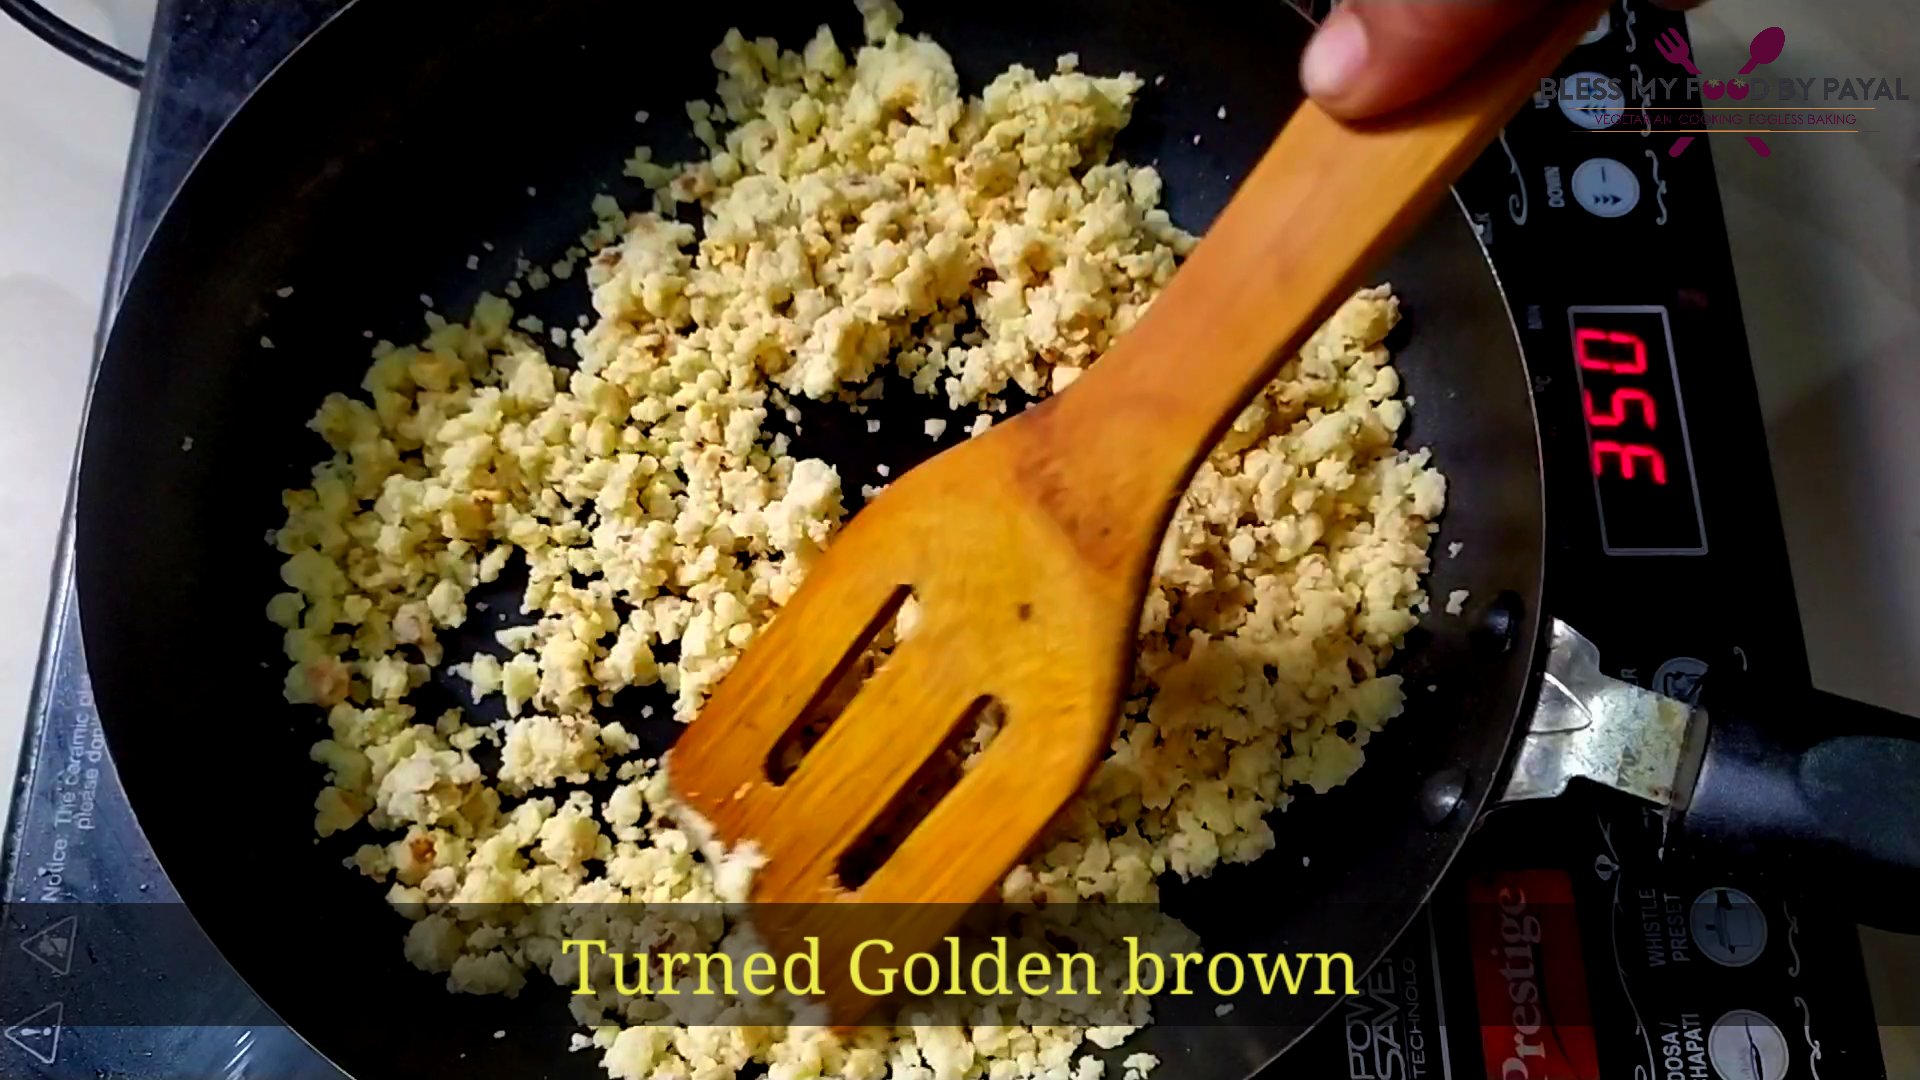
- Roast mawa on low flame untill it changes its colour to golden brown.
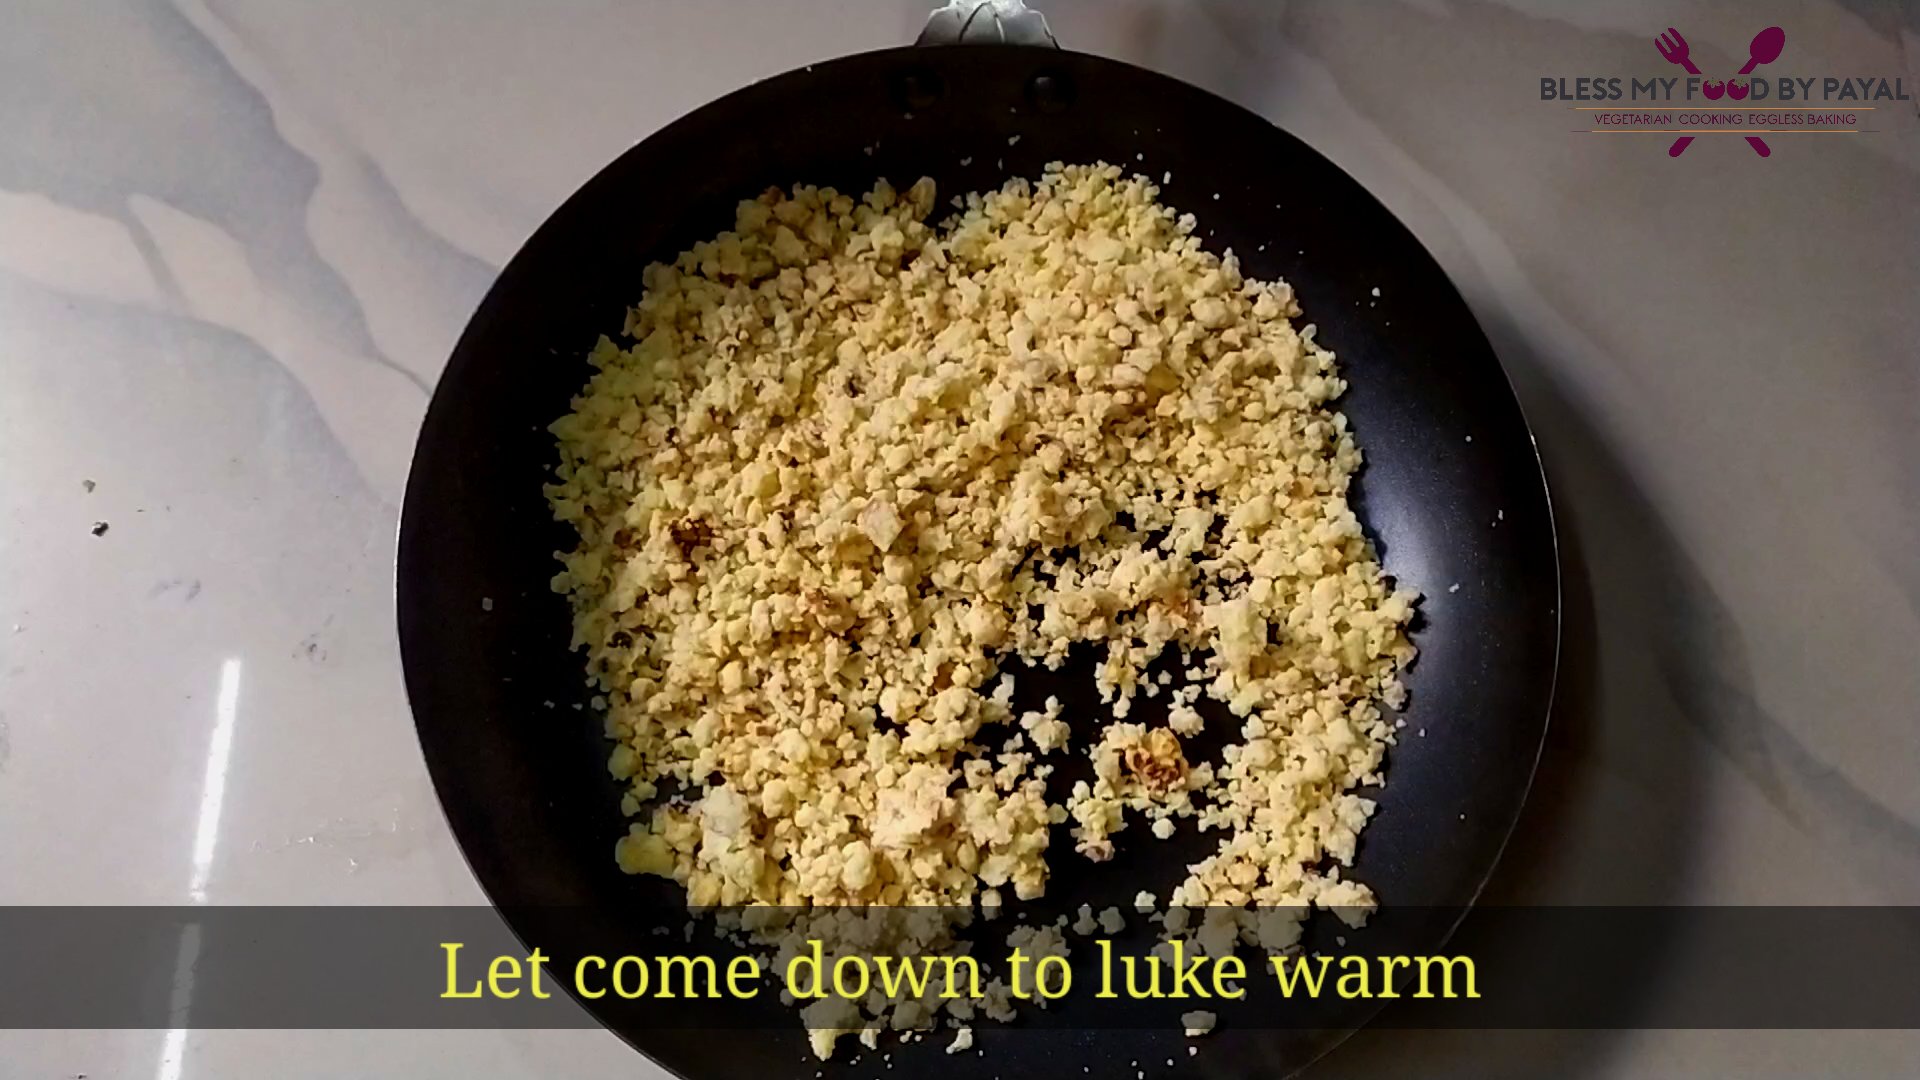
- Off the heat & let the temperature of mawa come down to luke warm.
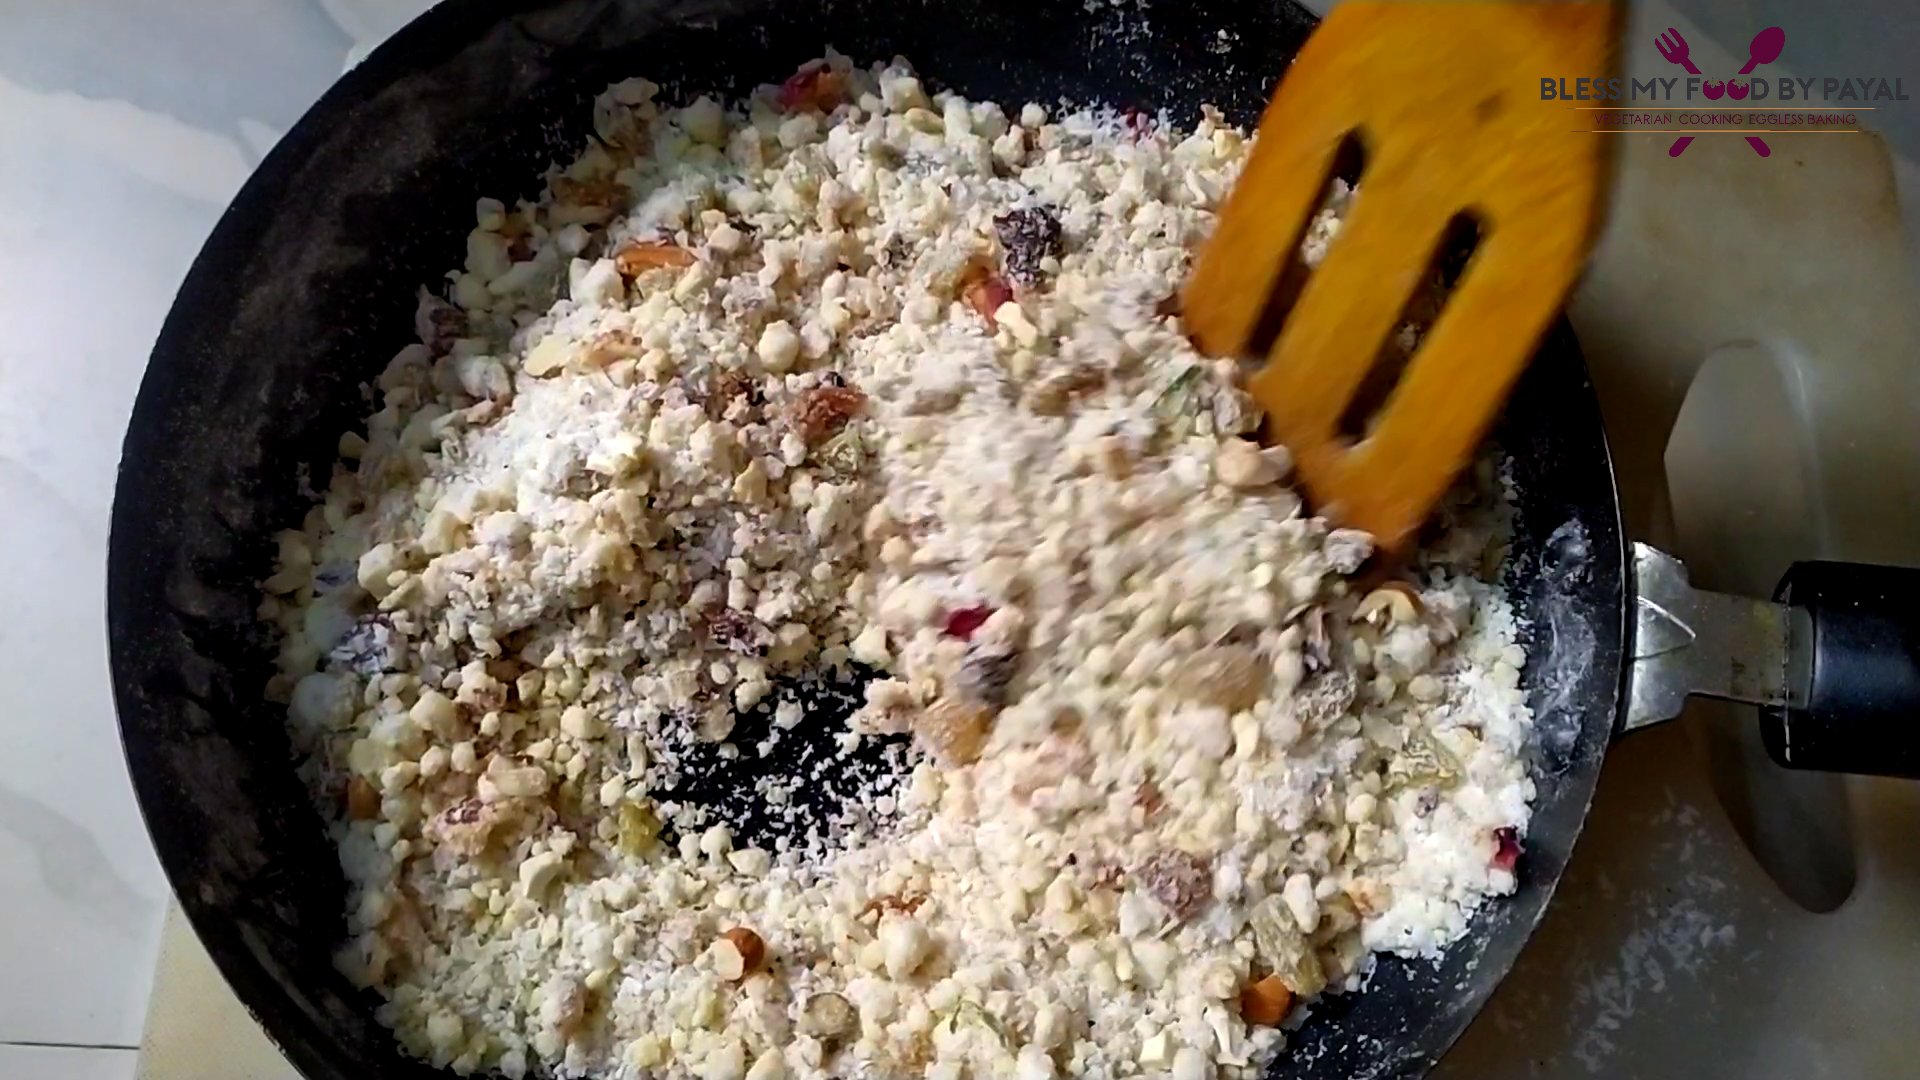
- Add dessicated coconut, powdered sugar, cardamoms, nutmeg powder & all the chopped dry fruits. Mix.
SHAPING & PRAPARING GUJIA (watching video will help you to understand better & easily)
- Take a ball size dough & roll it thin with the help of rolling pin. Better if you avoid using flour for dusting.
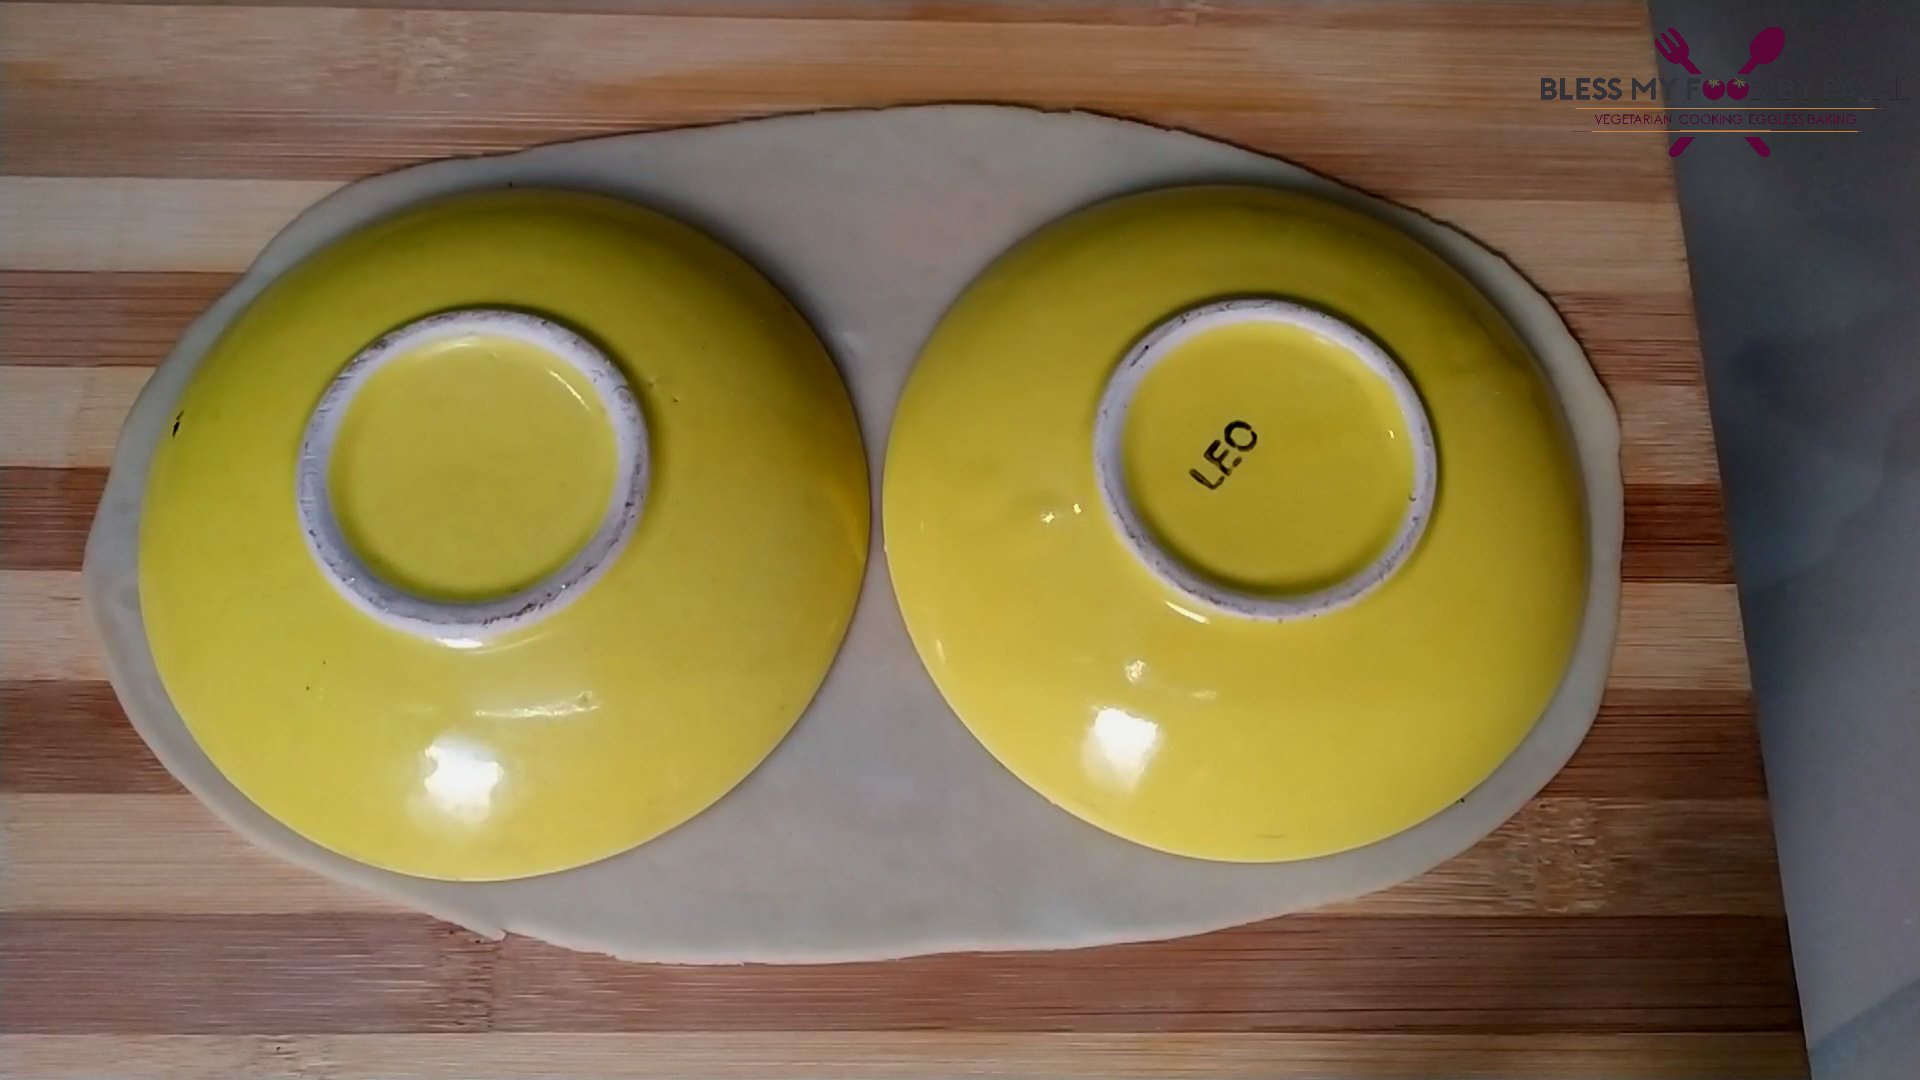
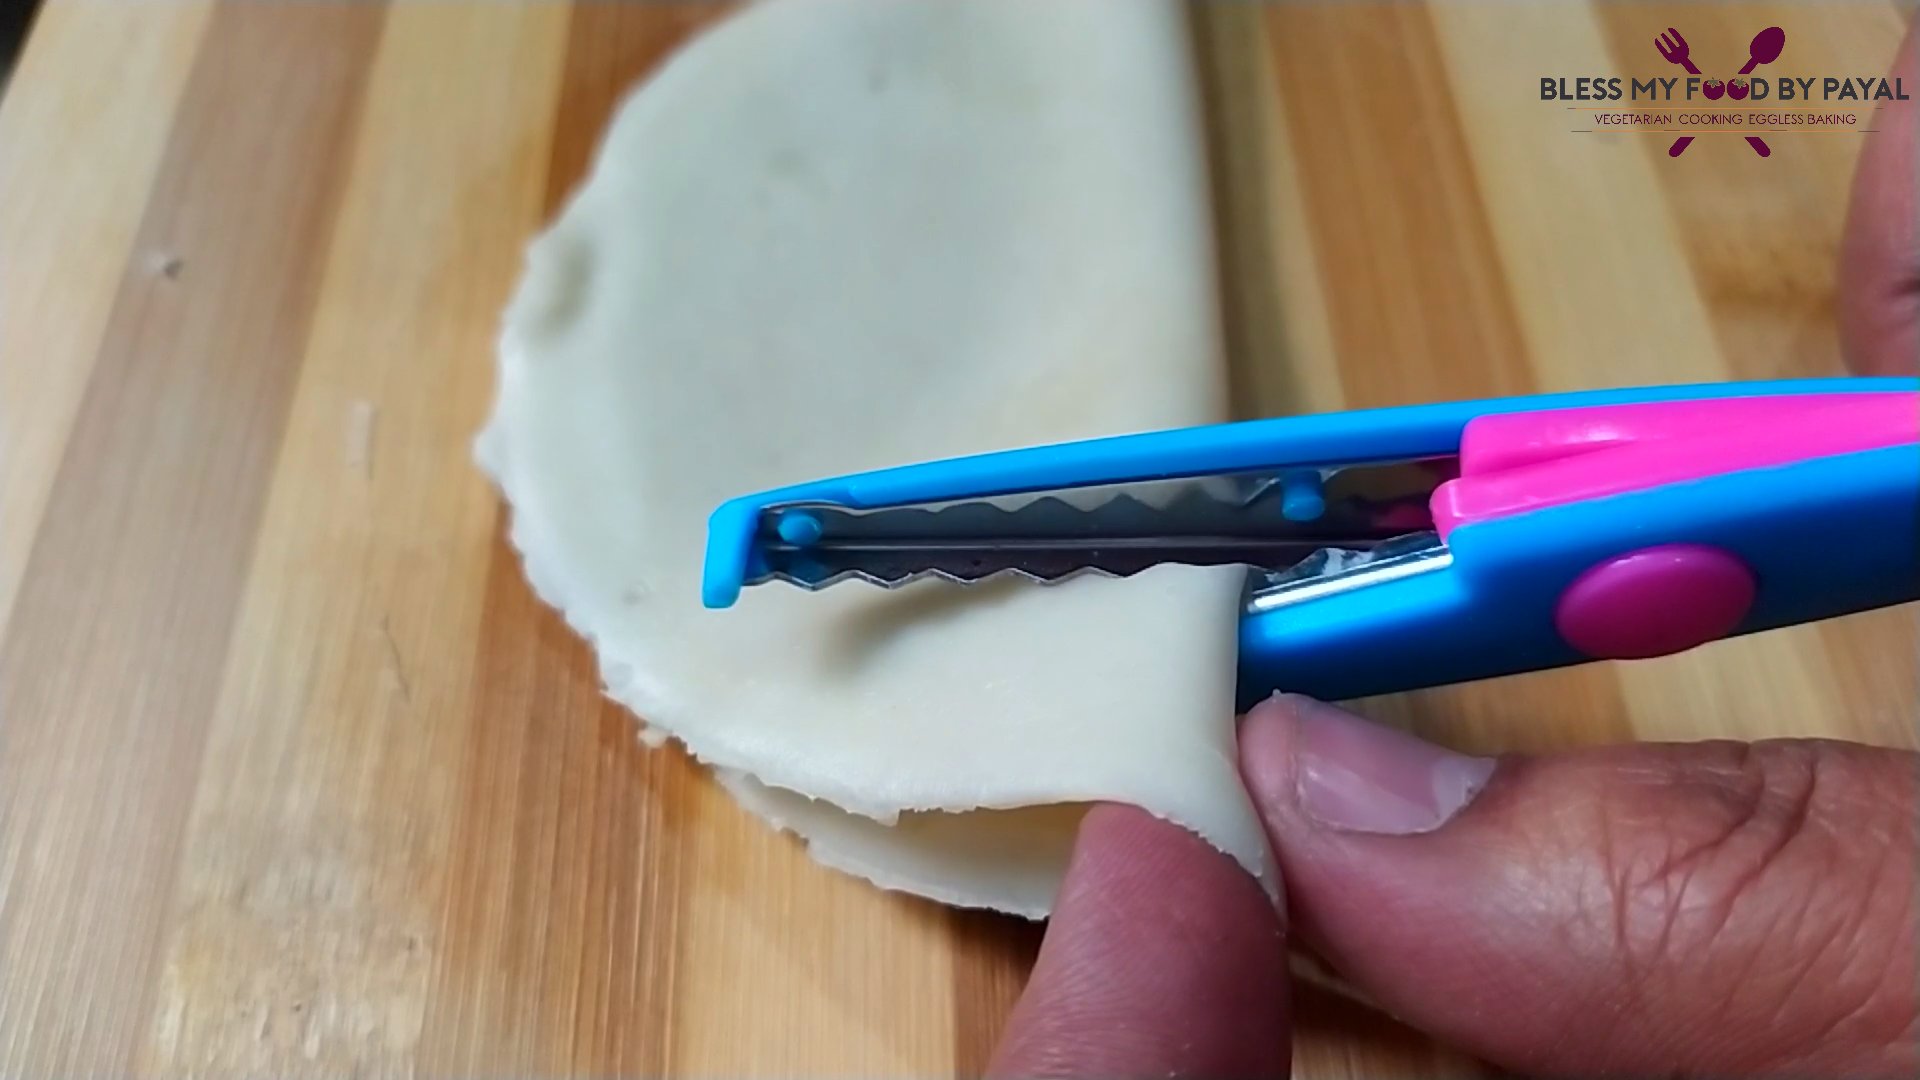
- Either using cookie cutter or small plate or small lid, glass or katori, whatever you have easily available, mark 2 cuts on the rolled dough.
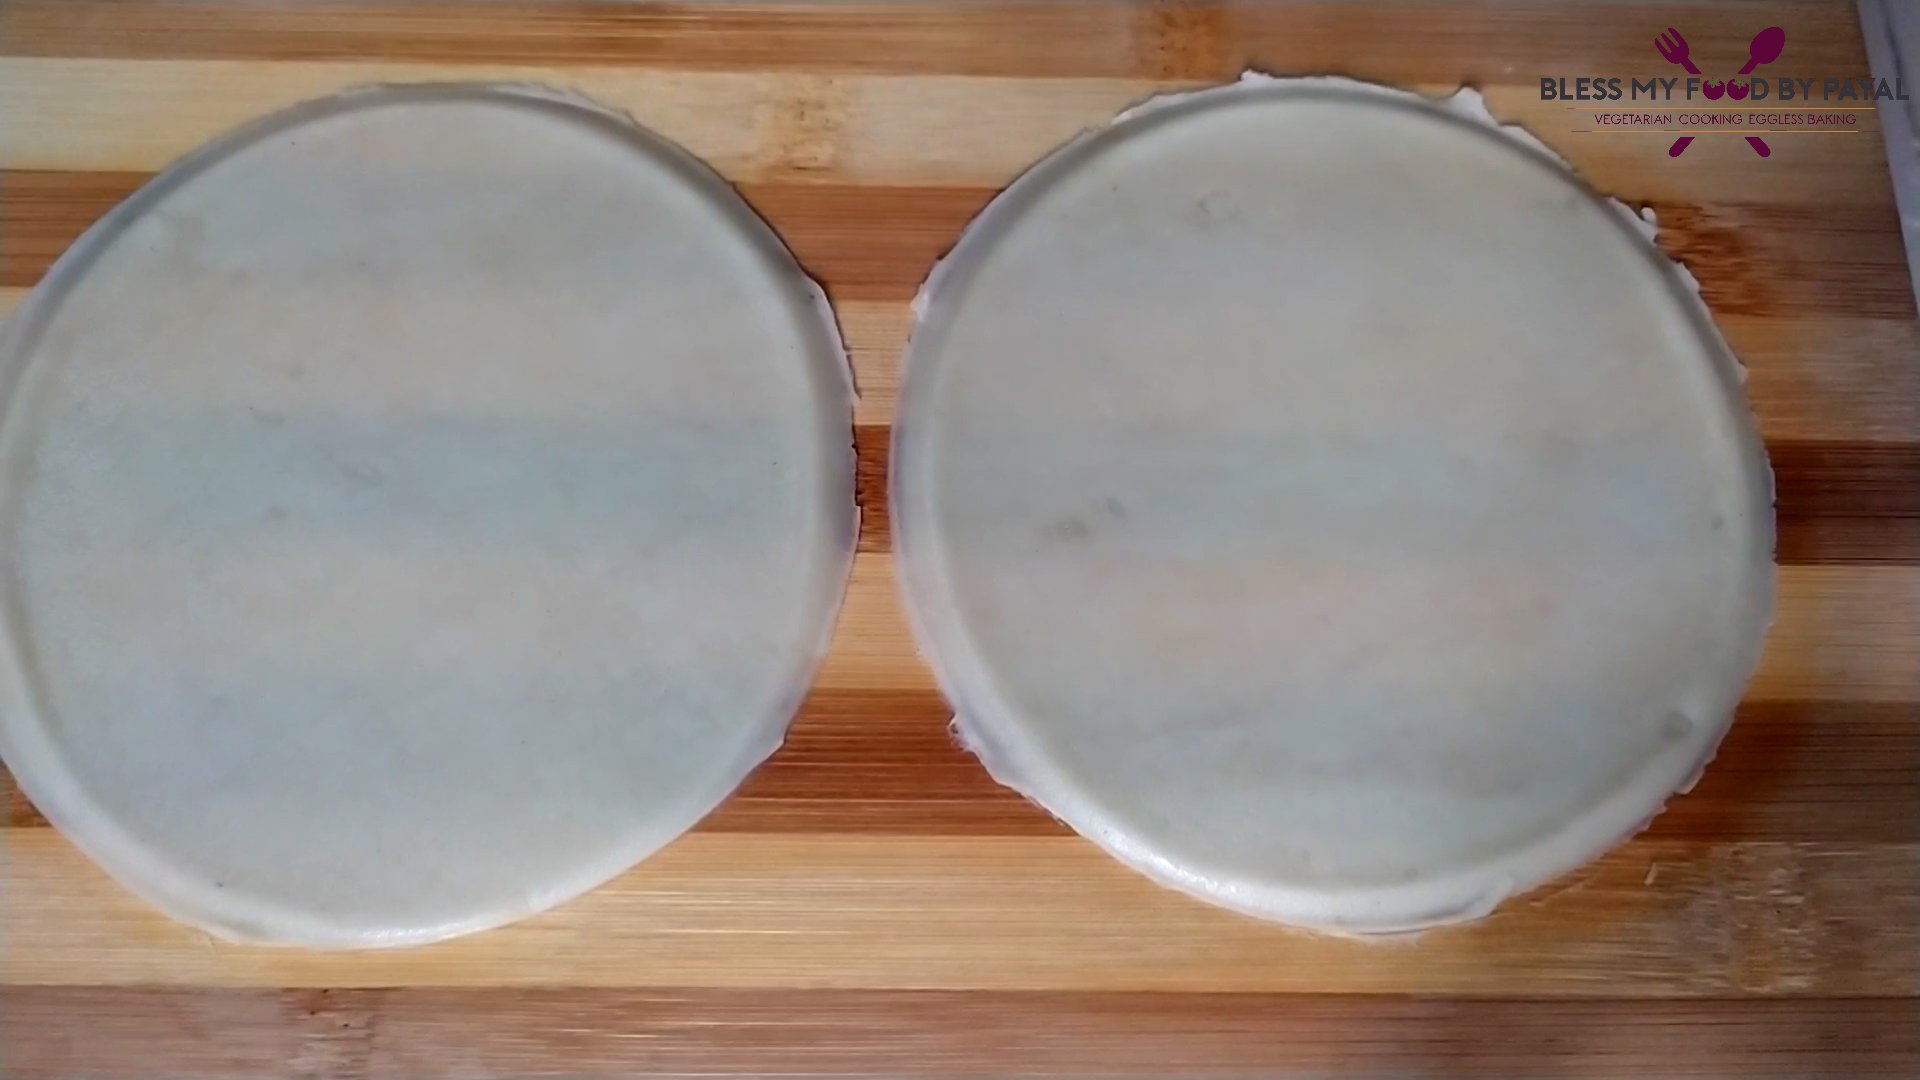
- Now you have 2 puri sized rolled disks.
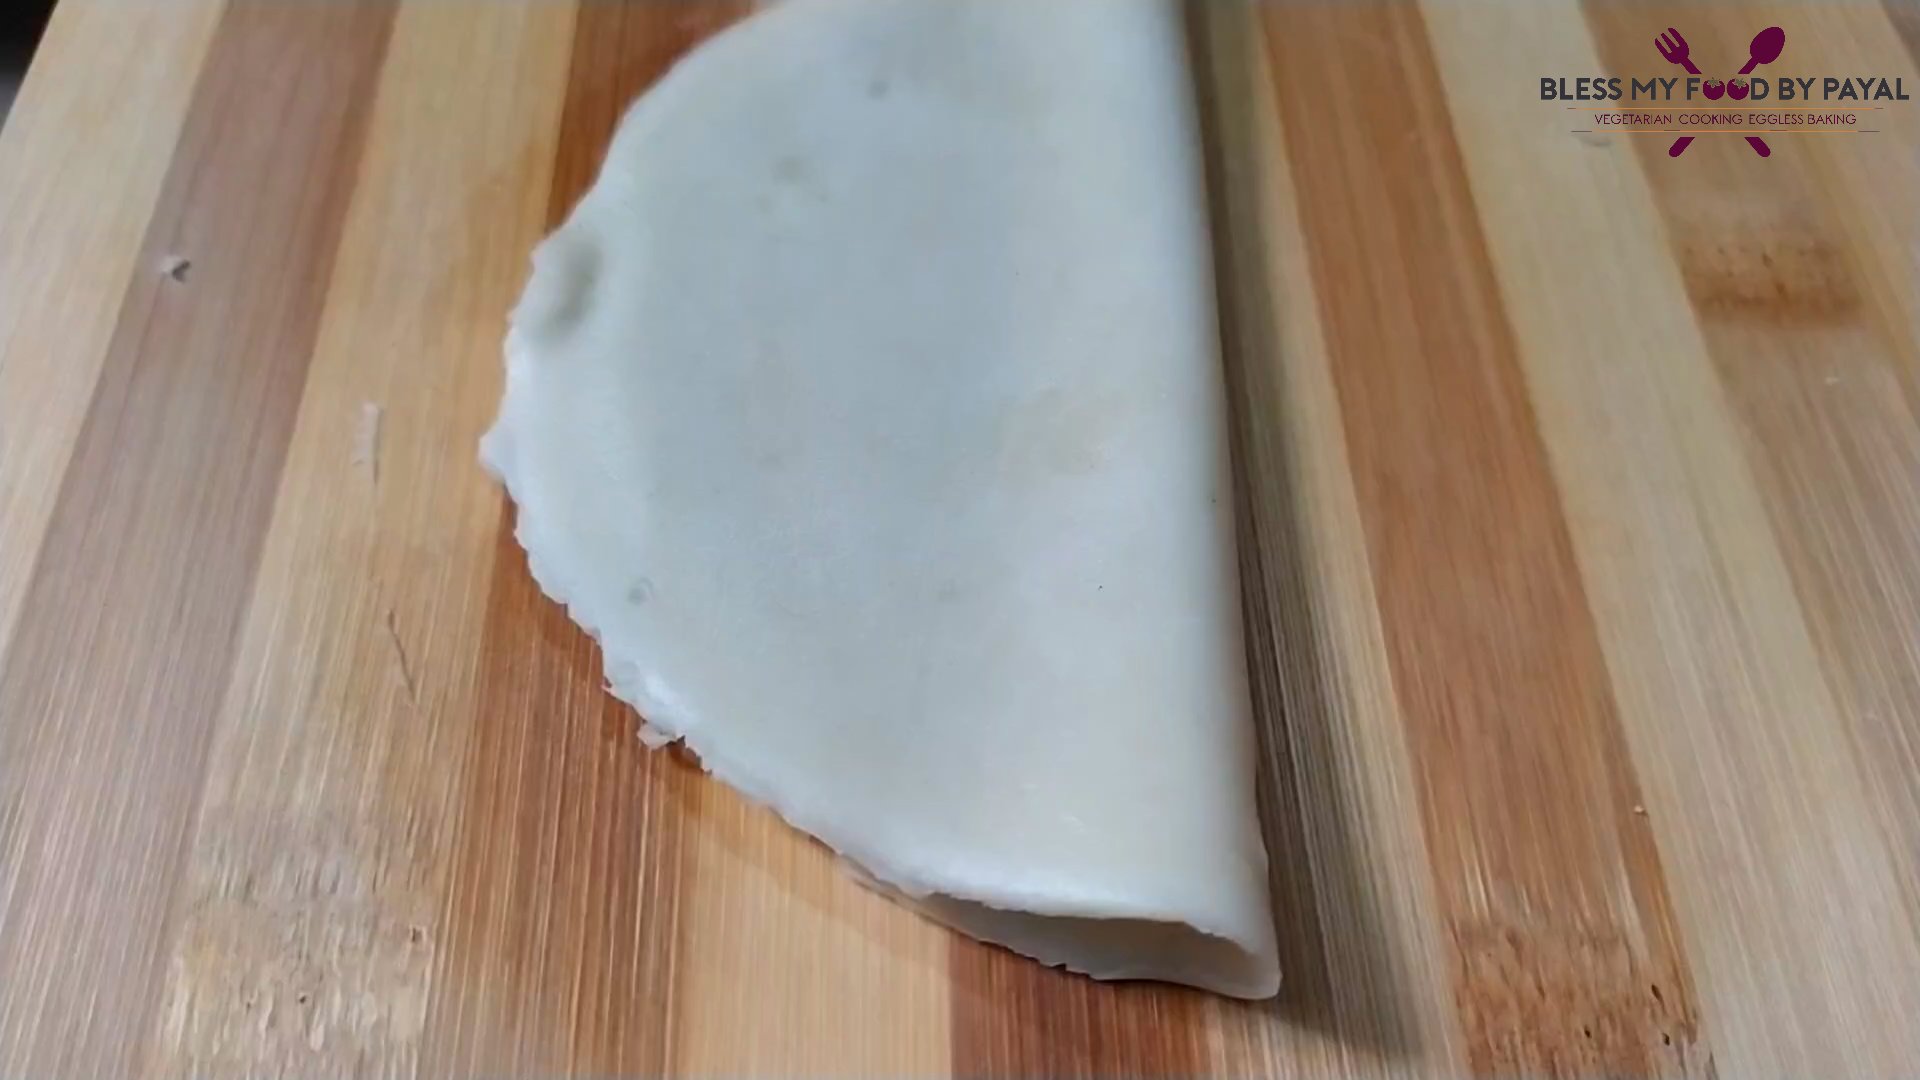
- Fold one puri towards outwardly, touching both the sides, making a half moon.
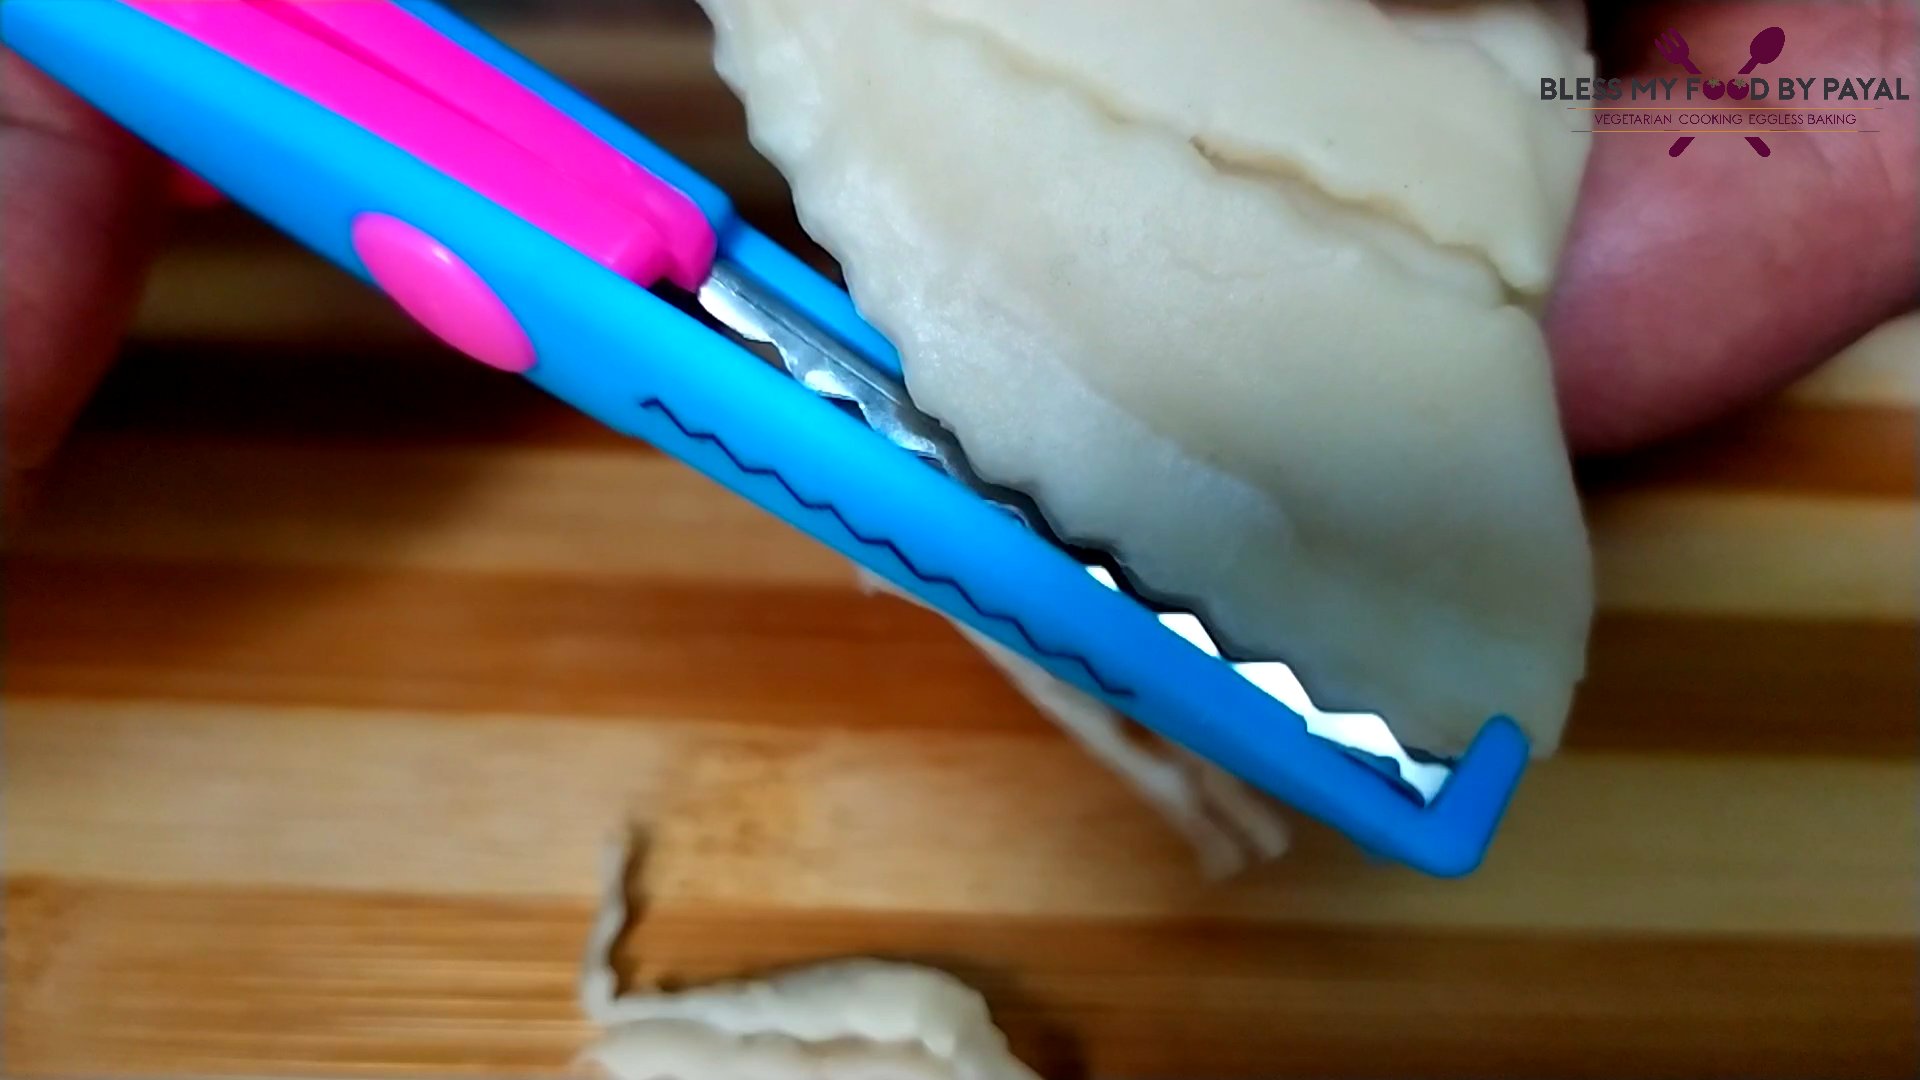
- Here we are using a designer sessior which cuts in zig zag pattern. If you don’t have such sessior, you may mark simple & straight cuts using pizza cutter or knife.
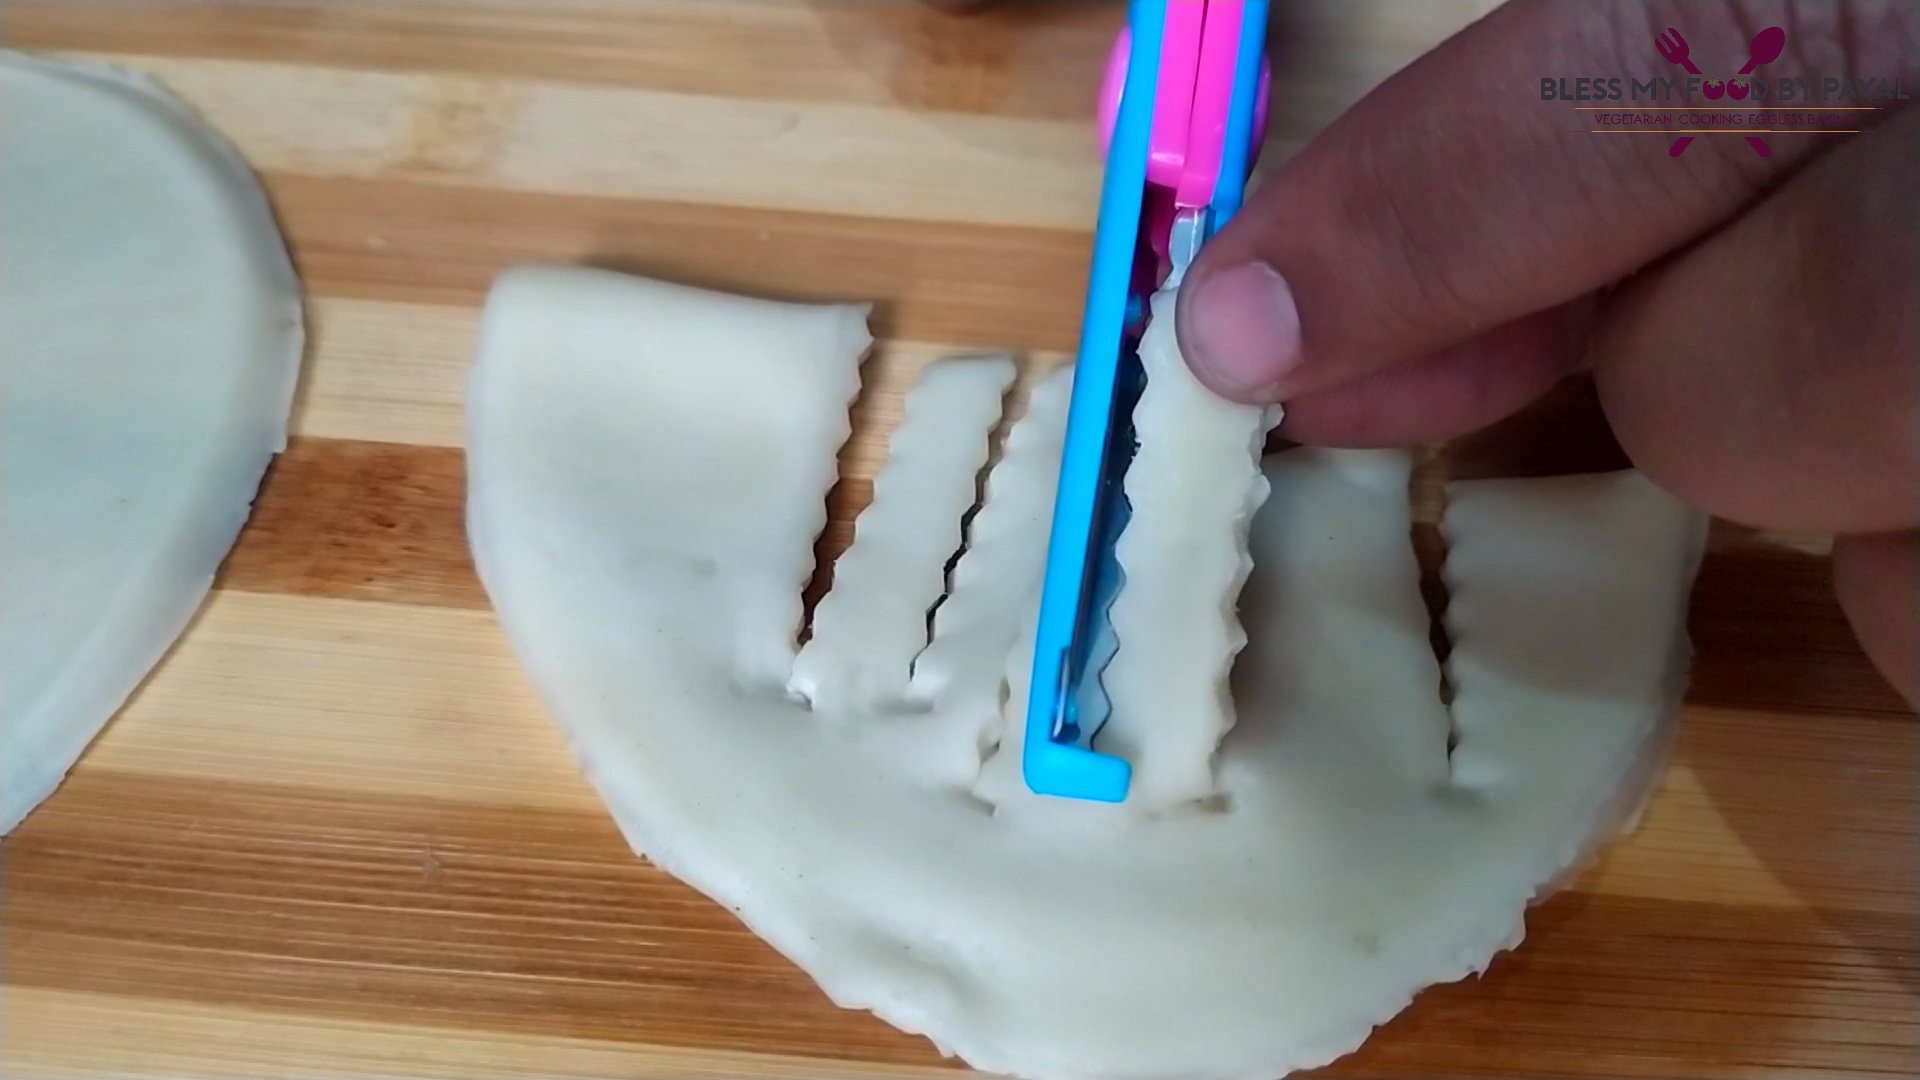
- Cut the half moon shaped puri beginning from straight side of puri towards round side. But mark a cut prior to an inch of the edge.
- Likewise mark 6 to 7 cuts so that you get strips inside the puri of about 1 cm each approximately.
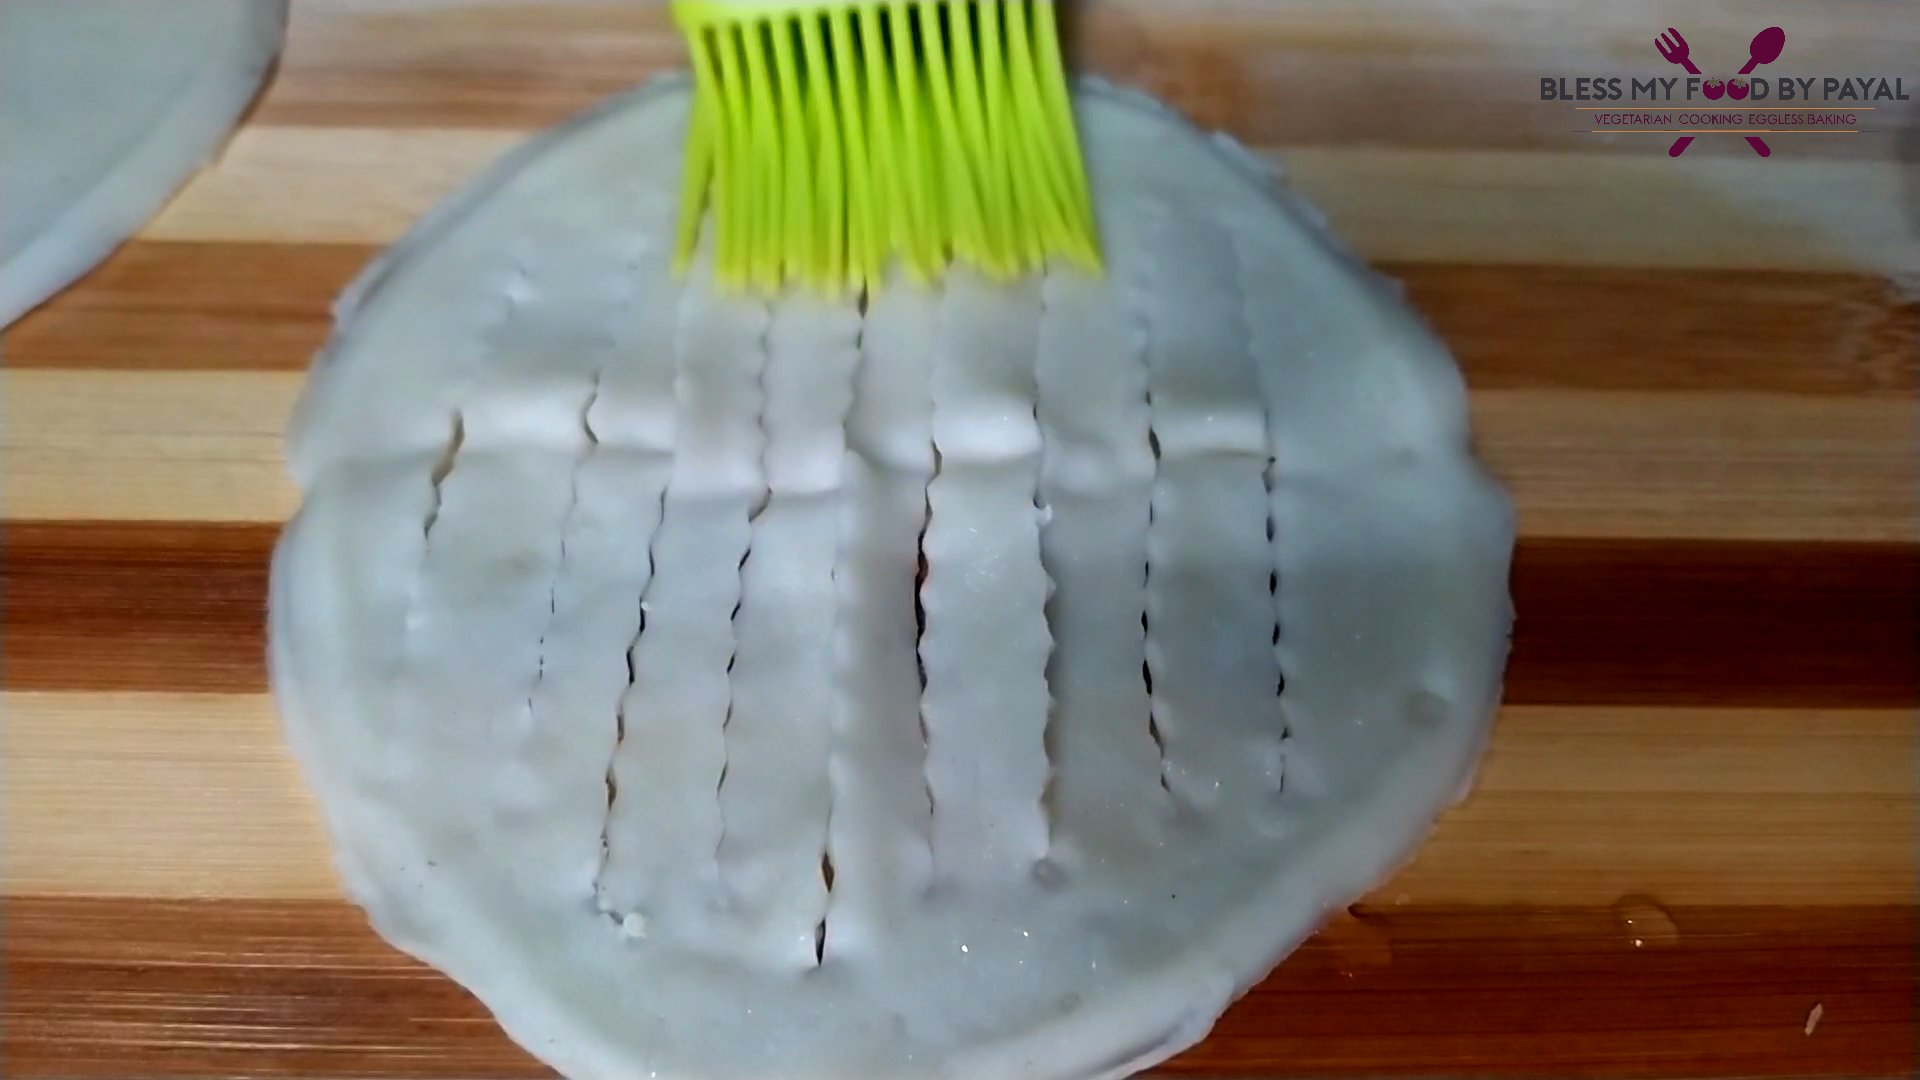
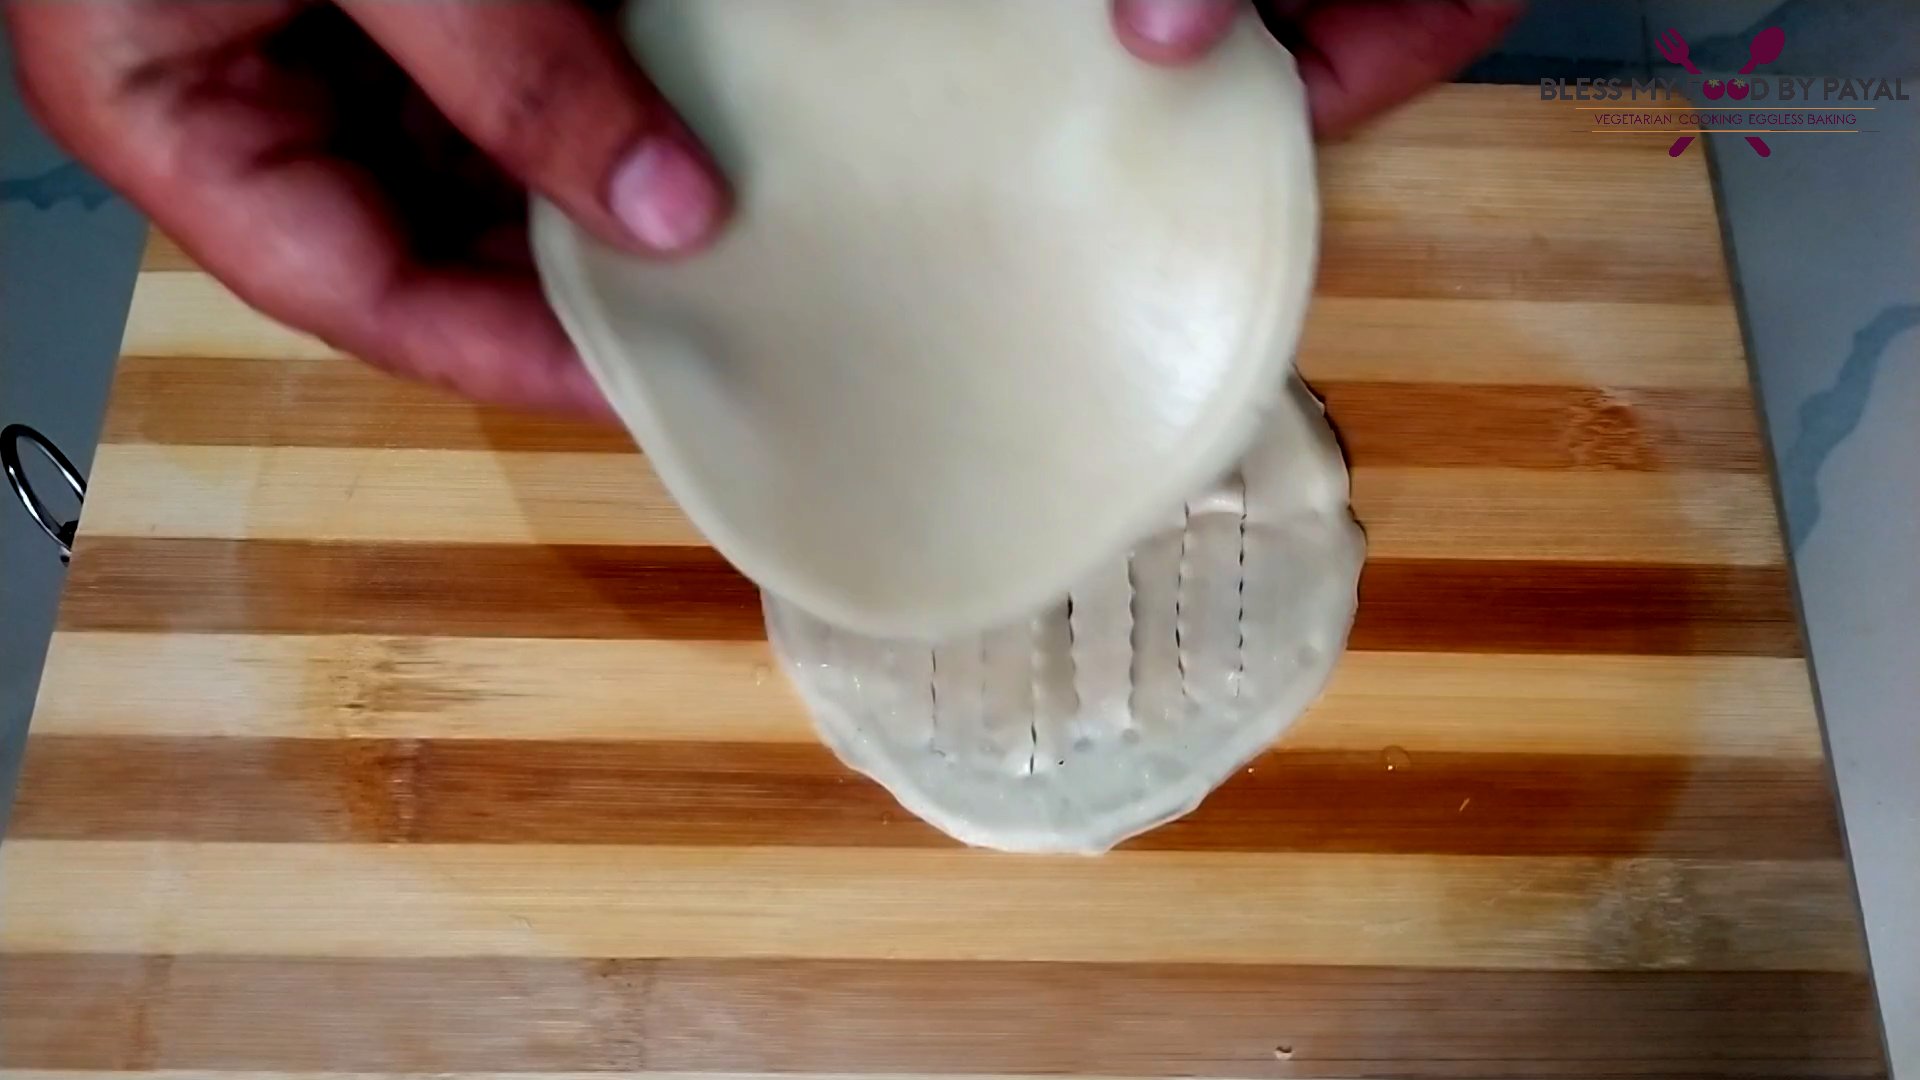
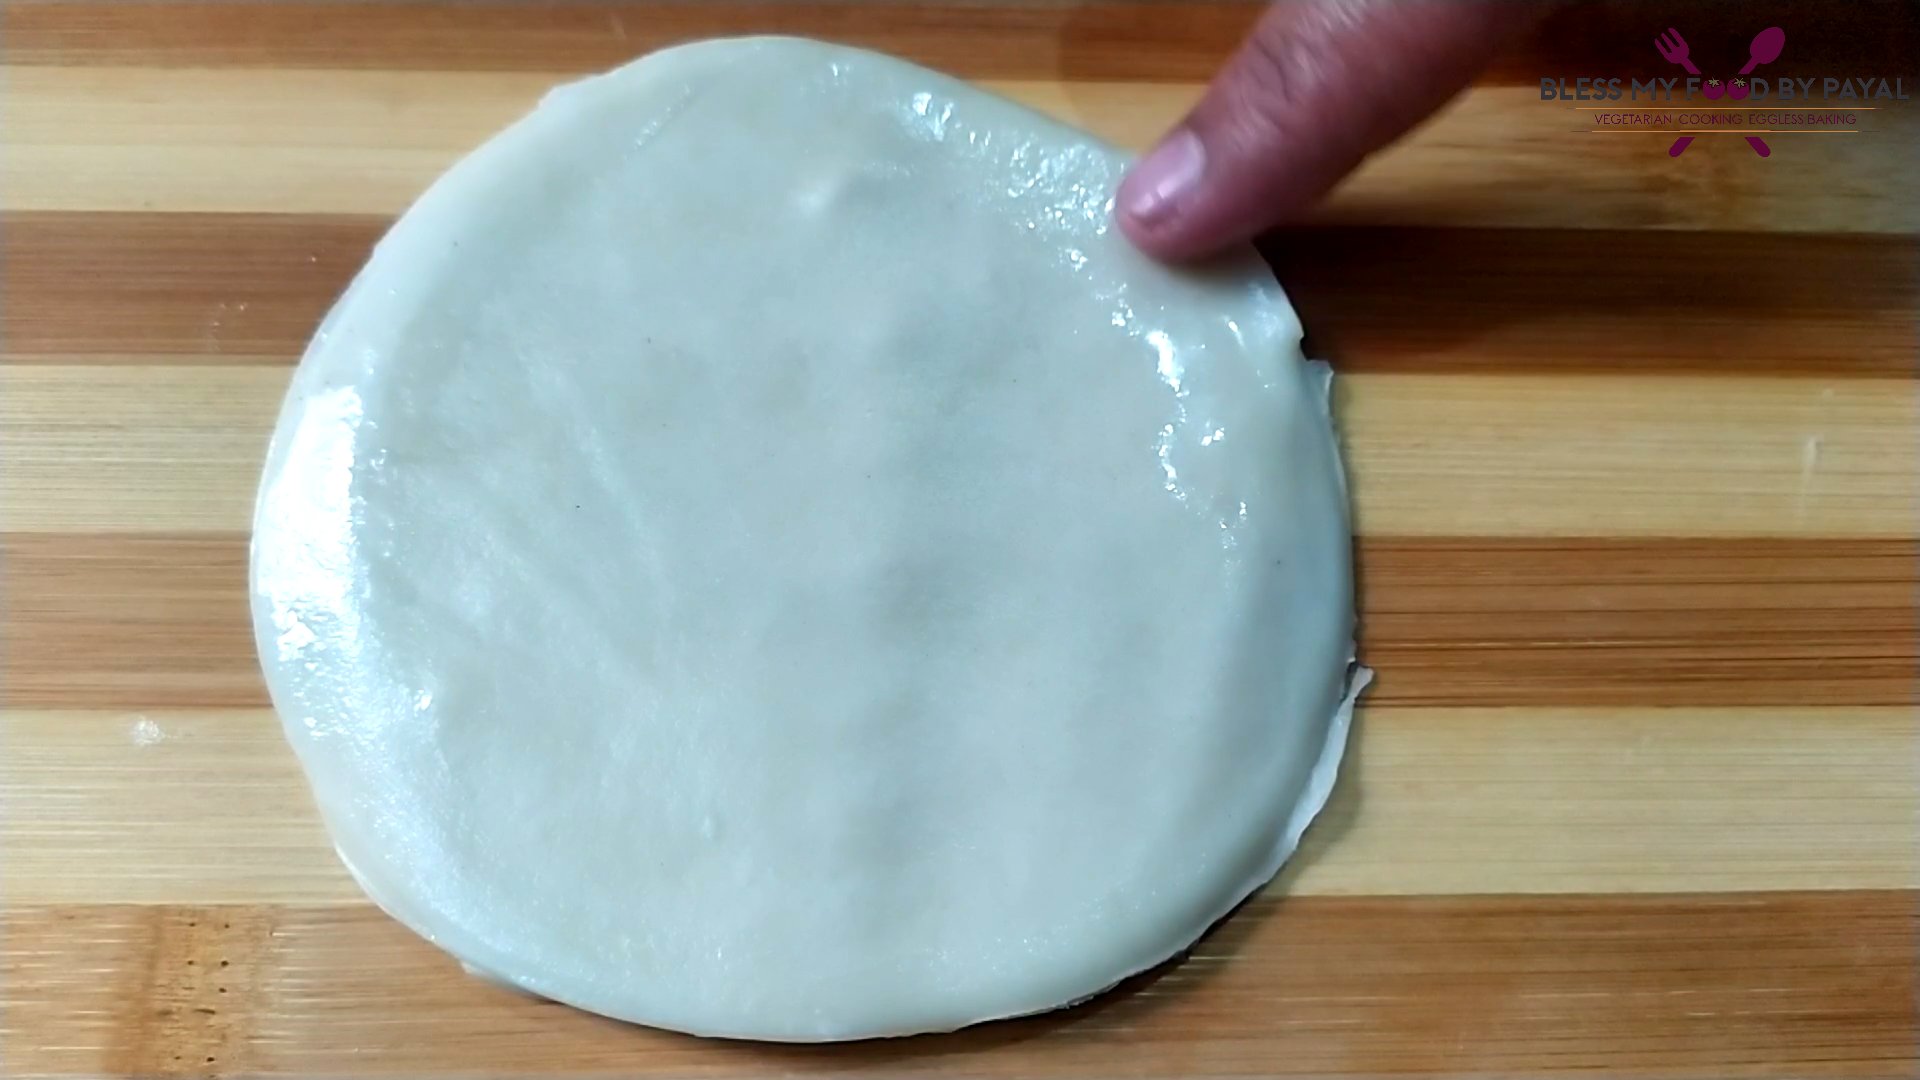
- Unfold the puri & brush it with water.
- Place second round puri over the first puri (with cut marks) which all the sides connecting each other.
- With the help of your finger tip, apply water around the border of puri.
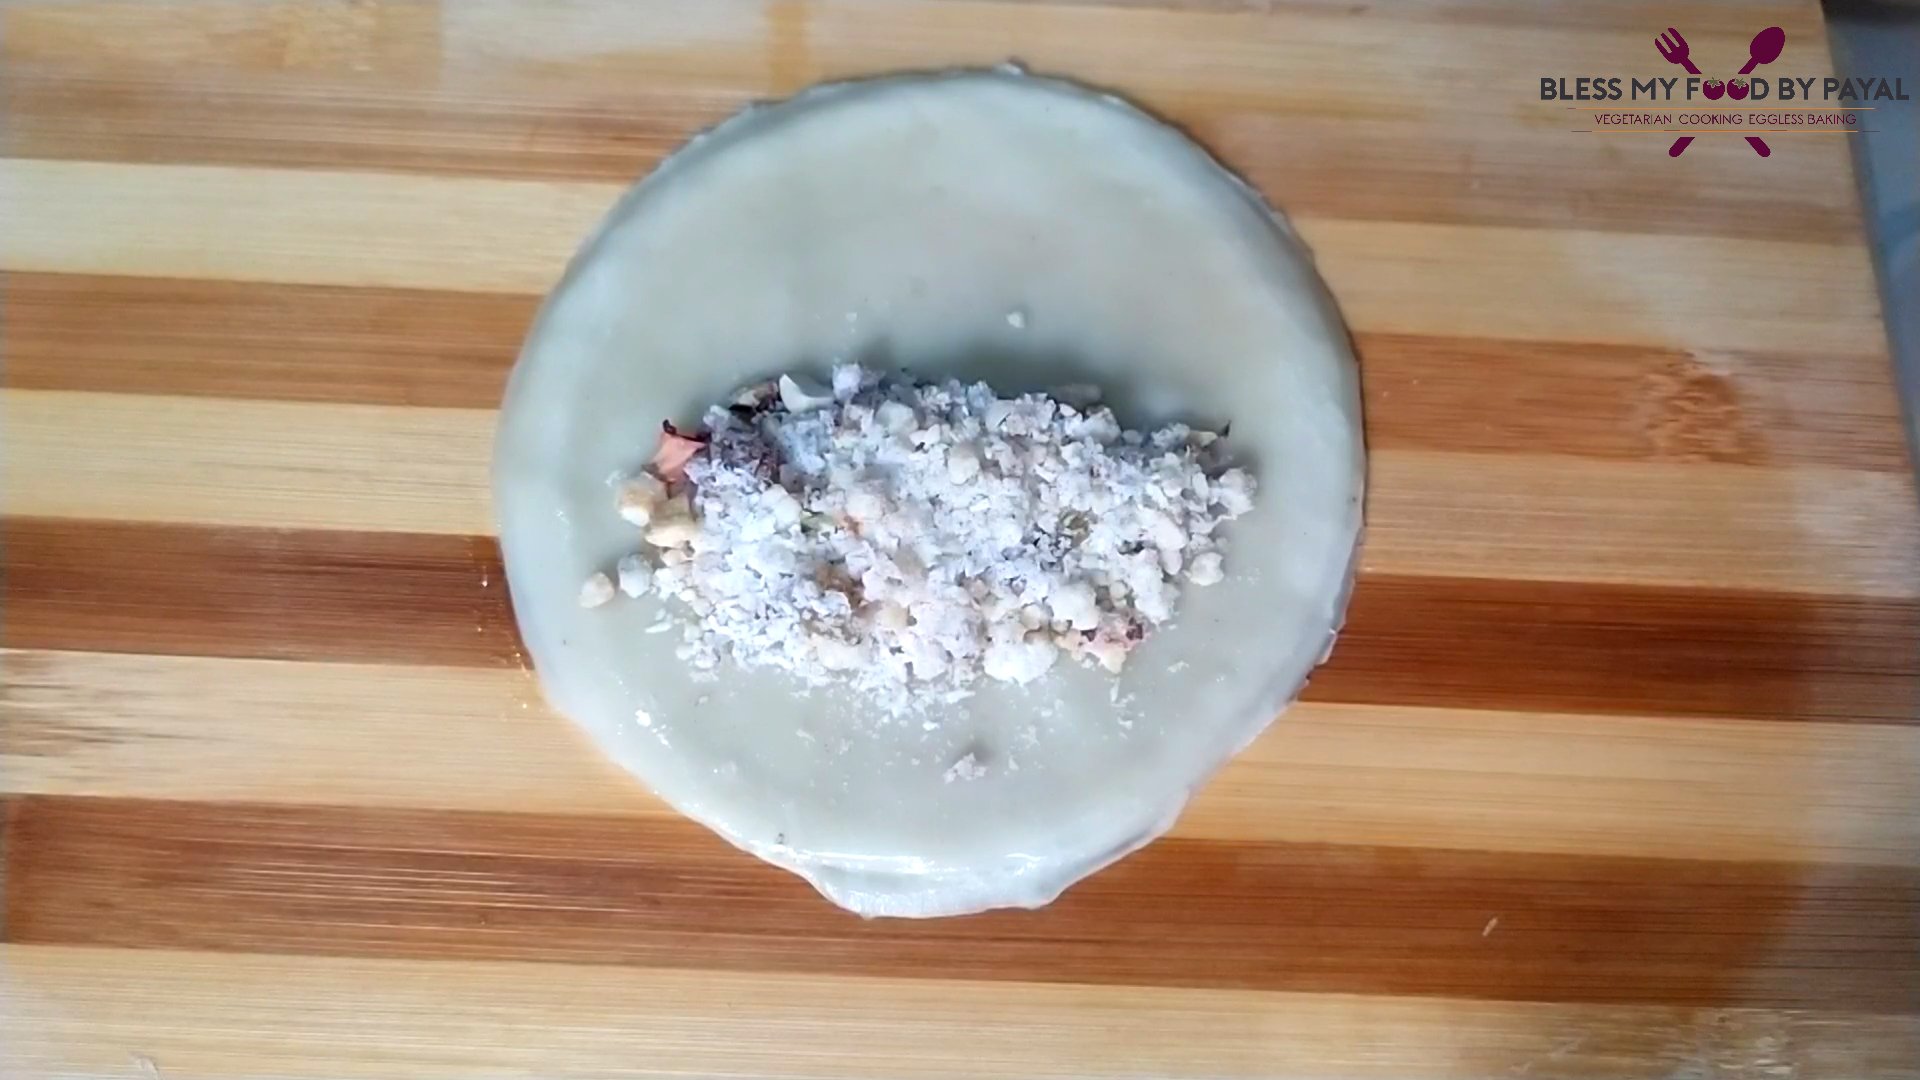
- Place a tbsp of stuffing on the side of puri.
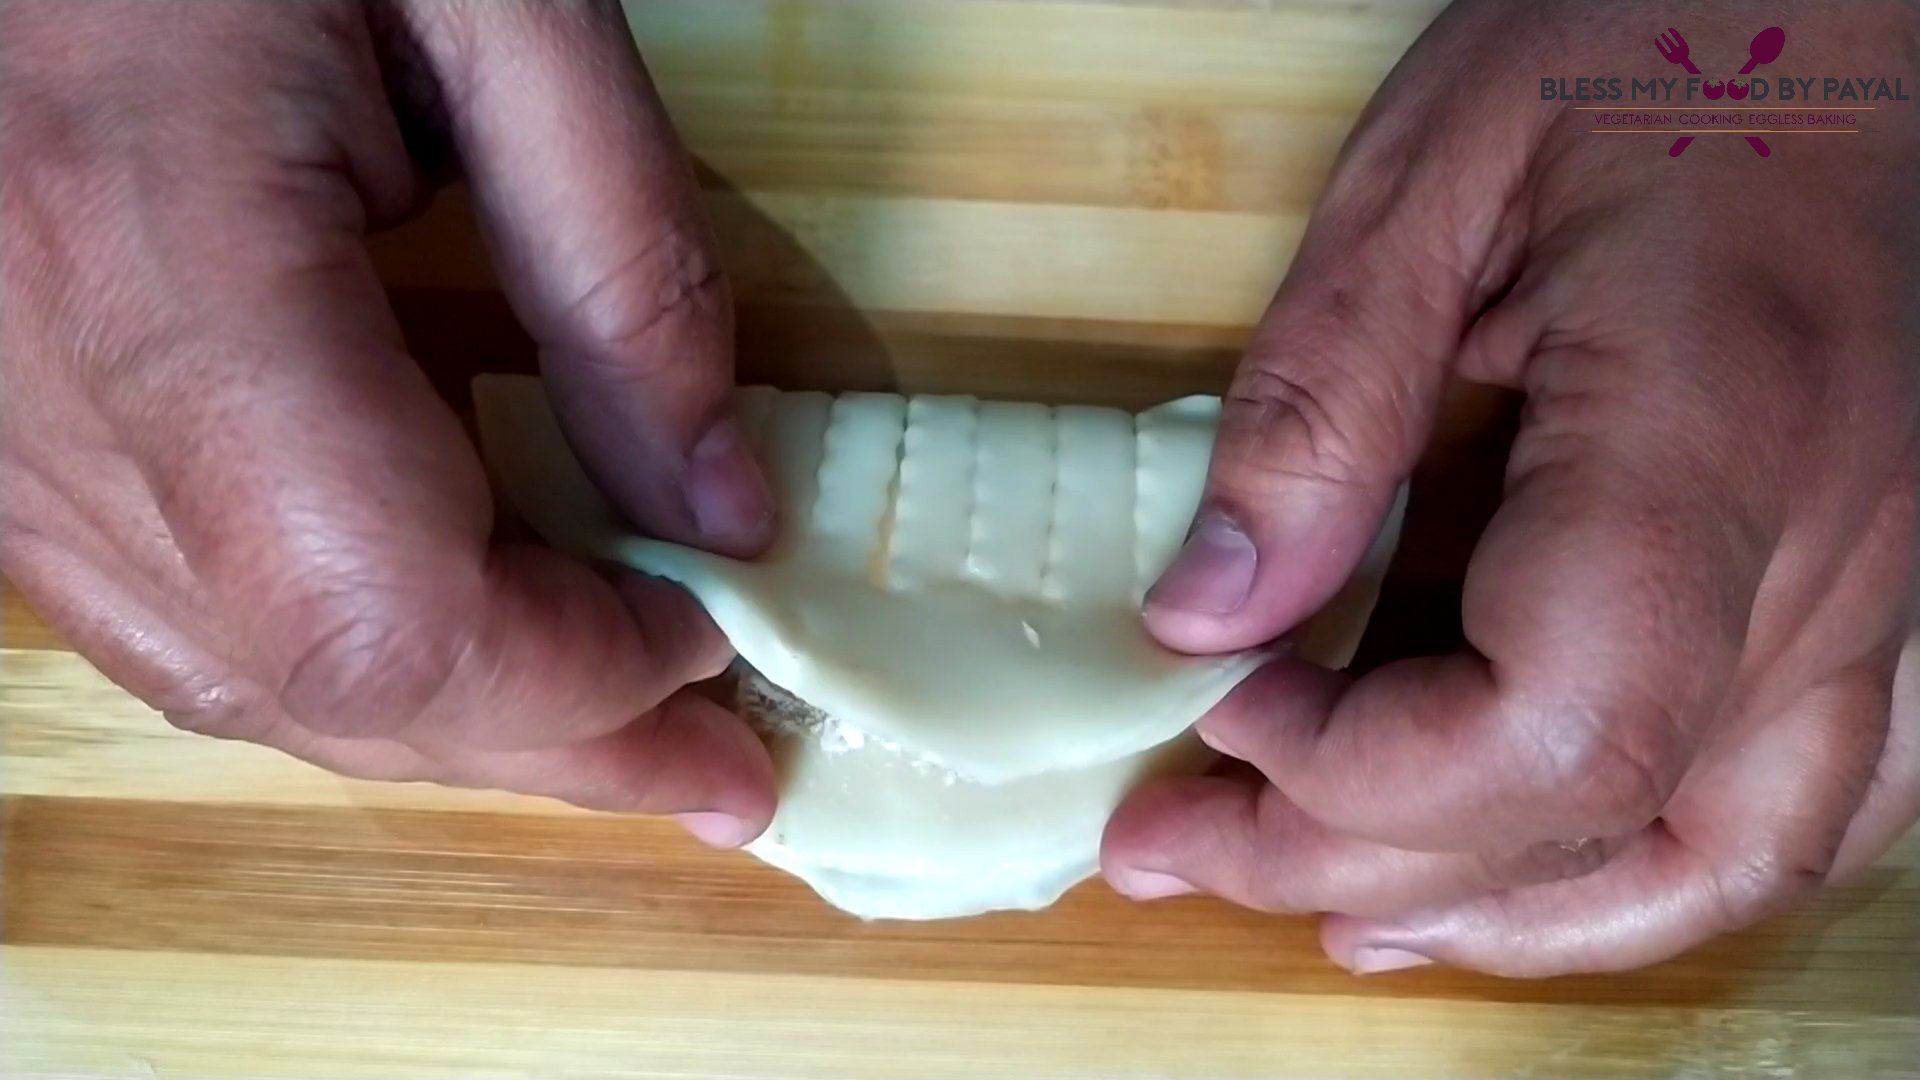
- By holding the other end of puri, close the filling in a crescent shaped puri.
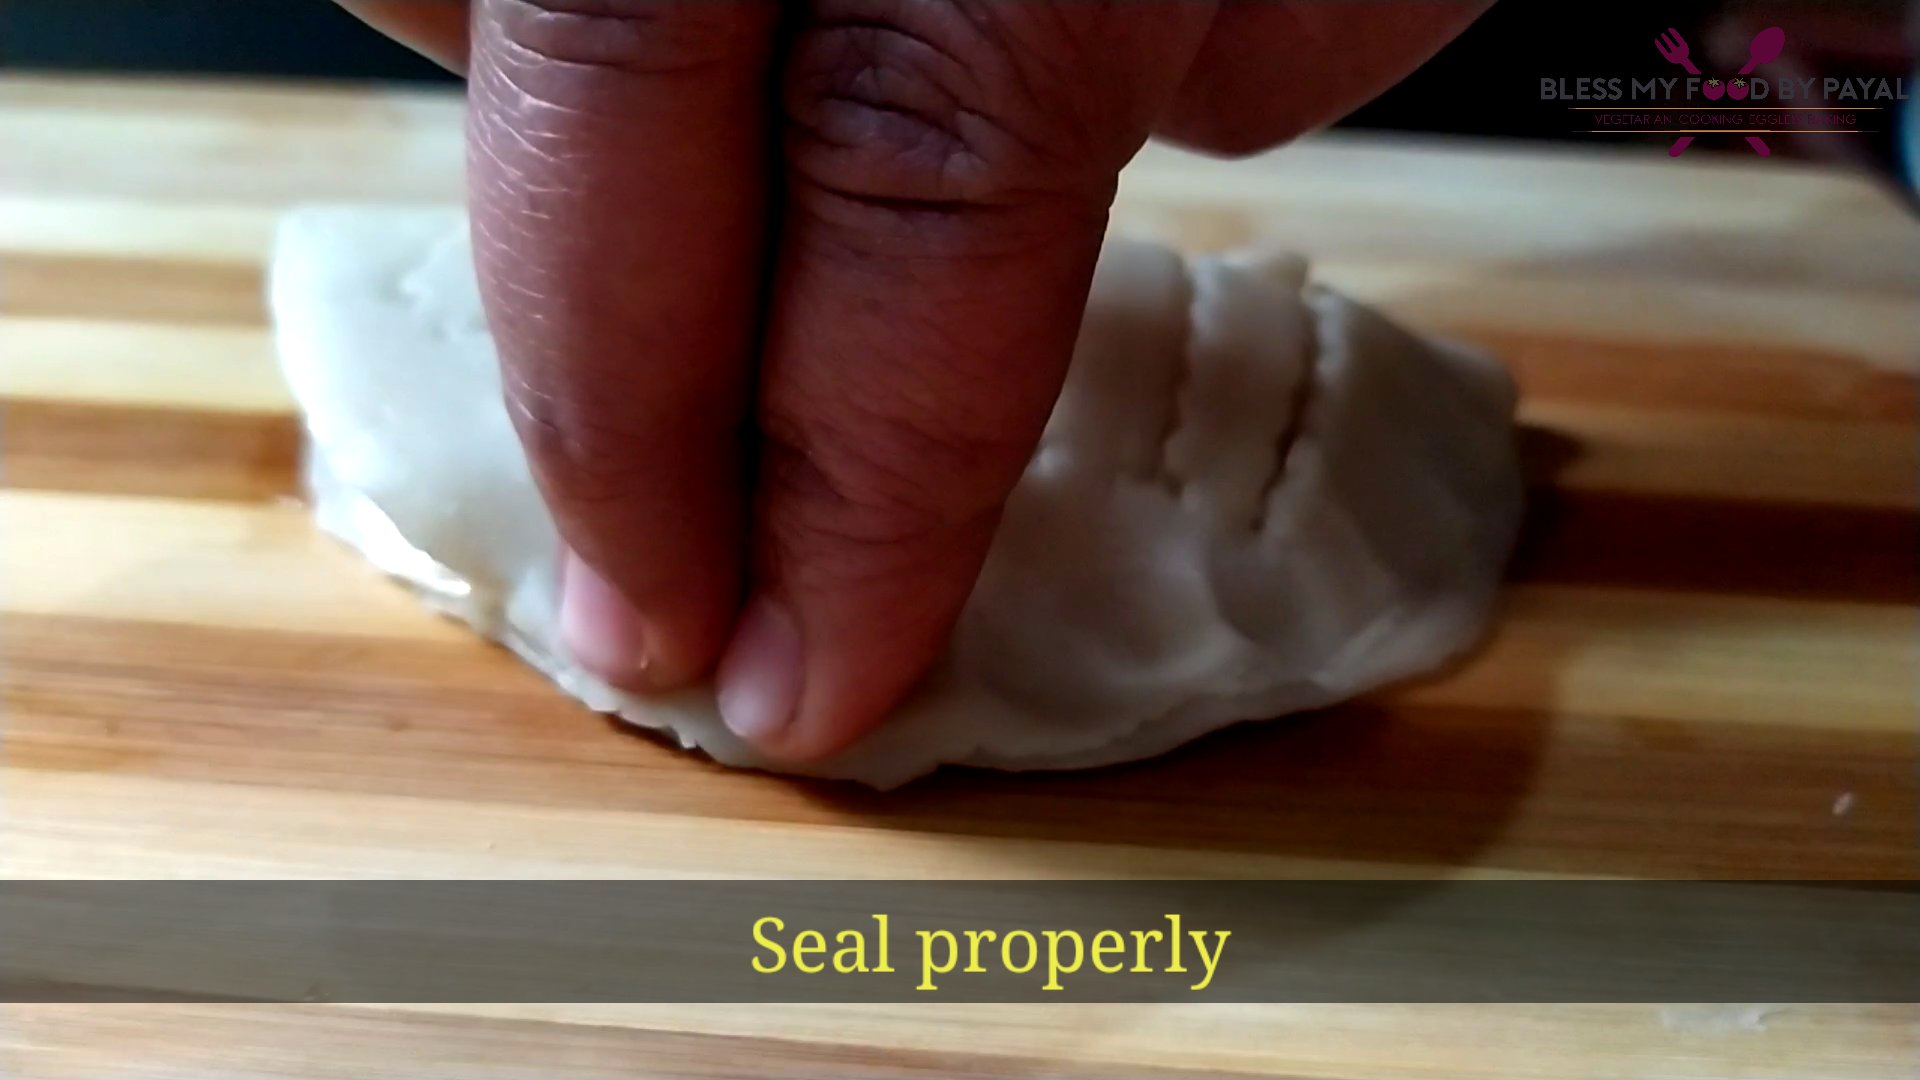
- Press the edges firmly so that stuffing should not come out.
- We have used the same sessior to give a designer outline to gujia. You may use fork or create a pleated design at the edges or whatever art you want to create. Purpose is to seal the gujia properly so that stuffing shouldn’t come out and at the same time gujia looks beautiful.
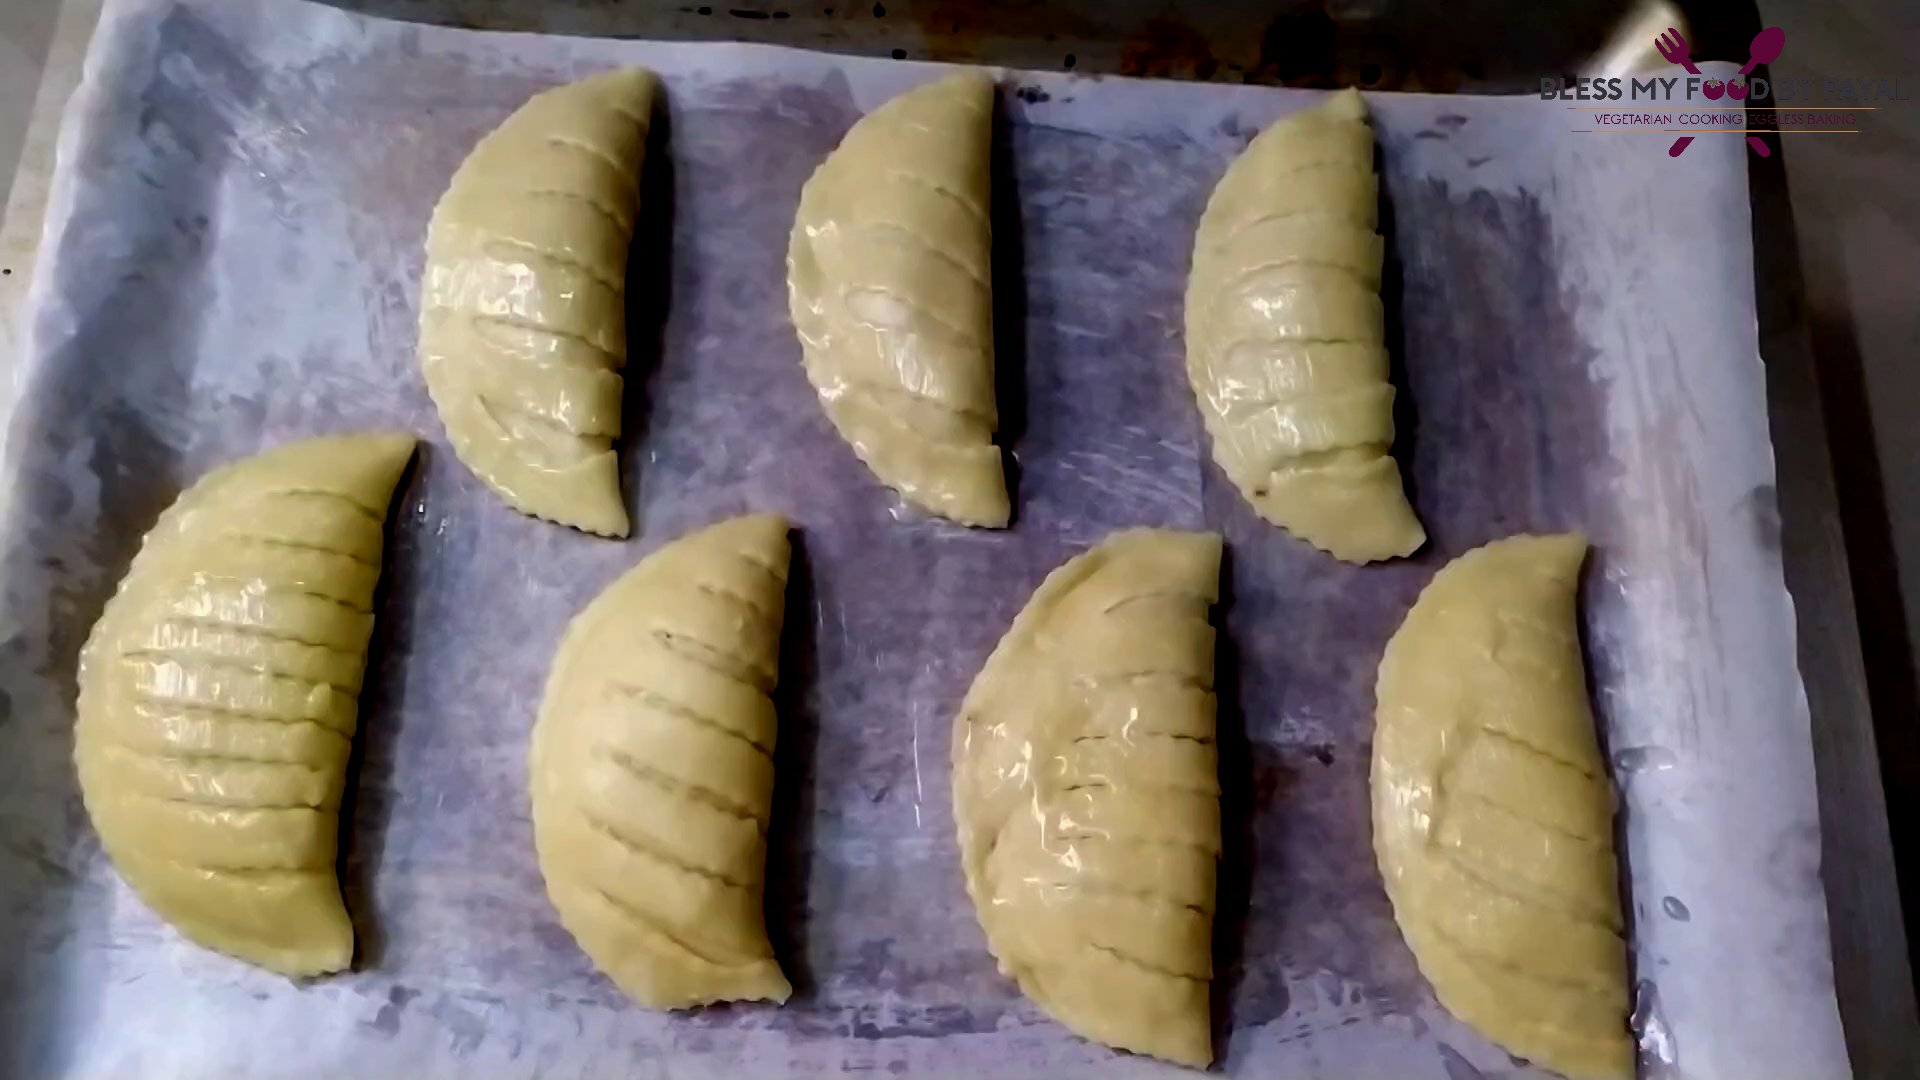
- Likewise make more gujia with the entire dough.

BAKING OF GUJIA
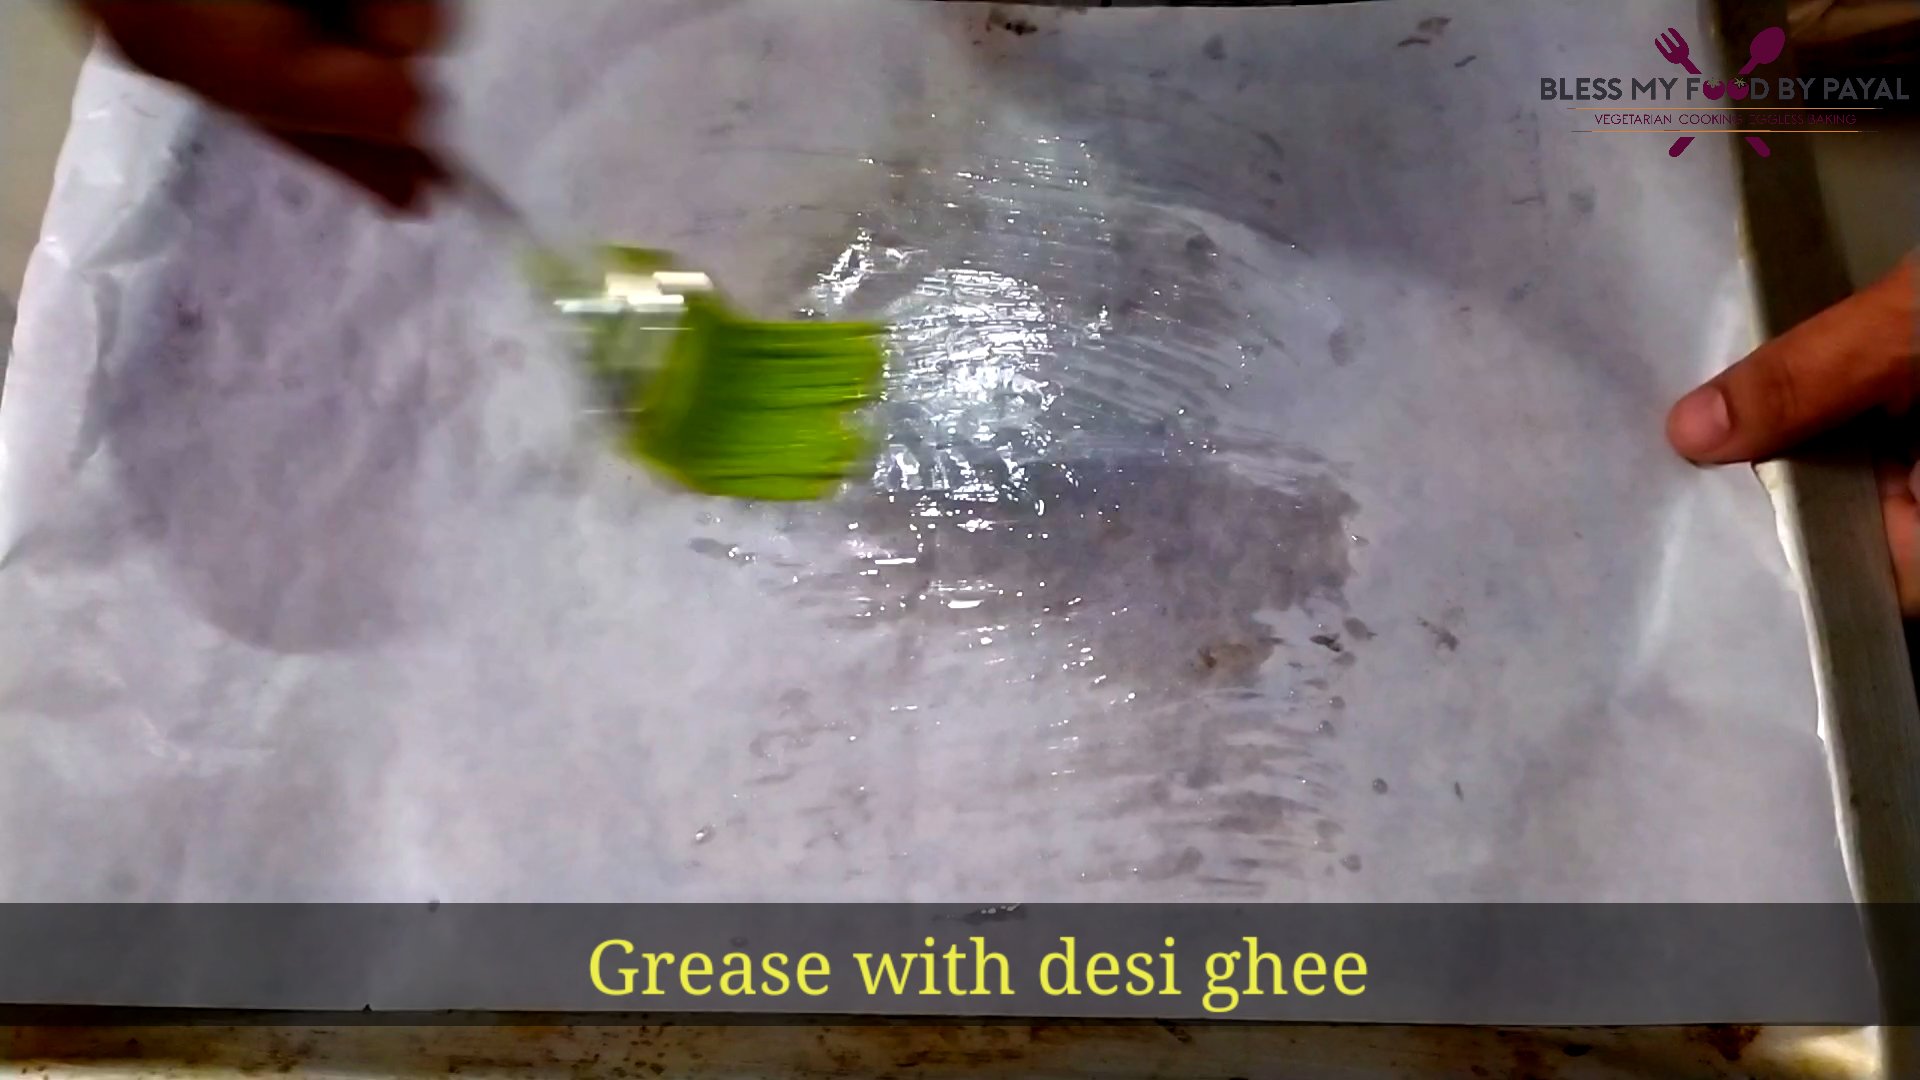
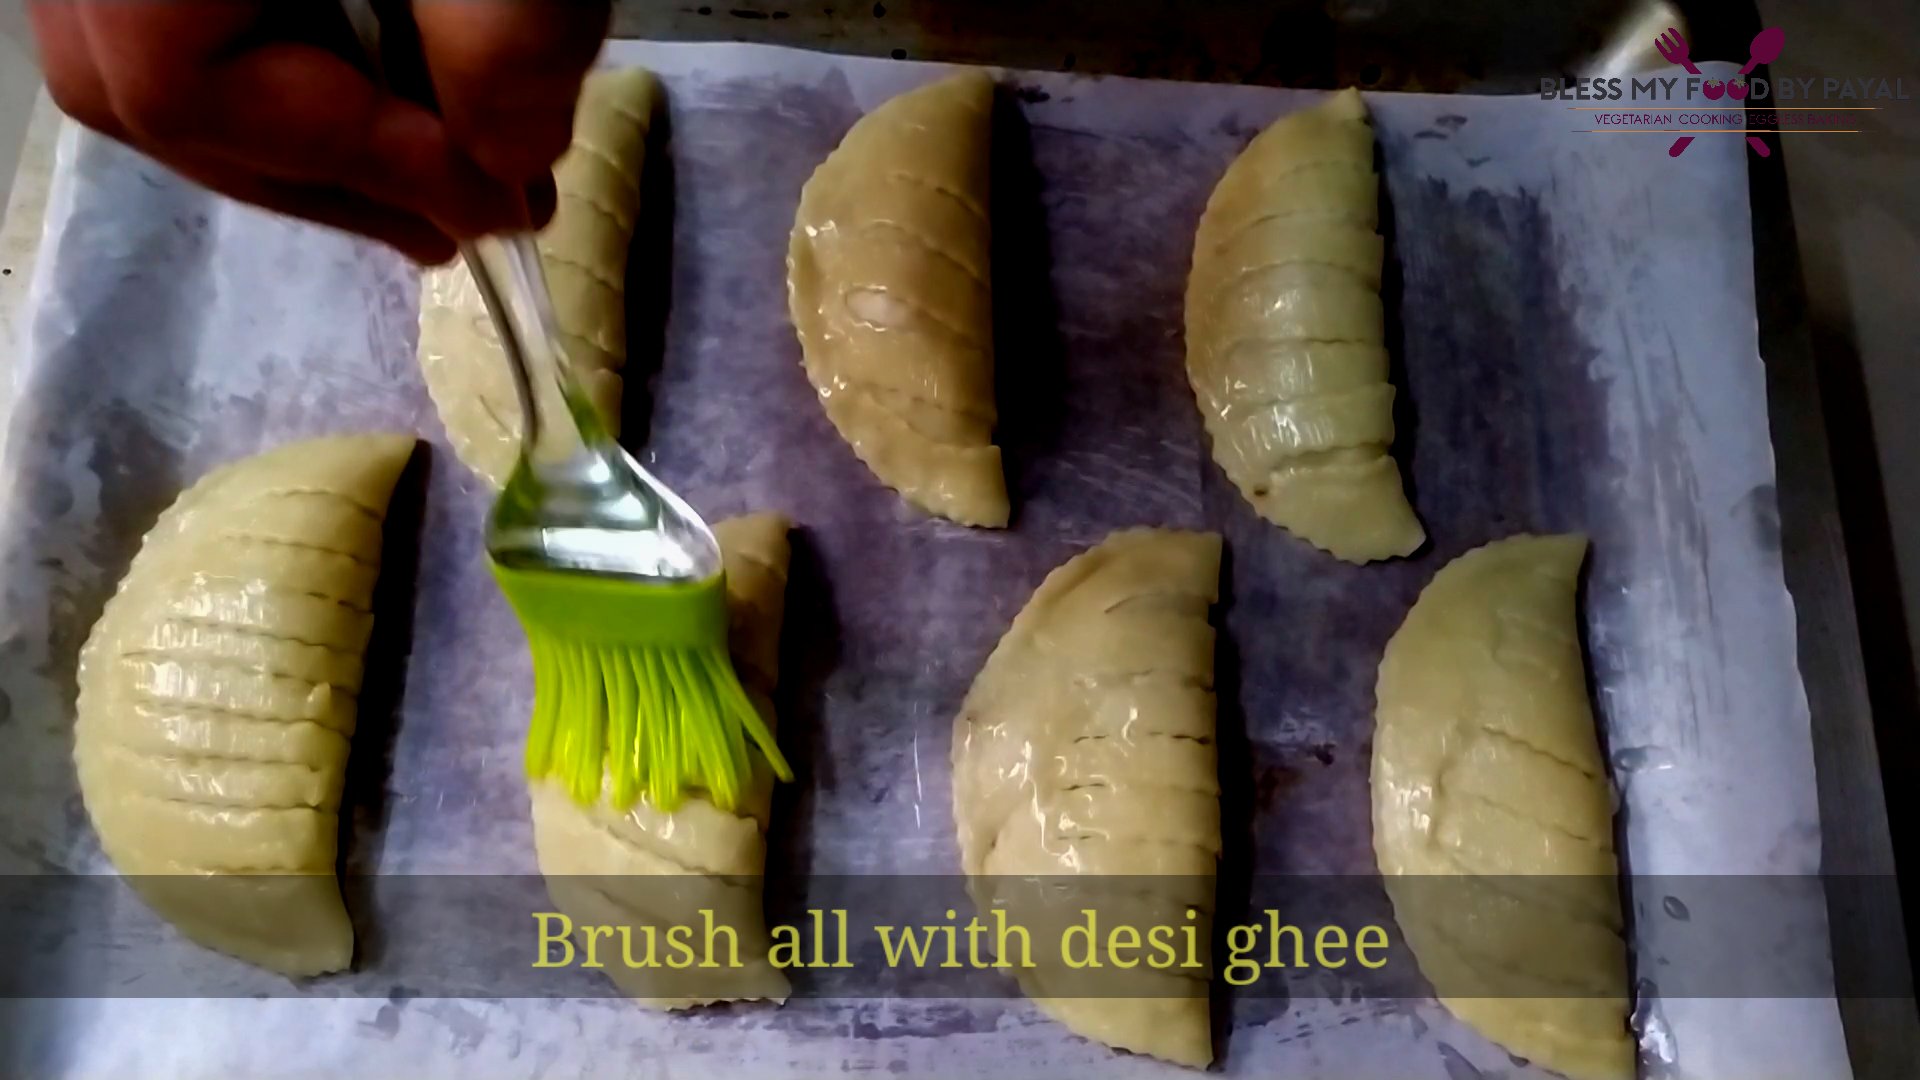
- Line a butter paper on baking tray and brush it with desi ghee.
- Arrange all gujia over it & brush them too with desi ghee. You may also use milk for giving wash.
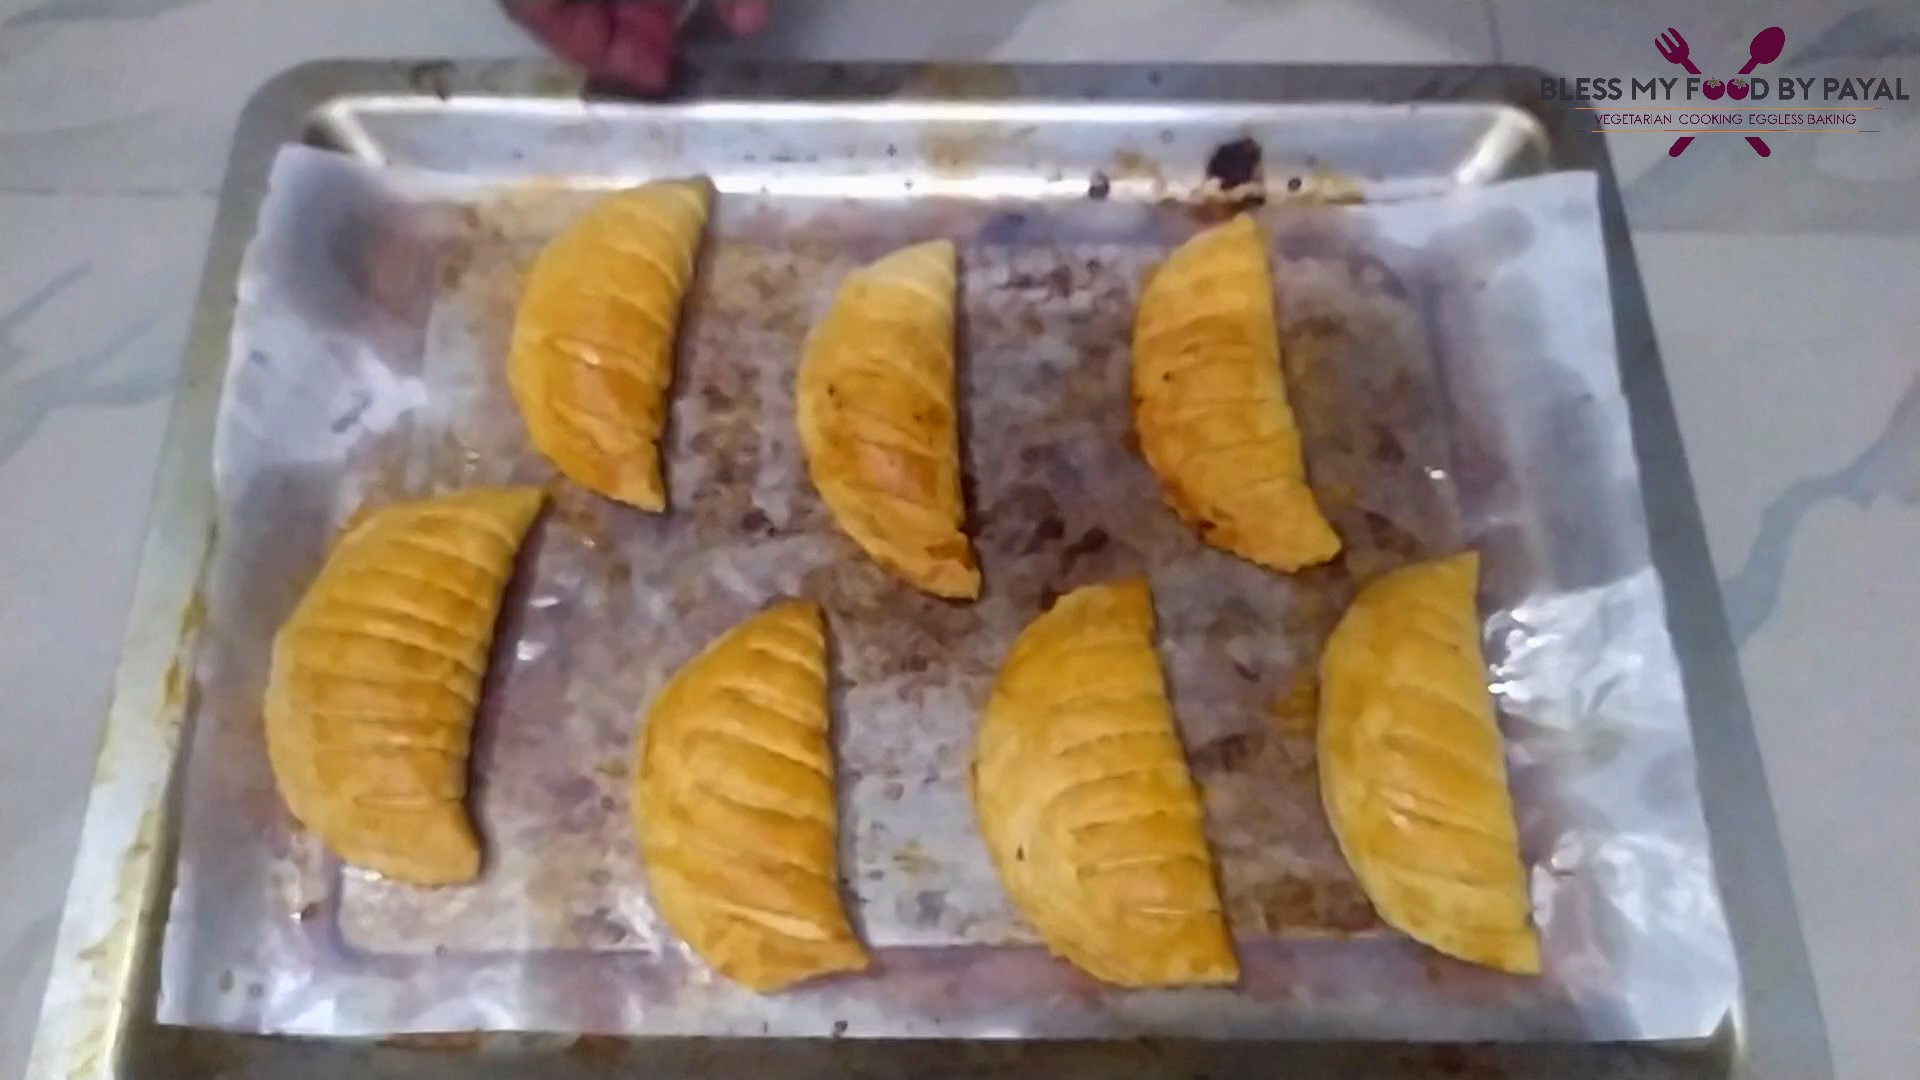
- Bake Gujia @180℃ for about 45 minutes or untill they turn golden brown. Baking time may differ depending upon each oven.
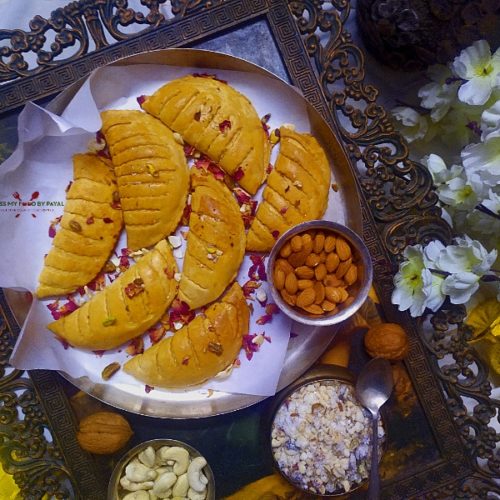
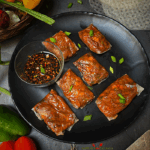
- Your baked layered gujia is ready. Enjoy.
NOTES
1. We have made LAYERED gujia which used double the dough for each gujia than regular. If you are planning to make plain gujia & not the layered one, with the given quantity of ingredients for dough, you will be able to make almost double the amount of gujia than we make.
2. What we are trying to convey above that with 2 cups of maida, 1/4 cup of desi ghee & 1/2 cup of milk, we managed to get 7 Gujia because these are layered one. But if one is making plain gujia with the given ingredients, the quantity of gujia will be doubled.
3. The quantity of ingredients for stuffing is for roughly 7-8 gujia. You may adjust as per your need.
4. While making one gujia, cover the bowl carrying dough with a lid. It will prevent the dough from turning dry.
5. Instead of baking, you can deep fry gujia in oil or desi ghee until golden brown.
6. In case of frying, you need to be more cautious about the sealing of gujia. If your gujia is not sealed properly, the stuffing may begin to come out in oil and it will damage your rest of the frying gujia too.
7. But even after taking all possible measures, your gujia burst into oil, immediately take it out before the stuffing spreads. Let other gujia fry first and burst one in the last and messed up oil can be filtered later.
Layered Gujia recipe – recipe card
Layered & Baked Gujia Recipe
Ingredients
FOR DOUGH
- 2 Cup all purpose flour/maida
- 1/4 cup desi ghee
- 1/2 cup milk chilled
FOR STUFFING
- 1 tbsp desi ghee
- 1/4 cup khoya/mawa
- 1/4 cup dessicated coconut
- 1/4 cup powdered sugar
- 3-4 green cardamoms crushed
- 1 tbsp cashew nuts chopped
- 1 tbsp almonds chopped
- 1 tbsp walnuts chopped
- 1/8 tsp nutmeg powder
FOR SHAPING GUJIA
- Water as per need
FOR BAKING GUJIA
- Raw gujia
- Desi ghee as per need
Instructions
PREPRATION OF DOUGH
- Sieve maida in a bowl and add desi ghee in it.
- Start mixing it without adding milk. Dough should hold a shape.
- Slowly add milk and knead a tight dough.
- Cover the dough with a moist kitchen towel and keep aside for 20 minutes.
PREPARATION OF STUFFING
- Put desi ghee in a pan & add mawa in it. We are using the instant mawa which gets ready in less than 5 minutes.
- Roast mawa on low flame untill it changes its colour to golden brown.
- Off the heat & let the temperature of mawa come down to luke warm.
- Add dessicated coconut, powdered sugar, cardamoms, nutmeg powder & all the chopped dry fruits. Mix.
SHAPING & PREPARING GUJIA (watching video will help you to understand better & easily)
- Take a ball size dough & roll it thin with the help of rolling pin. Better if you avoid using flour for dusting.
- Either using cookie cutter or small plate or small lid, glass or katori, whatever you have easily, mark 2 cuts on the rolled dough.
- Now you have 2 puri sized rolled disks.
- Fold one puri towards outwardly, touching both the sides, making a half moon.
- Here we are using a designer sessior which cuts in zig zag pattern. If you don't have such sessior, you may mark simple & straight cuts using pizza cutter or knife.
- Cut the half moon shaped puri beginning from straight side of puri towards round side. But mark a cut prior to an inch of the edge.
- Likewise mark 6 to 7 cuts so that you get strips inside the puri of about 1 cm each approximately.
- Unfold the puri & brush it with water.
- Place second round puri over the first puri (with cut marks) which all the sides connecting each other.
- With the help of your finger tip, apply water around the border of puri.
- Place a tbsp of stuffing on the side of puri.
- By holding the other end of puri, close the filling in a cresent shaped puri.
- Press the edges firmly so that stuffing should not come out.
- We have used the same sessior to give a designer outline to gujia. You may use fork or create a pleated design at the edges or whatever art you want to create. Purpose is to seal the gujia properly so that stuffing shouldn't come out and at the same time gujia looks beautiful.
- Likewise make more gujia with the entire dough.
BAKING OF GUJIA
- Line a butter paper on baking tray and brush it with desi ghee.
- Arrange all gujia over it & brush them too with desi ghee. You may also use milk for giving wash.
- Bake Gujia @180℃ for about 45 minutes or untill they turn golden brown. Baking time may differ depending upon each oven.
- Your baked layered gujia is ready. Enjoy.
Notes
- We have made LAYERED gujia which used double the dough for each gujia than regular. If you are planning to make plain gujia & not the layered one, with the given quantity of ingredients for dough, you will be able to make almost double the amount of gujia than we make.
- What we are trying to convey above that with 2 cups of maida, 1/4 cup of desi ghee & 1/2 cup of milk, we managed to get 7 Gujia because these are layered one. But if one is making plain gujia with the given ingredients, the quantity of gujia will be doubled.
- The quantity of ingredients for stuffing is for roughly 7-8 gujia. You may adjust as per your need.
- While making one gujia, cover the bowl carrying dough with a lid. It will prevent the dough from turning dry.
- Instead of baking, you can deep fry gujia in oil or desi ghee until golden brown.
- In case of frying, you need to be more cautious about the sealing of gujia. If your gujia is not sealed properly, the stuffing may begin to come out in oil and it will damage your rest of the frying gujia too.
- But even after taking all possible measures, your gujia burst into oil, immediately take it out before the stuffing spreads. Let other gujia fry first and burst one in the last and messed up oil can be filtered later.
PIN IT FOR LATER
More from the site
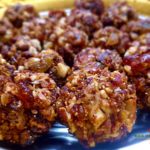
 Roasted Chana Barfi barfi
- 7 cup barfi recipe
- Khoya Gulab jamun using desi ghee residue | khoya Gulab jamun recipe | how to make Gulab jamun with khoya
- How to make dates ladoo?
- Doodh peda | milk peda recipe
- Homemade yeast recipe | how to make yeast at home | homemade khameer recipe
- Spiced Apple Chutney Recipe | Easy Apple Chutney Recipe
- Vegan German Apple cake recipe (Versunkener Apfelkuchen)
- Vegan Rice Paper Dumplings in Air Fryer
- Dal Pithi | Dal Dhokli

54 Diwali recipes | diwali sweets and snacks collection
Posted at 11:43h, 09 November[…] Gujia : Gujia, also called Karanji has special space over the festival. Made with 5 minutes khoya recipe and baking instead of frying makes it worth cherishing by the diet conscious people too. […]
Panchakjjaya Prasadam | Panchakjjaya recipe
Posted at 23:02h, 30 August[…] Layered and Baked Gujia recipe without mould […]
Radha Singhal
Posted at 15:10h, 10 NovemberCan we deep fry
blessmyfoodbypayal
Posted at 19:00h, 10 NovemberYes of course.
diwali recipes | diwali sweets and snacks | deepawali sweets | deepawali snacks - Bless My Food By Payal
Posted at 20:05h, 04 March[…] Gujia recipe : A crescent shaped sweet dumpling having a stuffing of mawa with sugar and dry fruits is the most popular recipe during holi and diwali. Gujia is traditionally made by deep frying in oil or desi ghee, but the present one are baked version […]