16 Oct Snacks Basket | how to make snacks basket at home
Last Updated on April 26, 2019 by blessmyfoodbypayal
Snacks Basket | how to make snacks basket at home recipe with step wise pictorial method.
Undoubtedly taste of the food comes at the first place but you can not overlook the importance of appearance/look/presentation of food at the same time. If your food is tasty and at the same time it has an appealing look, all praises are eagerly waiting for you.
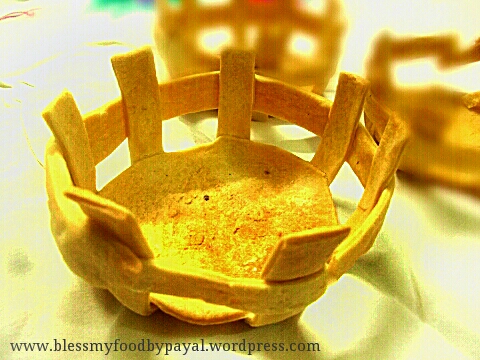
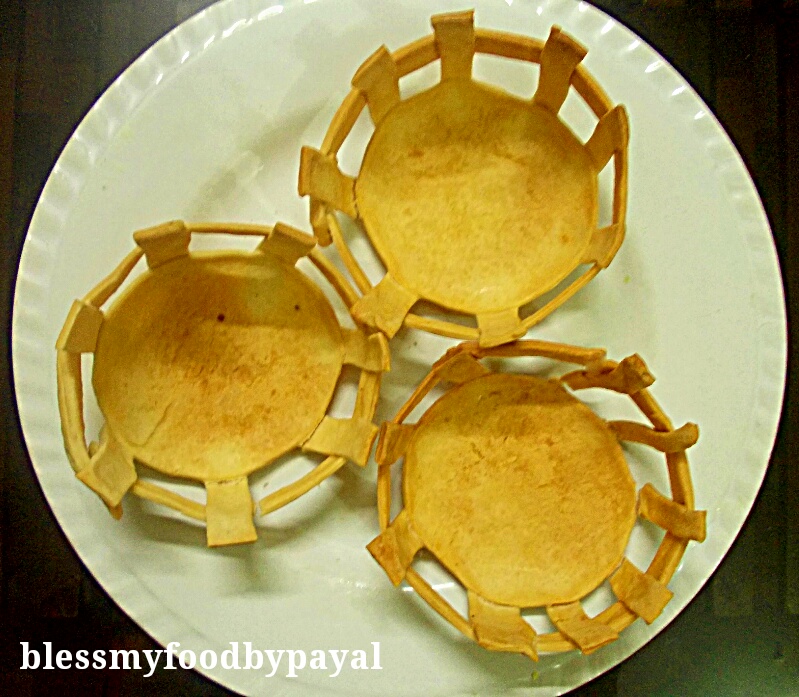
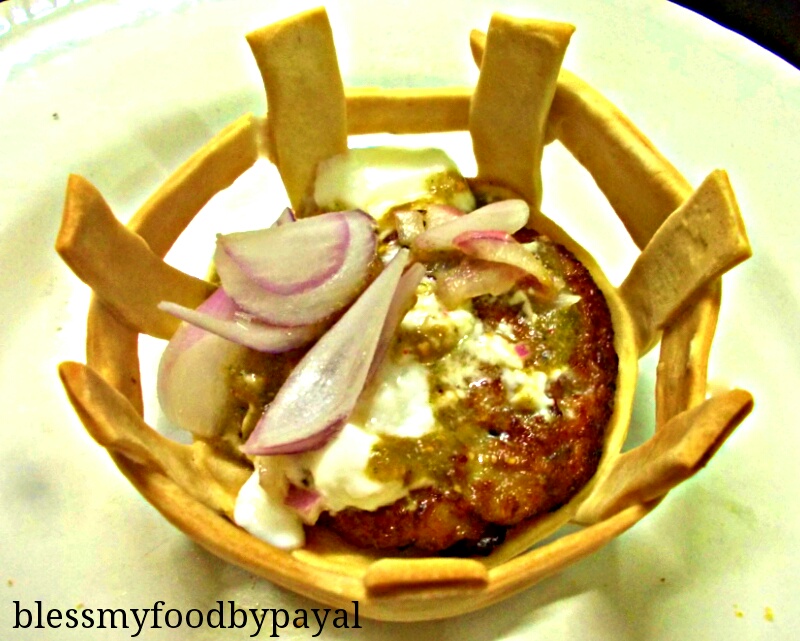
Today we are presenting these Snacks Baskets which will add beauty to the taste of your snacks. Make any snack of your choice and simply present them in these baskets. Your snack will appear catchy and at the same time these crispy baked baskets will add crunch to your snack.
So let’s make these beauties….
Snacks basket – recipe card

Snacks Basket | how to make snacks basket at home
Ingredients
- 2 cup All Purpose Four
- 1/4 tsp Carom seeds
- 1/4 tsp Baking soda
- 3 tbsp Oil
- 1 tsp Salt or as per taste
- Water as per need
Instructions
Making the Dough:
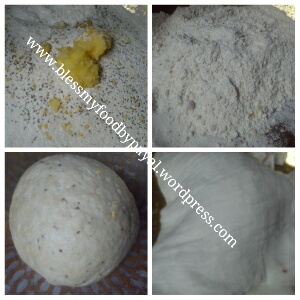
- Sieve flour, baking soda and salt in a mixing bowl.
- Add oil & rub the oil with your fingertips to get a breadcrumb like consistency.
- Now start kneading the flour to a stiff dough with water.
- Cover the dough with a moistened muslin cloth or kitchen towel and keep aside for 30-40 mins.
Cutting the Dough:
- Before we began with the method of cutting the dough, we would like to tell you that here we are using the steel katoris, available in almost every kitchen, for giving the shape to our baskets. That's why instead of any other cutter, we are using these katories itself for the purpose so that there shouldn't remain any chance of error in fixing the size of the rolled dough, we cut.
- The idea behind using this katori instead of any other baking pan/pie pan is that we want to make the baskets of such a size in which we can adjust any of the snacks.
- Do keep in mind that whatever utensil you are using must be compatible to your oven.
Making of strips :
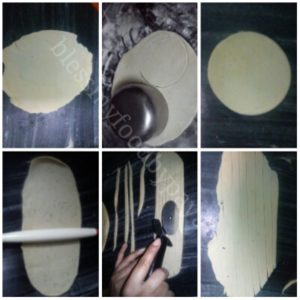
- Take a ball out of the dough and roll it like a chapati with the help of rolling pin. Roll the dough neither too thin nor too thick.
- Cut the dough in round shape with the katori. Keep aside.
- Now take one more ball out of the dough and start rolling it.
- Cut this dough into strips of half inch width with the help of knife or pizza cutter. Keep aside.
Forming the Shape:
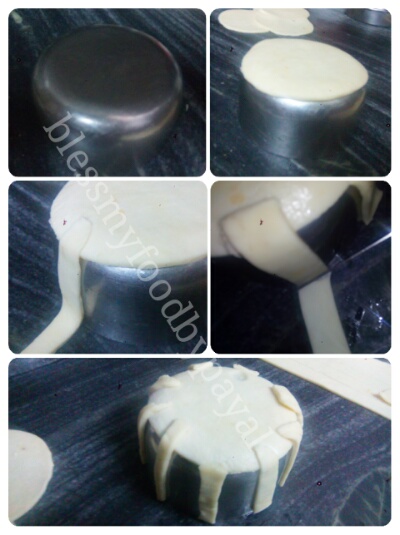
- Take the katori you used for cutting the dough. Place it upside down.
- Grease the katori from outside with oil.
- Now place the round shaped chapati over the katori.
- Take the strip and fix its one end on the edge of round shaped chapati. Apply water if finding difficulty in fixing the strip.
- Fix this strip from top to bottom of the katori and cut the strip where the katori ends.
- Repeatedly fix the strips from all sides of the katori with a desirable gap between each strip.
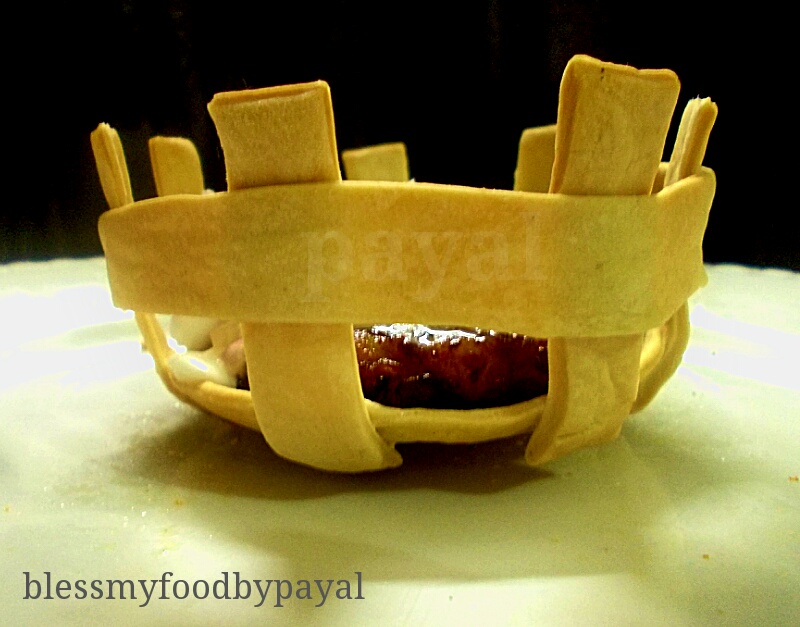
- Now take one more strip and fix it horizontally moving over from the center of all the strips prefixed vertically.
Baking :
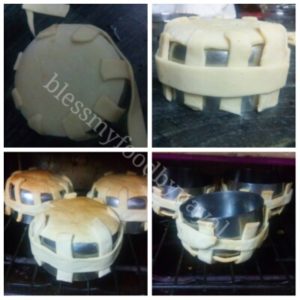
- Place this katori in a preheated oven at 180 degree Celsius for 10-15 minutes or unit the snacks basket is turned golden brown.
- Keep an eye on your baskets while baking and if you find that one side is completely baked but the other is yet to receive its end, just invert the sides and bake accordingly.
- When done, switch off the oven, bring out the Katories and let them cool down a bit.
- Carefully separate steel katories from the Baked Katories.
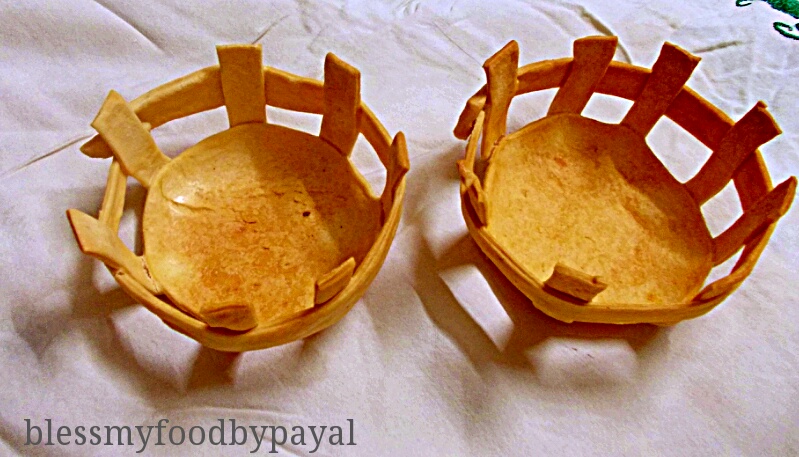
- Your snacks baskets are ready.
pictorial recipe of snacks basket
Making the Dough:
1. Sieve flour, baking soda and salt in a mixing bowl.
2. Add oil & rub the oil with your fingertips to get a breadcrumb like consistency.
3. Now start kneading the flour to a stiff dough with water.
4. Cover the dough with a moistened muslin cloth or kitchen towel and keep aside for 30-40 mins.
Cutting the dough:
Before we began with the method of cutting the dough, we would like to tell you that here we are using the steel katoris, available in almost every kitchen, for giving the shape to our baskets. That’s why instead of any other cutter, we are using these katories itself for the purpose so that there shouldn’t remain any chance of error in fixing the size of the rolled dough, we cut.
The idea behind using this katori instead of any other baking pan/pie pan is that we want to make the baskets of such a size in which we can adjust any of the snacks.
Do keep in mind that whatever utensil you are using must be compatible to your oven.
Now the method begins…
1. Take a ball out of the dough and roll it like a chapati with the help of rolling pin. Roll the dough neither too thin nor too thick.
2. Cut the dough in round shape with the katori. Keep aside.
3. Now take one more ball out of the dough and start rolling it.
4. Cut this dough into strips of half inch width with the help of knife or pizza cutter. Keep aside.
Forming the Shape: (better understandable with pictures)
1. Take the katori you used for cutting the dough. Place it upside down.
2. Grease the katori from outside with oil.
3. Now place the round shaped chapati over the katori.
4. Take the strip and fix its one end on the edge of round shaped chapati. Apply water if finding difficulty in fixing the strip.
5. Fix this strip from top to bottom of the katori and cut the strip where the katori ends.
6. Repeatedly fix the strips from all sides of the katori with a desirable gap between each strip.
7. Now take one more strip and fix it horizontally moving over from the center of all the strips prefixed vertically.
Baking :
1. Place this katori in a preheated oven* at 180 degree Celsius for 10-15 minutes or unit the snacks basket is turned golden brown.
2. Keep an eye on your baskets while baking and if you find that one side is completely baked but the other is yet to receive its end, just invert the sides and bake accordingly.
3. When done, switch off the oven, bring out the Katories and let them cool down a bit.
4. Carefully seperate steel katories from the Baked Katories.
Your snacks baskets are ready.
Serve Snacks of your choice them and receive all attention and appreciation of your guests.
NOTE
* If you don’t have oven, you can simply fry these Baskets along with Katories in a hot oil. But be careful in handling with the volcano like hot Katories in that case.
You can make these Katories well in advance and in bulk. Just preserve them in airtight container.
Regards
PAYAL BALI SHARMA
SHAILENDER SHARMA





annascuisine
Posted at 17:46h, 18 OctoberGreat idea.
Payal Bali Sharma
Posted at 18:04h, 18 OctoberThanks alot
annascuisine
Posted at 00:41h, 19 OctoberMy pleasure. 🙂
Payal Bali Sharma
Posted at 17:19h, 16 OctoberThank you so much dear…
Rini
Posted at 16:30h, 16 OctoberVery cute
Payal Bali Sharma
Posted at 17:21h, 16 OctoberThank you
Anonymous
Posted at 15:53h, 16 OctoberNew one
Payal Bali Sharma
Posted at 16:01h, 16 OctoberThanks a ton