
12 Jun Oven-Baked Kunafa with Vermicelli | How to Make Kunafa in Oven Using Vermicelli | Easy Homemade Kunafa Without Kataifi Dough

Last Updated on March 4, 2026 by blessmyfoodbypayal
Oven-Baked Kunafa with Vermicelli | How to Make Kunafa in Oven Using Vermicelli | Easy Homemade Kunafa Without Kataifi Dough recipe with step wise pictorial method.
Kunafa, also pronounced and spelled as Knafeh, Kunefe, Knefe and Kanafeh is a Middle – Eastern (Palestine, Jordan, Syria, Lebanon and Turkey) favourite baked desert, traditionally made during the month of Ramadan, a period of fasting for those of the Islamic faith.
Mainly pronounced as Ku-na-fa, this desert is made with a very fine vermicelli-like Phylo pastry, also called shredded Phylo dough, kataifi or knafeh dough. Also a thick syrup of sugar and a few drops of rose water or orange blossom water is poured on it during the final minutes of cooking. Often the top layer of Kunafa is tinted with red food coloring & different nuts of one’s choice are sprinkled on top as a garnish.
Along with many names, Knafeh comes in number of forms, textures, presentations and fillings. The texture of the Kunafa also varies from fine (knafe naameh) to rough (knafeh khesneh), brominated kunafa & perplexing Knafeh. In different variations of this dish, the cream is replaced by mozzarella or by cream cheese or cottage cheese and at times cinnamon is added. The exact ingredients differ depending on which region it comes from.
We are presenting the recipe of Kunafa with little variations depending upon the availability of ingredients. As already said, this type of Kunafa is made with a very fine vermicelli-like Phylo pastry, also called shredded Phylo dough, kataif or knafeh dough. But this dough is not available in our city, so we are using very thin vermicelli. The filling of it is made with a cream prepared from milk.
The second thing we tried with our recipe is an attempt to curtail the calories to the maximum we could do. The traditional kunafa is made with too much of butter/ghee and sugar, hence highly rich in calories. Just imagine that where we are mentioning 2-3 tsp of butter/ghee, traditional kunafa demands about 1 cup of butter/ghee. So we have tried our best to curtail the calories wherever it was possible to do without affecting the traditional taste of kunafa.
Step wise Pictorial recipe of Oven-Baked Kunafa with Vermicelli | How to Make Kunafa in Oven Using Vermicelli | Easy Homemade Kunafa Without Kataifi Dough
Making of Kunafa involves 3 stages which includes making of:-
Cream filling
Sugar syrup
Final Kunafa
MAKING OF CREAMY FILLING
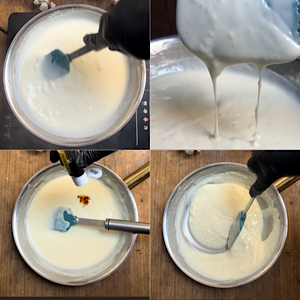
Take a pan & add remaining milk, corn flour and milk powder. Remember, pan is not on the heat yet. Whisk them so well so that there remains no lumps. Add butter, processed cheese and sugar.
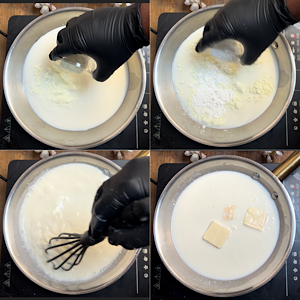
Now place the pan on low heat and let it cook on low heat. When the milk turns thick, remove it from the heat. Add vanilla essence and mix well. Keep aside and let the cream come to room temperature.
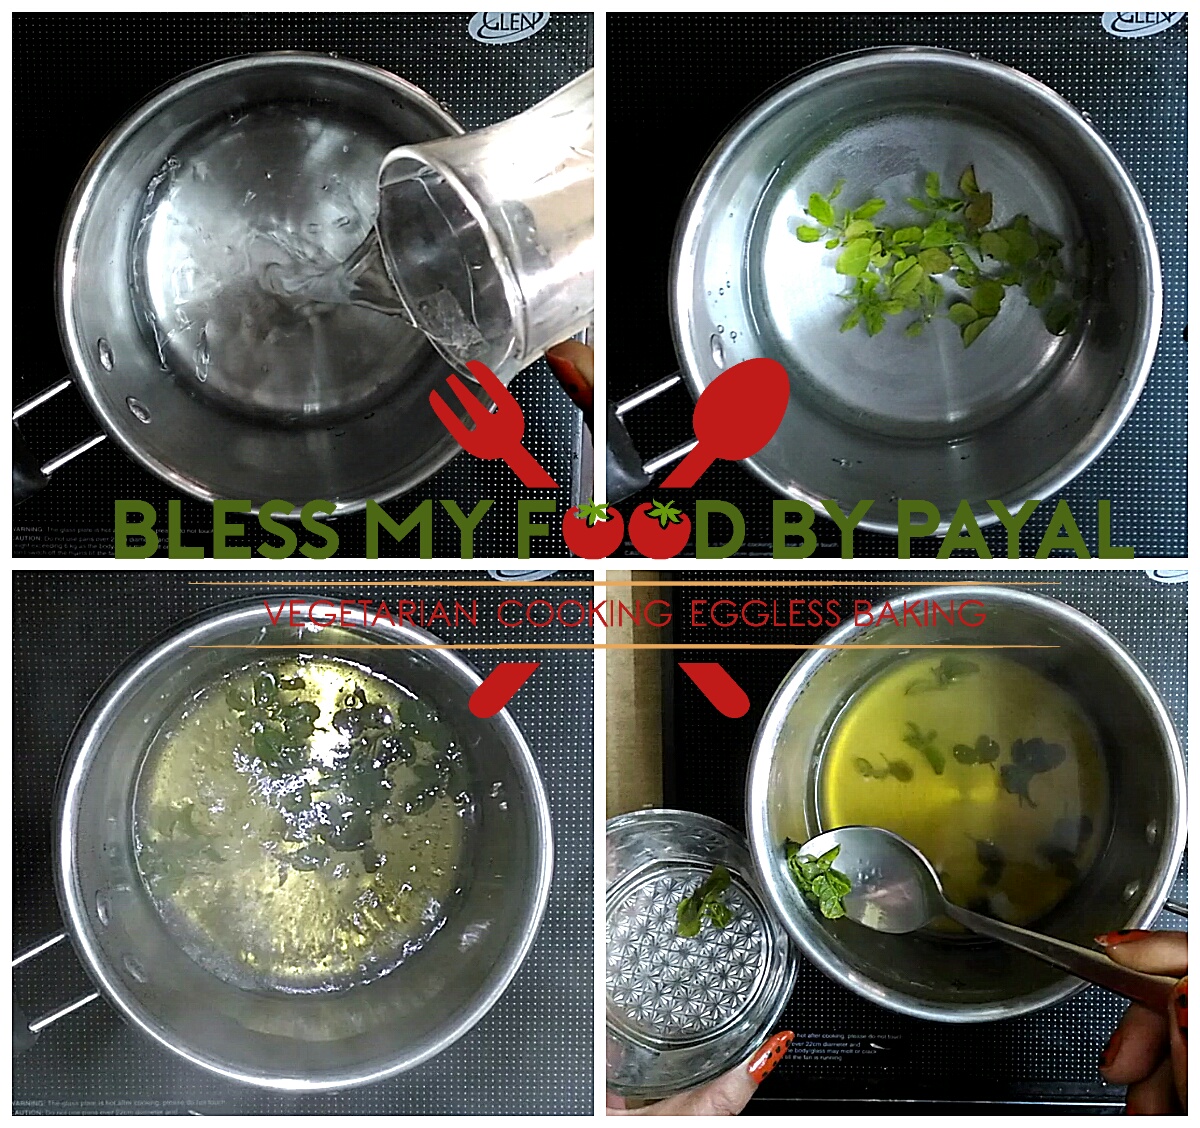
MAKING OF SUGAR SYRUP
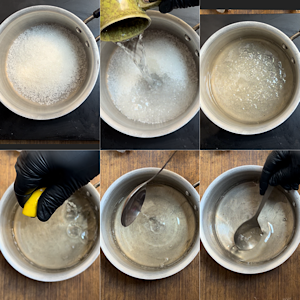
Place a saucepan filled with water & sugar on a gas stove. When it begins to boil, reduce the flame to medium and let it boil for 10 minutes. Switch off the flame, add lemon juice & kewra water. Mix well & keep aside.
MAKING OF KUNAFA’S OUTER LAYERS
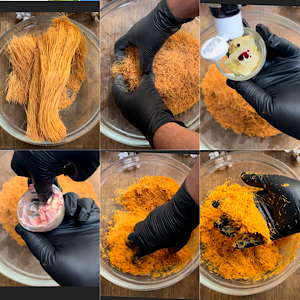
Take vermicelli in a bowl & crush it using your hands. Take a small bowl & mix soft butter & red food colour. Mix well. Add this butter to the vermicelli. Mix all preferably with hands so that the entire batch of vermicelli is coated thoroughly and become little moist. But don’t over do.
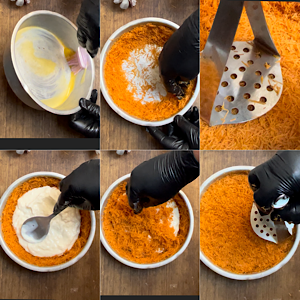
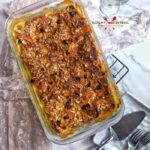
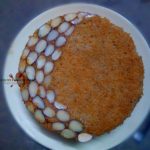
Grease the baking pan (ours is 6 inches round) with butter. Put some vermicelli & firmly press it on the sides of the greased pan. Make a kind of wall with the vermicelli around the sides of the pan so that the cream will remain confined to the vermicelli & will not flow out during the baking process. Put some vermicelli at the base of the baking tin as well and pack the vermicelli as tightly as possible with the help of potato masher. You can also use the bottom of a cup/katori to pack it tightly. Pour in the cream filling and spread with a spatula into an even layer. Take the rest of the vermicelli & spread it over the cream filling & lightly press it.
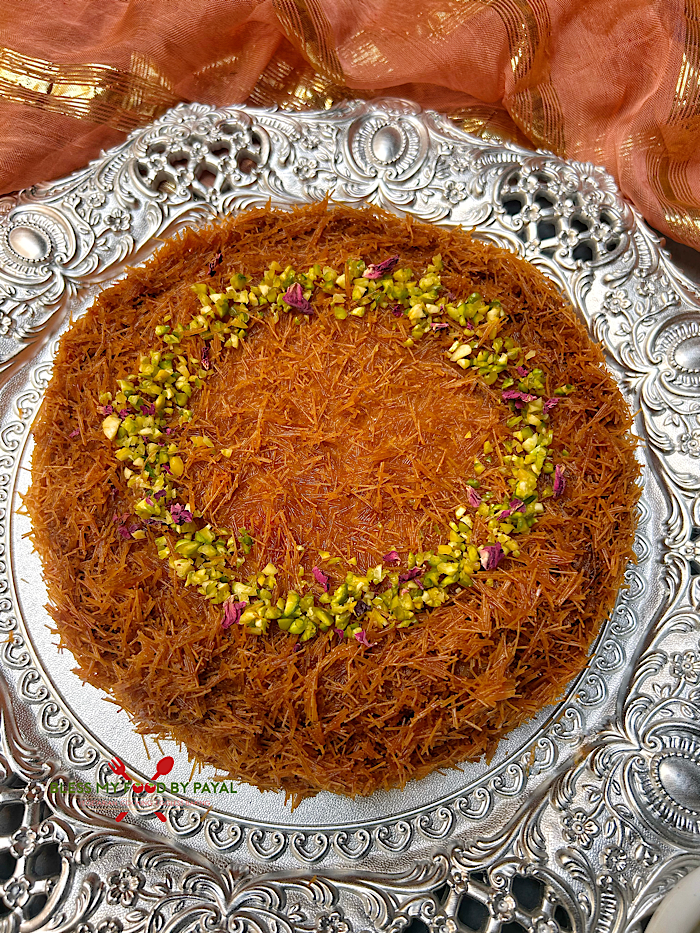
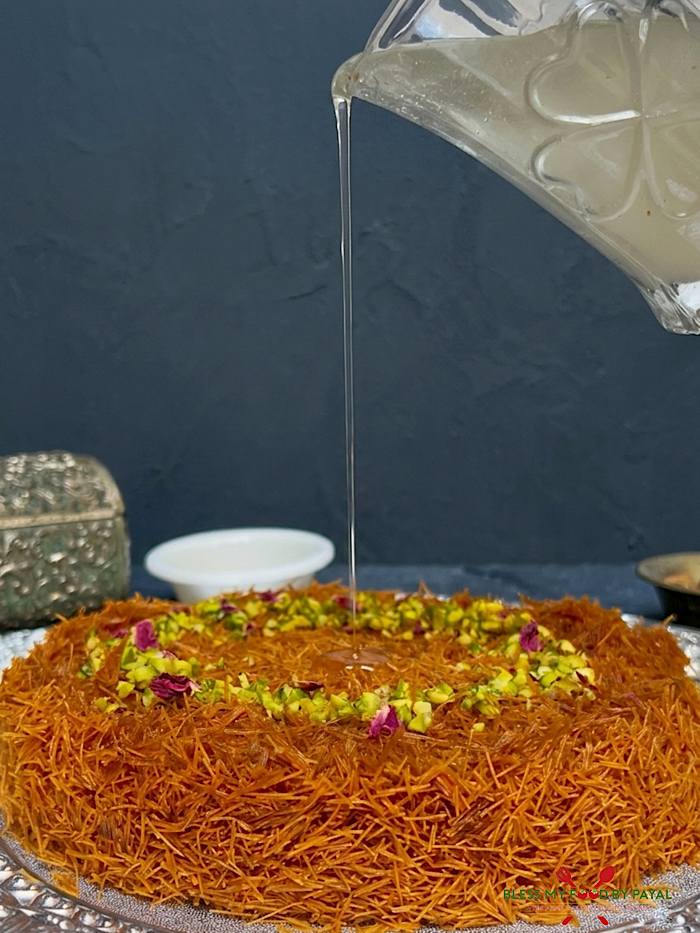
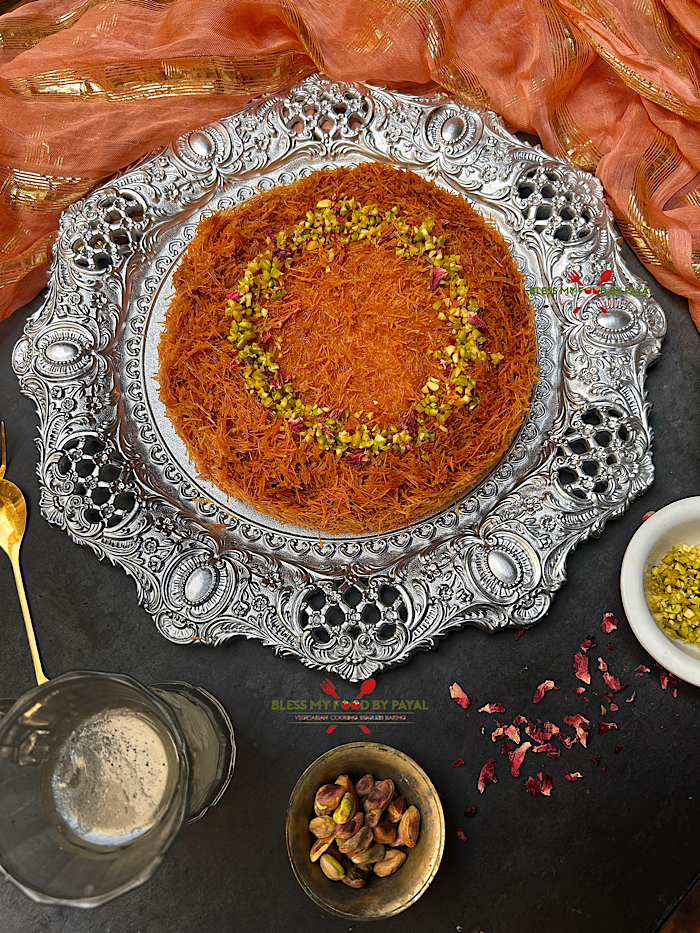
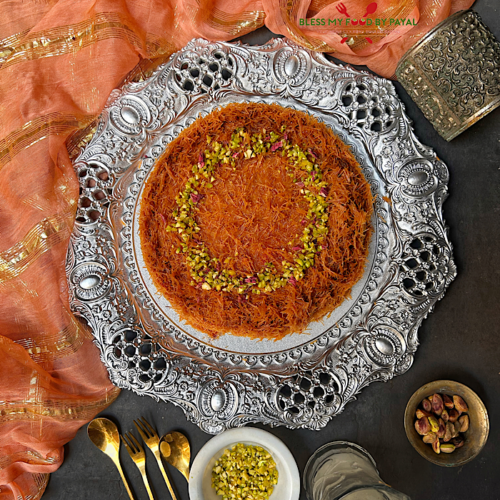
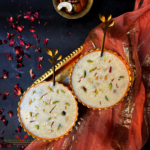
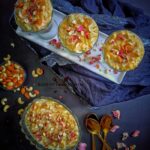
Transfer the pan to the oven and bake for 20 to 25 minutes. Remove the kunafa from the oven and immediately pour on the sugar syrup, starting from the edge and moving towards the center, in a circular motion, making sure to cover the entire surface. You can also reserve some syrup for drizzling over individual servings if desired. Let the kunafa rest until warm or completely cool. Invert on to a serving plate. Garnish with thinly chopped pistachios and dry rose petals.
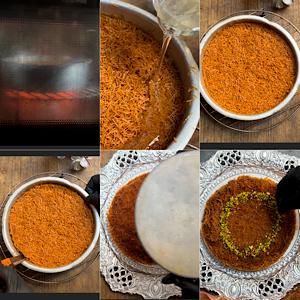
Cut and serve by drizzling more sugar syrup.
NOTES
- Instead of processed cheese, you can opt for cheese slices, mozzarella, cream cheese, cream, heavy cream or condensed milk as well. If using condensed milk, then skip adding extra sugar in milk.
- In place of cornflour, you can also add custard powder. In that case, do not add vanilla essence.
- The traditional kunafa is always drizzled with sugar syrup. However some people love to cherish kunafa with the drizzling of condensed milk/milkmaid.
- The traditional kunafa is made with Kataifi dough. Kataifi dough is nothing but the vermicelli like shredded phyllo dough. As kataifi dough is not available in our city, so we have made kunafa with vermicelli.
We have used roasted vermicelli. You can use even unroasted one but in that case, baking time will be little extra. - Don’t allow to simmers sugar syrup beyond 10 minutes. Better set the timer, otherwise it could thicken too much and become candy-like and not pourable.
Oven-Baked Kunafa with Vermicelli | How to Make Kunafa in Oven Using Vermicelli | Easy Homemade Kunafa Without Kataifi Dough – recipe card
Oven-Baked Kunafa with Vermicelli | How to Make Kunafa in Oven Using Vermicelli | Easy Homemade Kunafa Without Kataifi Dough
Ingredients
FOR CREAMY FILLING
- 2 cup Milk (full fat)
- 4 tbsp Cornflour
- 2 tbsp milk powder (optional)
- 2 tbsp Sugar
- 2 cubes processed cheese
- 1/2 tsp Butter unsalted
- 1/2 tsp Vanilla essence
FOR SUGAR SYRUP
- 1 cup Water
- 1 cup Sugar
- juice of half lemon
- Few drops of Kewra water or rose water
FOR KUNAFA OUTERS
- 250 grams Vermicelli/seviyaan (very thin & roasted)
- 3-4 tbsp Unsalted soft Butter
- 2 drops of Red food colour (optional)
FOR GARNISH
- Chopped Pistachios and dry rose petals
Instructions
MAKING OF CREAMY FILLING
- Take a pan & add remaining milk, corn flour and milk powder. Remember, pan is not on the heat yet.
- Whisk them so well so that there remains no lumps.
- Add butter, processed cheese and sugar.
- Now place the pan on low heat and let it cook on low heat.
- When the milk turns thick, remove it from the heat.
- Add vanilla essence and mix well.
- Keep aside and let the cream come to room temperature.
MAKING OF SUGAR SYRUP
- Place a saucepan filled with water & sugar on a gas stove.
- When it begins to boil, reduce the flame to medium and let it boil for 10 minutes.
- Switch off the flame, add lemon juice & kewra water. Mix well & keep aside.
MAKING OF KUNAFA’S OUTER LAYERS
- Take vermicelli in a bowl & crush it using your hands.
- Take a small bowl & mix soft butter & red food colour.
- Mix well.
- Add this butter to the vermicelli.
- Mix all preferably with hands so that the entire batch of vermicelli is coated thoroughly and become little moist. But don't over do.
- Grease the baking pan (ours is 6 inches round) with butter.
- Put some vermicelli & firmly press it on the sides of the greased pan. Make a kind of wall with the vermicelli around the sides of the pan so that the cream will remain confined to the vermicelli & will not flow out during the baking process.
- Put some vermicelli at the base of the baking tin as well and pack the vermicelli as tightly as possible with the help of potato masher. You can also use the bottom of a cup/katori to pack it tightly.
- Pour in the cream filling and spread with a spatula into an even layer.
- Take the rest of the vermicelli & spread it over the cream filling & lightly press it.
- Transfer the pan to the oven and bake for 20 to 25 minutes.
- Remove the kunafa from the oven and immediately pour on the sugar syrup, starting from the edge and moving towards the center, in a circular motion, making sure to cover the entire surface. You can also reserve some syrup for drizzling over individual servings if desired.
- Let the kunafa rest until warm or completely cool.
- Invert on to a serving plate.
- Garnish with thinly chopped pistachios and dry rose petals.
- Cut and serve by drizzling more sugar syrup.
Notes
- Instead of processed cheese, you can opt for cheese slices, mozzarella, cream cheese cream, heavy cream or condensed milk as well. If using condensed milk, then skip adding extra sugar in milk.
- In place of cornflour, you can also add custard powder. In that case, do not add vanilla essence.
- The traditional kunafa is always drizzled with sugar syrup. However some people love to cherish kunafa with the drizzling of condensed milk/milkmaid.
- The traditional kunafa is made with Kataifi dough. Kataifi dough is nothing but the vermicelli like shredded phyllo dough. As kataifi dough is not available in our city, so we have made kunafa with vermicelli.
We have used roasted vermicelli. You can use even unroasted one but in that case, baking time will be little extra. - Don't allow to simmers sugar syrup beyond 10 minutes. Better set the timer, otherwise it could thicken too much and become candy-like and not pourable.
More from the site
 Methi Seviyan without milk | sweet vermicelli
- Hyderabadi Tootak Recipe (vegetarian)
- Suji Ki Kheer Recipe | Rava Payasam | Creamy & Delicious Semolina Pudding
- Mutanjan recipe
- Kunda Kheer recipe
- vermicelli kheer with custard powder
- Custard Bread Pudding Recipe | Bread and Butter Pudding With Custard
- Custard Cake delight recipe
- Dry Fruit Custard recipe | Plain Custard Recipe
- Eggless almond cake recipe | almond upside down cake | easy almond cake without condensed milk

shibani
Posted at 11:02h, 13 JuneVery interesting recipe
Payal Bali Sharma
Posted at 11:52h, 13 JuneThank you Shibani
annascuisine
Posted at 18:40h, 12 JuneInteresting to read vermicelli as one of the ingredients. But, it looks amazing.
Payal Bali Sharma
Posted at 18:43h, 12 JuneVermicelli seems to be your favourite 😉
Thank you for dropping by.
annascuisine
Posted at 18:46h, 12 JuneYes, I like vermicelli. 🙂
healthyindiankitchen
Posted at 15:34h, 12 JuneGod this is awesome…and the efforts you have put in to perfect out the dish is marvellous! I love Mediterranean desserts… thanks for sharing the recipe with a healthy twist 🙂
Payal Bali Sharma
Posted at 13:07h, 13 JuneThank you so much. Just loved the way you appreciated my efforts. Thank you once again.
Anonymous
Posted at 09:52h, 12 Junefantastic dish
Payal Bali Sharma
Posted at 12:26h, 12 JuneThank you
Rini
Posted at 02:50h, 12 JuneVery beautiful looking dessert Payal. 🙂
Payal Bali Sharma
Posted at 02:52h, 12 JuneThanks a ton Rini