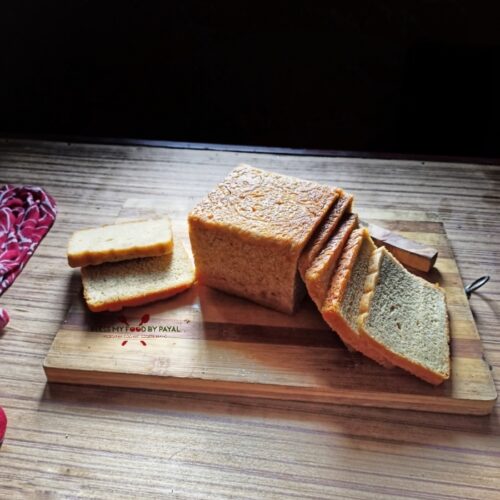
Overnight bread recipe
Overnight bread is a kind of bread-making technique which involves an elongation of fermentation period. The bread dough is allowed to a deliberate transformation and rise slowly, typically 10 to 12 hours or even longer, typically overnight, hence the name.
Ingredients
1 cup = 200 ml
FOR ACTIVATING YEAST
- 1/2 cup milk (lukewarm)
- 1/2 tsp active dry yeast
- 2 tbsp sugar (we used bura sugar)
FOR KNEADING DOUGH
- 2.5 cup whole wheat flour (332 gram)
- 1/2 tsp salt
- 3/4 cup to 1 cup Lukewarm milk for kneading dough
- Activated yeast
- Few drops of oil
FOR BAKING BREAD
- 1-2 tbsp milk
- 2-3 butter
Instructions
FOR ACTIVATING YEAST
- Take a bowl and add 1/2 cup of lukewarm milk.
- Mix 2 tbsp sugar in it.
- Then add 1/2 tsp of yeast. We have used active dry yeast.
- Mix and leave for 10 minutes.
- After 10 minutes or may be in less or more time, you will find the frothy top. It's a sign that yeast is activated.
FOR KNEADING DOUGH
- Take 2.5 cup of whole wheat flour in a bowl.
- Add 1/2 tsp of salt and mix well.
- Pour the yeasted mixture and mix well.
- Now start adding lukewarm milk and begin to bring the flour together.
- Once the flour has come together, transfer it on a larger surface so that it can be easily kneaded. We are already using a wide parat which is used in almost every Indian home to knead dough, so not in need to transfer dough on any wide surface.
- Keep on adding milk and go on with the kneading of dough. The dough will be sticky initially.
- The dough needs to be kneaded for good 15 minutes. Approximately we used 1+1/4 cup (including the milk in which yeast was activated) for kneading dough. You requirement of milk may be different depending on the texture of flour.
- Transfer the dough in a well greased bowl and also apply oil over the dough.
- Cover the dough with a lid.
- Place the bowl at some warm place in the kitchen for 1:30 to 2 hours. This is the first proofing.
- After the said period, dough will get doubled in size.
- Punch out the gases and knead it for just a minute.
- Now roll the dough into a tight log of your tin size.
- Grease a 7 inches bread tin generously. Don't miss the corners. Generously really means generously.
- Place the log in it with the seam side down.
- Apply some oil over the top of loaf to avoid skin formation.
- It's a time to cover the tin. Generally cling wrap is used for the purpose but we avoid using cling wrap because it will not allow the dough to expand beyond a limit. So we use a big sized air tight box who is larger than the baking tin, especially in height.
- Place the baking tin in this box.
- Put a lid on the box.
- Place the box in refrigerator overnight or for 10-12 hours. This is the second proofing.
BAKING
- In the morning or after 10-12 hours, preheat the oven @180°C for 10 minutes. If using microwave oven, then pre-heat at convection mode and if using OTG, then pre-heat with both the rods on.
- Simultaneously bring the box out of refrigerator.
- Give a good milk wash to the loaf. No need to bring the loaf to room temperature or leave on counter for any duration of time.
- This is the stage when you may or may not cover the loaf pan with lid. Mostly people bake without lid so that they can keep eye on bread while baking, though it gives a dome shape to the bread. We baked one bread without lid.
- Alternatively you can cover the loaf pan with a lid. It gives a perfect square shape to the bread like you get in market but for that you have to be sure about the baking time of your bread and this precision comes with the practice as you can't keep eye on your bread. We have baked another bread with lid but make sure to grease the tin lid as well.
- If baking in microwave, place the loaf pan on short heightened rack and bake the bread for 30-35 minutes or till the bottom sounds hollow when tapped.
- If baking in OTG, then after preheating the oven is done, bake the bread in middle rack with only lower rod on. Baking time will be 30-35 minutes or till the bottom sounds hollow when tapped. If the bread has not attained the brown colour from the top, bake during the last 8-10 minutes with both the rods on.
- Take the bread tin out of the oven and allow the bread to cool for 4-5 minutes in the tin.
- Run a buttered knife around the bread.
- Turn the tin upside download, tap it slowly, invert the bread over a wired rack and again invert.
- Brush the top with softened butter inorder to get the lovely sheen.
- Place a clean damp (not wet) towel over the bread for 20-30mins.
- Thereafter allow the bread to cool down completely for atleast 2-3 hours.
- Slice and serve.
Notes
- Instead of milk, you can use water for activating yeast and also for kneading dough.
- Better use powdered sugar because granulated sugar takes time in dissolving and even the milk is just lukewarm.
- Instead of sugar, you can use honey or jaggery powder as well.
- If yeast doesn't activate, do not move ahead with the recipe. Bread will not be formed.
- Do not add all liquid in one go for kneading dough. Add bit by bit and keep on kneading.
- You can keep the bread in refrigerator even for 18-20 hours for 2nd proofing.
- Baking with lid asks for extra baking time in comparison to baking without lid.
- If having a big loaf pan, enhance the quantity of ingredients but keep the quantity of yeast as it is.