Cheesy Discs | cheesy veg discs | homemade cheesy discs recipe with step wise video and pictorial method.
If you are searching for something very easy with the basic ingredients and at the same time dish needs to be having a posh appearance with a wow factor, your search ends here.
Where on one hand, this recipe is very easy to make; on the other hand, it gives you the liberty to make the fillings of your own choice. And undoubtedly, this is going to bring so much of Wow’s for you too.

This recipe was originally posted on 1st June 2016 but at the time, we had no youTube channel so the post was without a video support. Furthermore realised few changes which should have been made and we brought now in this update.
Learned this recipe from Ms. Roochi from a food group and recreated here in this blog. Kindly have a look.
Also see..
Step wise Pictorial recipe of cheesy discs
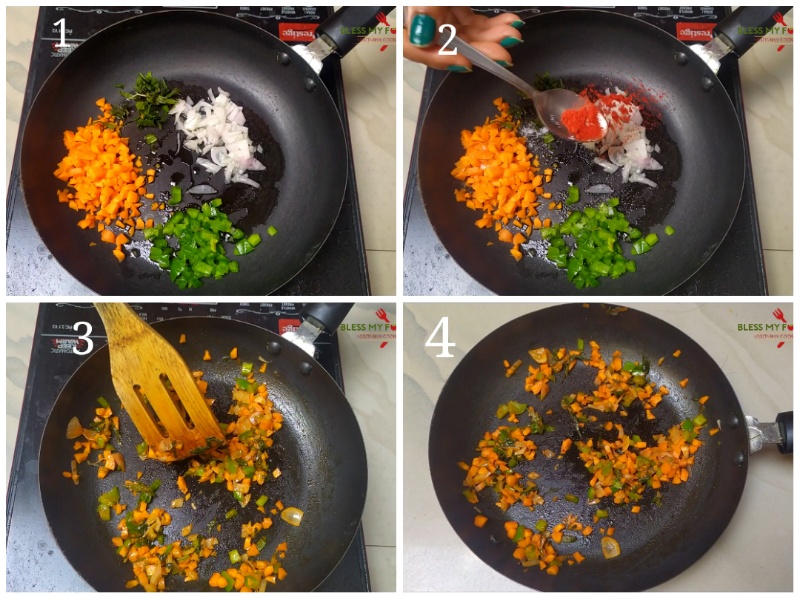
- Heat oil in pan and add all vegetables i.e carrot, capsicum, spring onion bulb, spring onion greens along with salt and red chilli powder.
- Saute for a minute on medium heat. Vegetables shouldn’t loose their crunch,
- Remove the pan from heat and keep aside for cooling down.
- Take a piece of bread and cut it with the help of a round cutter and keep it aside. (We will write it as ‘Round Bread’ for easy understanding).
- Take another piece of bread and cut it in the same manner as done above. (2nd round bread).
Take a small size round cutter and cut the 2nd round bread from inside so that it becomes a ring. (We will write it as ‘Bread Ring’ for the same reason). Repeat the same process for all the pairs of bread. 1 piece Round bread; another piece bread ring.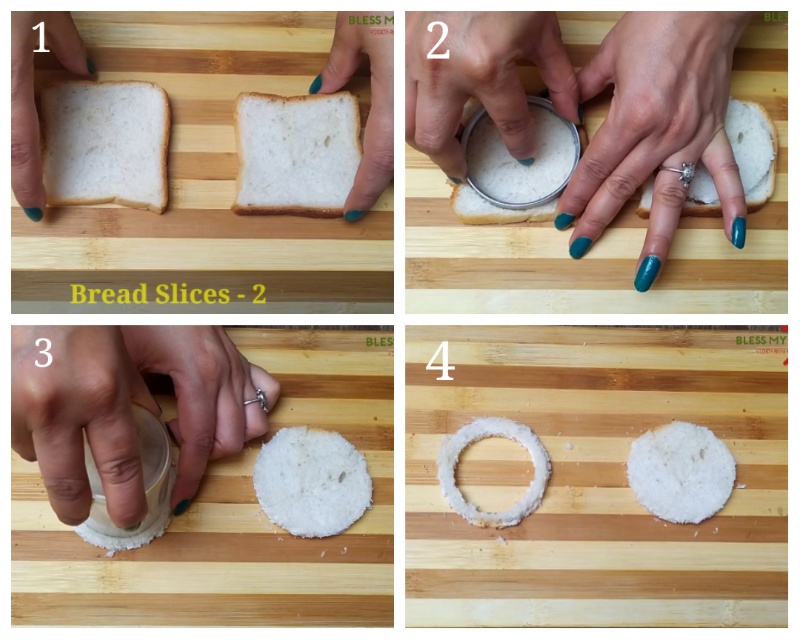
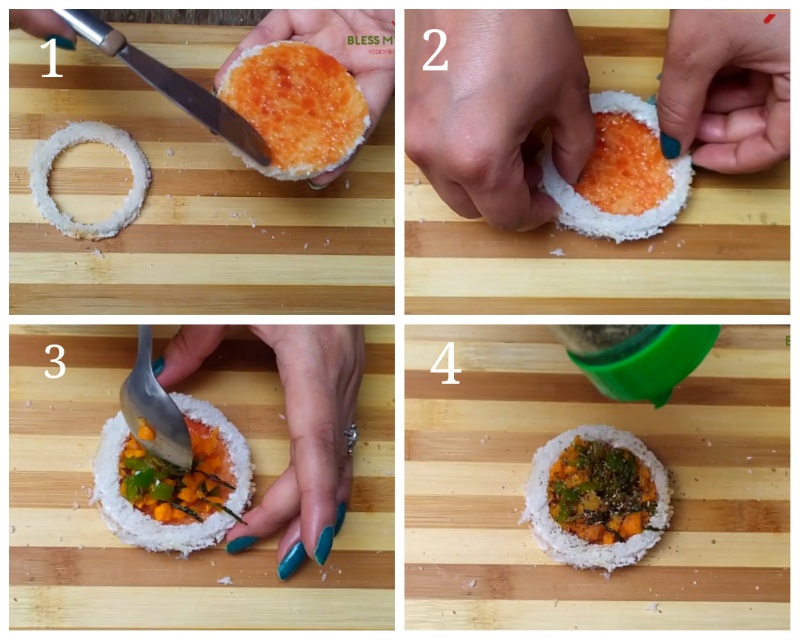
- Take the round bread and apply about a tsp of Tomato ketchup on it.
- Place the bread ring on the round bread.
- Fill the gap in the centre with about a tbsp of vegetables mixture.
- Sprinkle black pepper powder, chilli flakes, mixed herbs and grated Mozzarella cheese on it.
- Then give a milk wash to the discs with the help of a brush. It will give a fine golden color to your discs.
- Now place them in a pre-heated oven at 180° C for 15 minutes. Baking time may vary from oven to oven so please do keep an eye on cheesy discs and bring them out when turned golden brown.
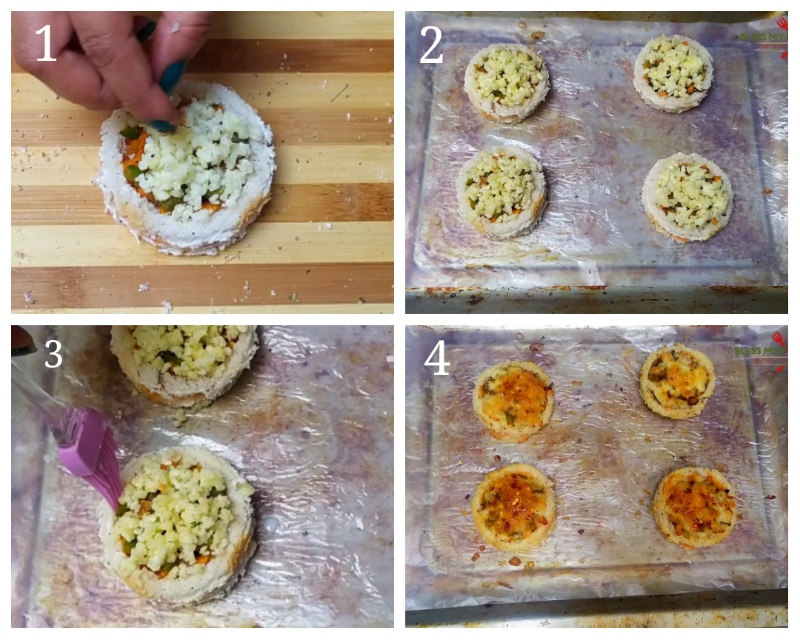


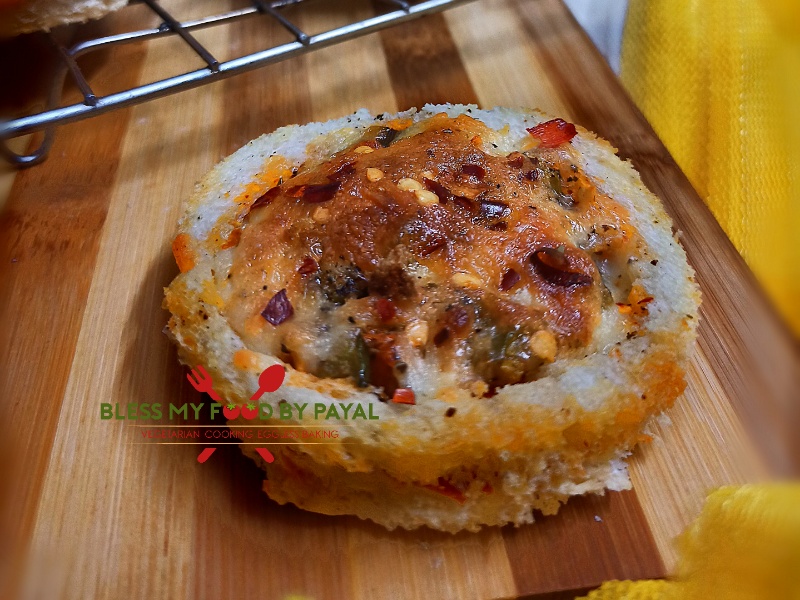
Your cheesy discs are ready to be served. Serve them hot with Tomato Ketchup.
NOTE
- So far as the ingredients are concerned, you can draw your own ideas also in case of some of the contents. Along with tomato ketchup, you can apply mayonnaise and/or garlic paste or any paste/Sauce of your choice.
Also fill the vegetables of your liking/availability. - If you don’t have the round cutters, no issues. We too don’t have the small one. You can take 2 katories of different sizes. One should be wider than the other. We used cutter actually to make the Round breads but a small glass to make the rings.
Cheesy discs – recipe card
Cheesy Discs | cheesy veg discs | homemade cheesy discs recipe

Cheesy Discs : baked round bread carrying delectable topping.
- 8 slices Bread
- 4 tsp Tomato Ketchup
- 2 tbsp Capsicum (chopped)
- 2 tbsp Carrot (chopped)
- 2 tbsp Spring onion bulbs (chopped)
- 2 tbsp Spring onion greens (chopped)
- 1 tsp Oil
- 1/4 tsp Red chilli powder
- 1/4 tsp Black pepper powder
- 1/2 cup Mozzarella Cheese (grated)
- 1 tbsp Chilli flakes
- 1 tbsp Mixed herbs
- 1 tsp Black pepper powder
- salt as per taste
- Milk as per need
-
Heat oil in pan and add all vegetables i.e carrot, capsicum, spring onion bulb, spring onion greens along with salt and red chilli powder.
-
Saute for a minute on medium heat. Vegetables shouldn’t loose their crunch,
- Remove the pan from heat and keep aside for cooling down.
-
Take a piece of bread and cut it with the help of a round cutter and keep it aside. (We will write it as ‘Round Bread’ for easy understanding).
-
Take another piece of bread and cut it in the same manner as done above. (2nd round bread).
-
Take a small size round cutter and cut the 2nd round bread from inside so that it becomes a ring. (We will write it as ‘Bread Ring’ for the same reason).
- Repeat the same process for all the pairs of bread. 1 piece Round bread; another piece bread ring.
- Take the round bread and apply Tomato ketchup on it.
- Place the bread ring on the round bread.
-
Fill the gap in the centre with about 1 tbsp of vegetables mixture.
- Sprinkle black pepper powder, chilli flakes, mixed herbs and grated Mozzarella cheese on it.
- Then give a milk wash to the discs with the help of a brush. It will give a fine golden color to your discs.
- Now place them in a pre-heated oven at 180° C for 15 minutes. Baking time may vary from oven to oven so please do keep an eye on cheesy discs and bring them out when turned golden brown.
- Your cheesy discs are ready to be served.
-
Serve them hot with Tomato Ketchup or with any dip of your choice..
- So far as the ingredients are concerned, you can draw your own ideas also in case of some of the contents. Along with tomato ketchup, you can apply mayonnaise and/or garlic paste or any paste/Sauce of your choice.
Also fill the vegetables of your liking/availability. - If you don’t have the round cutters, no issues. We too don’t have the small one. You can take 2 katories of different sizes. One should be wider than the other. We used cutter actually to make the Round breads but a small glass to make the rings.
PIN IT FOR LATER

Regards
PAYAL BALI SHARMA
SHAILENDER SHARMA
Yummyyyyyy!!!!
Thanks a ton Smita.
looks yummy!! Thanks for sharing the recipe 🙂
It’s all my pleasure. Thanks for dropping by.