Eggless checkerboard cookies recipe | Chocolate Vanilla checkerboard Cookies recipe | Vanilla and chocolate cookies
Eggless checkerboard cookies recipe is a fun recipe made with vanilla and chocolate dough.
Ingredients
FOR VANILLA DOUGH
- 100 grams/1 stick/1/2 cup butter unsalted
- 3 tbsp sugar powdered
- 3/4 cup all purpose flour/maida
- 1/2 tsp vanilla essence
- Half pinch salt
FOR CHOCOLATE DOUGH
- 100 grams/1 stick/1/2 cup butter unsalted
- 3 tbsp sugar powdered
- 3/4 cup all purpose flour/maida
- 1/2 tsp chocolate essence
- 2 tbsp cocoa powder
- Half pinch salt
ADDITIONAL
- Milk as per need
Instructions
MAKING OF VANILLA DOUGH
- Take butter, powdered sugar and vanilla essence in a bowl. Butter should be chilled and not melted or warm.
- Whisk it with the electric beater. You can whisk it with wire whisk also but that requires lots of time and powder.
- In 2 to 3 minutes, butter will become light and fluffy.
- Sieve all purpose flour and salt in it.
- Mix it and you will find a crumbled texture.
- Now assemble the mixture using your hand. Don't knead the dough but only bring it together. If mixture is troubling you in coming together, add a bit of cold milk. Though we didn't need to add milk at all.
- Wrap the vanilla dough in a cling film.
MAKING OF CHOCOLATE DOUGH
- The process of making chocolate dough is exactly similar to making of vanilla dough, except little changes in ingredients.
- Likewise whisk butter, sugar and essence together. We have added chocolate essence but if you don't have it, use vanilla essence without hesitation.
- Sieve all purpose flour, salt and cocoa powder.
- Make a dough the way you made the vanilla flavoured above.
- Cling wrap this dough too and place both the doughs in refrigerator for about 30 minutes or till they become firm.
FURTHER PROCESS
- After 30 minutes, unwrap both the doughs.
- Roll them into a log and cut from the centre dividing into equal parts.
- Now you have 4 portions of dough. 2 vanilla and 2 chocolate.
- Take any one dough (let it be chocolate), and roll it with the help of rolling pin. Don't roll it too thin. We didn't find any hardship in rolling them direct on the wooden surface. But if you find trouble, you can do all your work on cling wrap or butter paper.
- Cut the uneven sides of dough with knife leaving behind a rectangular slab which is almost 2 inches in width and 6 inches in length. Keep it aside.
- Now take another dough but it should be of alternate colour. If earlier we took dark (chocolate) coloured, now we will take light (vanilla) one and roll it too like the previous one and cutting it's odd sides.
- Brush milk on the earlier made slab (dark) and place the light slab on the dark one.
- Likewise make 4 layers of slabs in alternate colour one on another having milkwash in-between. Here we have chocolate > vanilla > chocolate > vanilla. To match perfectly, all slabs should be of equal size in length and width.
- Place them on a cling wrap and trim their uneven edges from all 4 sides.
- Put in refrigerator after wrapped in cling film for 30 minutes or until set.
- Take them out and unwrap.
- Facing any side either dark or light towards you, make 3 small marks at equal distance so that you get it easily from where to cut them.
- Now cut and divide them from the marks straightwardly. On dividing by giving 3 cuts, you will get 4 strips.
- Right now they are standing tall showing only 1 colour, but if you laid them onesided, there's 4 layers of alternate colour in each strip.
- Milkwash the alternate coloured side of one strip.
- Take up the another strip and place it on the milk washed strip in such a way that light layer should come in face with dark strip and vice versa.
- Likewise place all 4 strips one on another after milk washing each layer but do note, there much be a match of alternate colours and this is very important otherwise cookies will not come good in terms of appearance.
- Again wrap them and place in refrigerator for last time for 30 minutes.
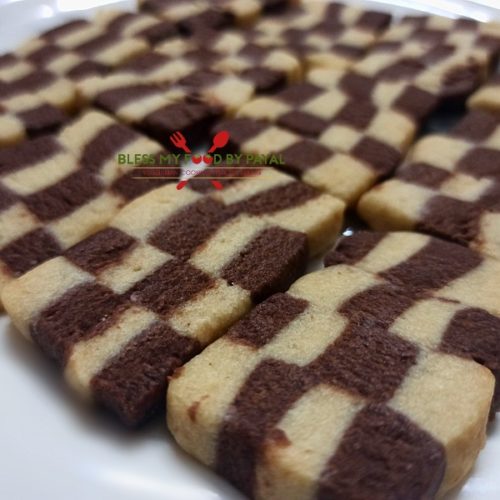
- Taking them out now, start cutting them into the rectangular size of cookies, as shown in picture.
- Arrange them on a baking tray lined with butter paper. Don't keep them joining one another.
- Bake in a pre-heated oven @180℃ for 18 to 20 minutes.
- Let them turn cool completely. Checkerboard cookies are ready. Enjoy.
Notes
Those uneven sides of dough we were keep trimming were not supposed to go waste. Just rolled them and cut with a cookie cutter and baked. They too are the cookies, you can call them vanilla chocolate cookies.