24 Dec homemade desi ghee from malai | desi ghee recipe | homemade ghee

Last Updated on May 3, 2021 by blessmyfoodbypayal
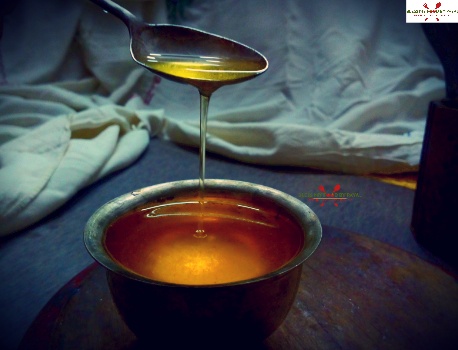
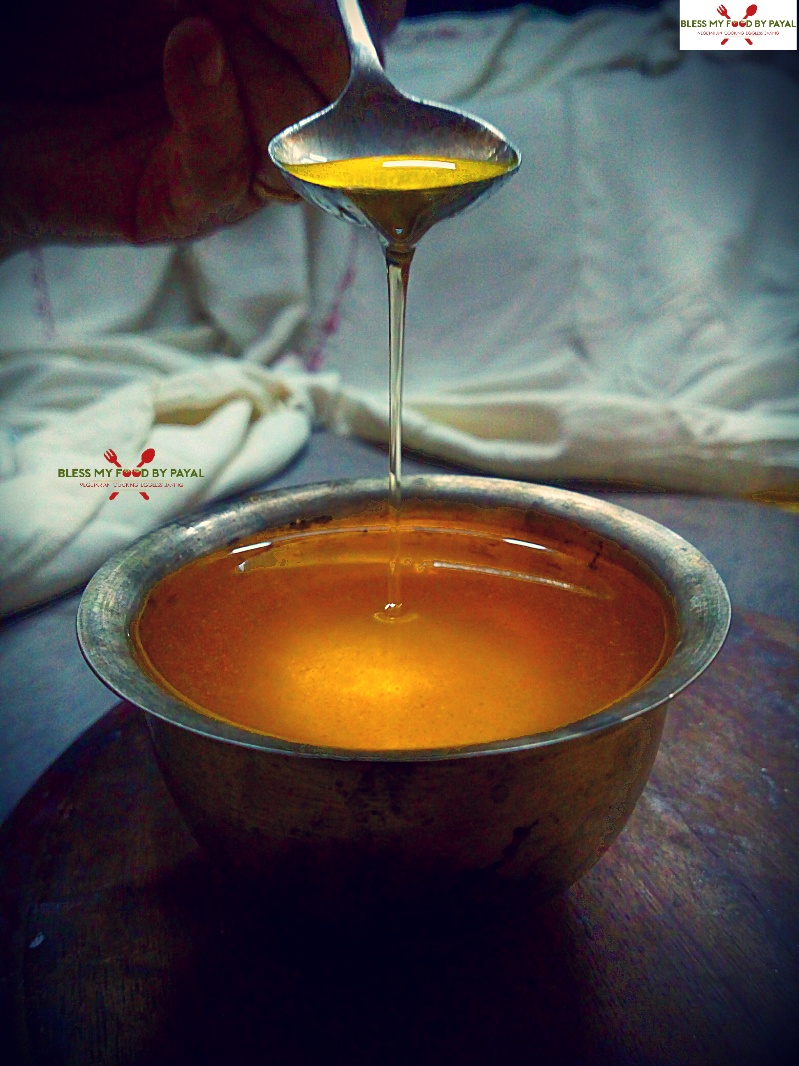
homemade desi ghee from malai | desi ghee recipe | homemade ghee with step wise pictorial and video method.
Desi ghee is something which is prepared in almost every Indian house and Indian meal is incomplete without desi ghee.
The present recipe of desi ghee is considered as the instant recipe because in this recipe we are making desi ghee directly from the collected malai.
most of the people make desi ghee from malai in a way that firstly they make white butter out of the malai and then make desi ghee from the white butter which is obviously a time taking process because you have to go through the two stages ; one making of white butter and second making of desi ghee.
honestly speaking, since a long time we were also keep on making desi ghee by adopting the another method that is firstly making of white butter and then ghee out of the white butter. a concept was installed in our mind that the ghee which is made through the white butter is good and you get more quantity of ghee in comparison to the ghee made directly from malai.
this time we broke out our barrier and tried this way. Wondered to see no difference at all. Rather this one is easy method. You need a blender to make white butter and as a result, so much of utensils are there to wash.
not just easy, but this method is less time taking. One, because, you don’t need to give time to make white butter. Second, for churning malai to make white butter, malai needs to be brought to room temperature. Whereas there’s no need to give much time prior to begin the actual process.
so do adopt this easy method if you want only desi ghee out of malai.
Step wise pictorial recipe of homemade desi ghee from malai
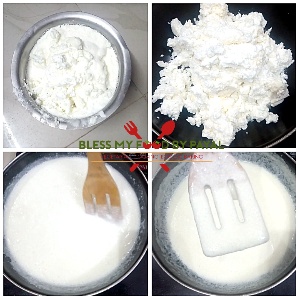
1. Take malai out of the freezer and place on shelf so that it turns little soft & can be transferred to pan easily.
2. Take a wide pan or Kadai and transfer all the malai in it.
3. Place Kadai on low flame.
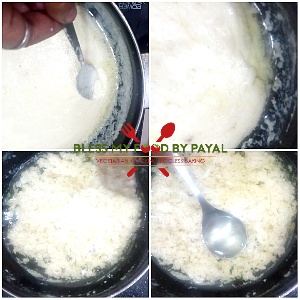
4. Malai will begin to melt slowly. Star stirring.
5. After some time, malai will completely melt and look like a thick milk. Keep stirring at intervals.
6. After 10 to 15 minutes, malai will turn little creamy.
7. At this stage, from the edges, little water like liquid will begin to be seen. That is actually ghee which will begin to separate from malai. Keep stirring.
8. After 15 to 20 minutes you will find more ghee on the edges. Keep stirring.
9. After some more time, milk solids will settle down in the kadai and ghee will get separated. Switch off the flame.
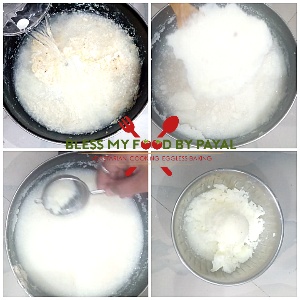
10. Now take a bowl, place a big sieve on the bowl. Then place some muslin cloth or kitchen towel in the sieve.
11. Pass the entire mixture through it.
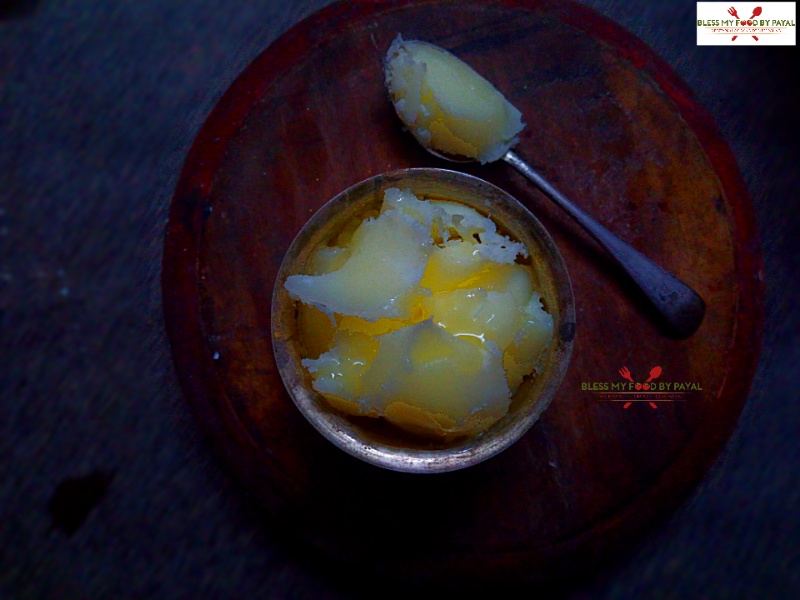
12. Ghee will collect in the bowl and some whitish material will stay in the kitchen towel. This material is called ghee residue which still have so much of ghee in it.
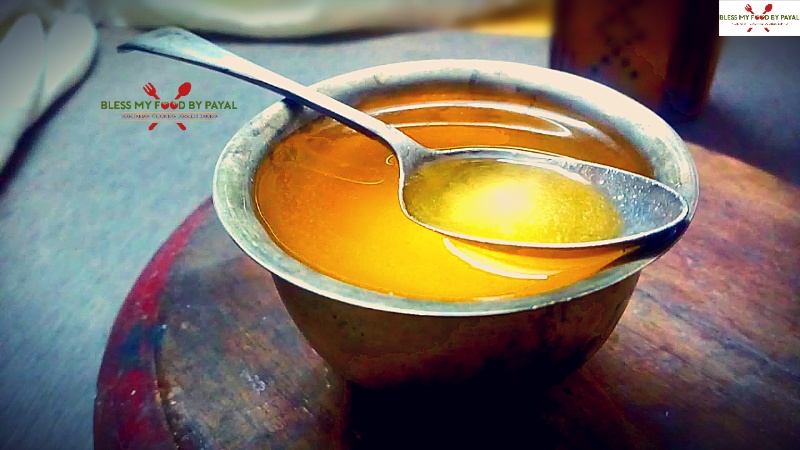
13. Your ghee is ready but this is not the end yet because ghee residue still have so much of ghee in it.

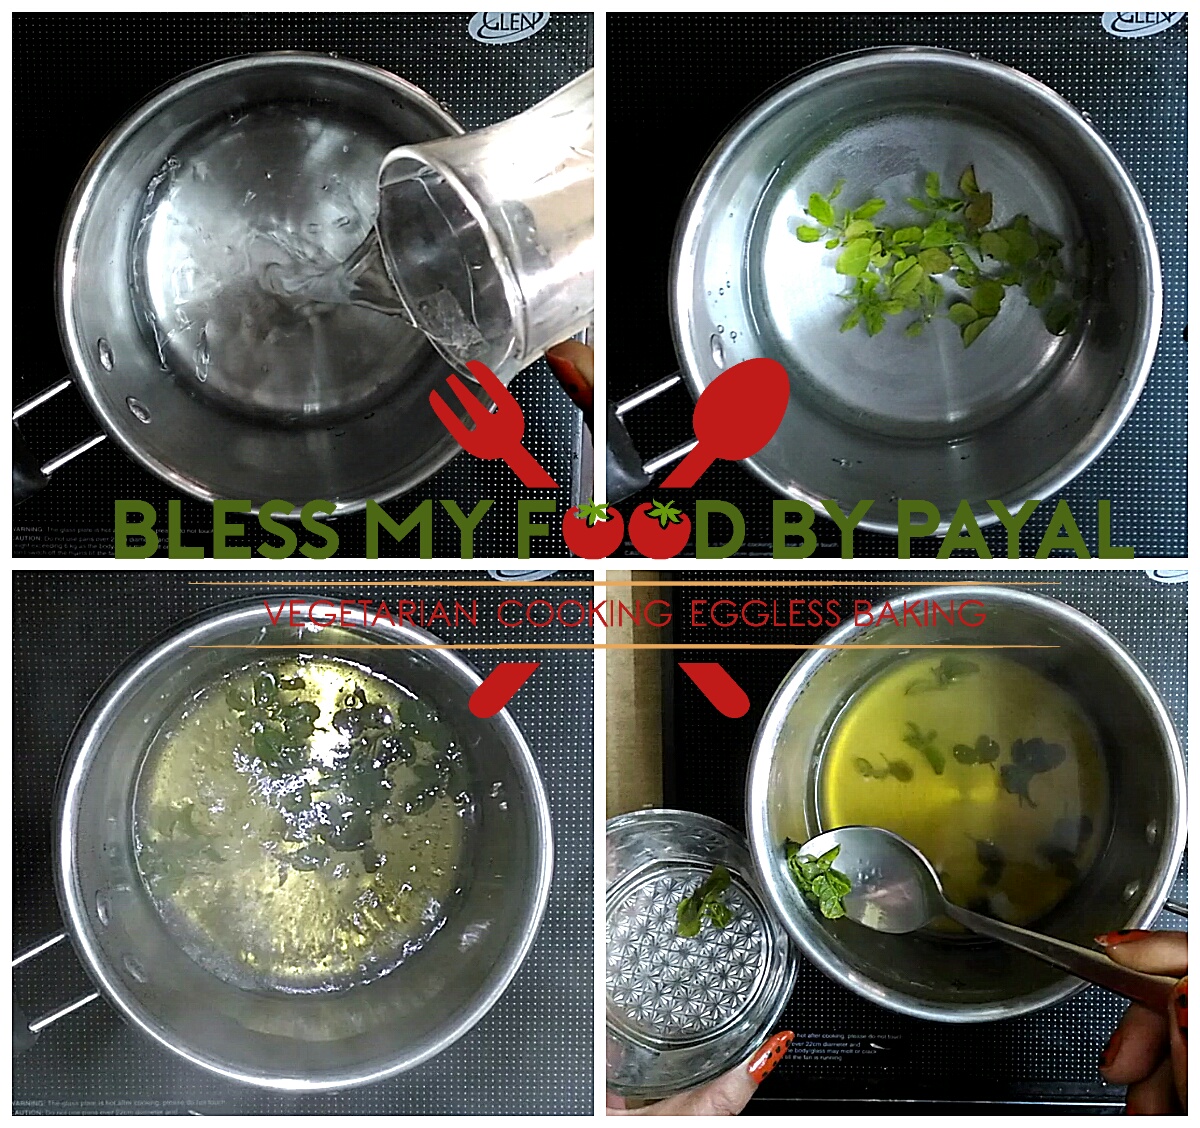
14. Transfer ghee residue back in the kadai and pour some clean water in it so that ghee residue merges well in water.
15. Place Kadai in refrigerator for 2 to 3 hours.
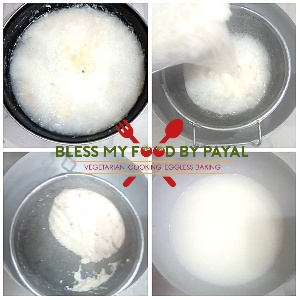
16. Take Kadai out of the refrigerator. There will be a whitish layers set on the surface of the water in Kadai. That is also ghee which is soft frozen due to being in refrigerator.
17. Collect that layer of ghee.
18. The water in the kadai still have some chunks of ghee as well as residue at the bottom. Time to collect that ghee too.
19. Take a small sieve and move it through the surface of the water. Ghee chunks will itself get collected into the sieve. Be careful not to go deep into water because ghee residue is settled down there. You have to collect only and only ghee.
20. Once you see that there’s no more ghee capturing in the sieve, means all ghee is collected. Stop the process. Your another batch of ghee is also abstracted hence ready.
21. As what is left after filtering is not a waste but very useful, so you need to go ahead to save the leftover too.
22. Filter the water through the sieve. Ghee residue and water, which is something like butter milk, get separated.
23. Butter milk can be used to make rice or kneading dough or use it in making daals.
24. Ghee residue is very tasty and healthy and you can make several delicious recipes out of it. See below to check the various recipes made with ghee residue.
So we made ghee twice out of same malai with zero wastage.
Have a look at numerous recipes made using leftover desi ghee residue
NOTE
- While you begin to collect malai, just add 1 tbsp of curd in the bowl. This will give a long life to the collected malai.
- Always put the bowl in freezer.
- Don’t keep collecting malai for an extra long days. During summers, make ghee out of malai collected for a week and during winters, don’t go beyond 15 to 20 days. Otherwise malai will begin to get rotten and also you will not get good quality of ghee residue.
- During the whole process of making desi ghee directly from malai, stirring is very important because otherwise your malai will stick to the bottom and as a result ghee will burn and turn bitter.
- Stirring is also important because you have ghee residue also in the kadai and this will become spoil and become unusable if burnt.
homemade desi ghee from malai – recipe card

homemade desi ghee from malai | desi ghee recipe | homemade ghee
Ingredients
- Malai / Milk cream collected for 15 days
- Water as per need
Instructions
- Take malai out of the freezer and place on shelf so that it turns little soft & can be transferred to pan easily.
- Take a wide pan or Kadai and transfer all the malai in it.
- Place Kadai on low flame.
- Malai will begin to melt slowly. Star stirring.
- After some time, malai will completely melt and look like a thick milk. Keep stirring at intervals.
- After 10 to 15 minutes, malai will turn little creamy.
- At this stage, from the edges, little water like liquid will begin to be seen. That is actually ghee which will begin to separate from malai. Keep stirring.
- After 15 to 20 minutes you will find more ghee on the edges. Keep stirring.
- After some more time, milk solids will settle down in the kadai and ghee will get separated. Switch off the flame.
- Now take a bowl, place a big sieve on the bowl. Then place some muslin cloth or kitchen towel in the sieve.
- Pass the entire mixture through it.
- Ghee will collect in the bowl and some whitish material will stay in the kitchen towel. This material is called ghee residue which still have so much of ghee in it.
- Your ghee is ready but this is not the end yet because ghee residue still have so much of ghee in it.
- Transfer ghee residue back in the kadai and pour some clean water in it so that ghee residue merges well in water.
- Place Kadai in refrigerator for 2 to 3 hours.
- Take Kadai out of the refrigerator. There will be a whitish layers set on the surface of the water in Kadai. That is also ghee which is soft frozen due to being in refrigerator.
- Collect that layer of ghee.
- The water in the kadai still have some chunks of ghee as well as residue at the bottom. Time to collect that ghee too.
- Take a small sieve and move it through the surface of the water. Ghee chunks will itself get collected into the sieve. Be careful not to go deep into water because ghee residue is settled down there. You have to collect only and only ghee.
- Once you see that there's no more ghee capturing in the sieve, means all ghee is collected. Stop the process. Your another batch of ghee is also abstracted hence ready.
- As what is left after filtering is not a waste but very useful, so you need to go ahead to save the leftover too.
- Filter the water through the sieve. Ghee residue and water, which is something like butter milk, get separated.
- Butter milk can be used to make rice or kneading dough or use it in making daals.
- Ghee residue is very tasty and healthy and you can make several delicious recipes out of it. Click here to see various recipes made with ghee residue.
- So we made ghee twice out of same malai with zero wastage.
Notes
- While you begin to collect malai, just add 1 tbsp of curd in the bowl. This will give a long life to the collected malai.
- Always put the bowl in freezer.
- Don't keep collecting malai for an extra long days. During summers, make ghee out of malai collected for a week and during winters, don't go beyond 15 to 20 days. Otherwise malai will begin to get rotten and also you will not get good quality of ghee residue.
- During the whole process of making desi ghee directly from malai, stirring is very important because otherwise your malai will stick to the bottom and as a result ghee will burn and turn bitter.
- Stirring is also important because you have ghee residue also in the kadai and this will become spoil and become unusable if burnt.
More from the site
 Biscuits recipe with desi ghee residue
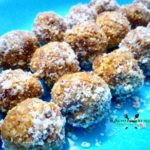
- Oats khoya Ladoo | oats laddu with ghee residue | oats Ladoo recipe
- 7 cup barfi recipe
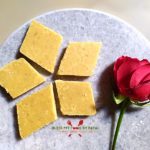
- custard flavoured paneer barfi from leftover ghee residue | paneer barfi | custard burfi
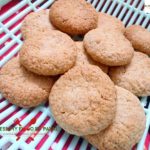
- eggless oats cookies with leftover ghee residue
- Atta ladoo from leftover ghee residue | how to make ladoo from leftover ghee residue
- Eggless Malai Cake recipe
- Ghee residue sweet rice recipe
- Besan ladoo with ghee residue
- Rajgira (amaranth) ladoo recipe


Eggless Fennel seeds cake recipe | eggless sounf cake recipe
Posted at 23:20h, 02 April[…] OIL : Use any oil which is unflavoured and without aroma. In place of oil, feel free to use butter or desi ghee. […]
Masala Gur Recipe | Masala Jaggery Recipe
Posted at 21:52h, 20 February[…] First of all grease a steel plate with desi ghee. We are using a cake […]
Shahi Dal Maharani recipe | Resturant style dal Maharani recipe
Posted at 01:17h, 14 February[…] In the meantime, prepare the tempering and for that take desi ghee in a pan and add cumin seeds. Let them […]
Moong Dal Halwa recipe with less ghee
Posted at 00:01h, 19 January[…] Take desi ghee in a […]
Authentic kashmiri shufta recipe
Posted at 11:09h, 09 November[…] Add 2 tbsp desi ghee in a […]
Pakang tod Mithai recipe | palangtod sweet recipe of pathankot
Posted at 21:12h, 04 November[…] 10. Add 1 tsp cardamom powder and 3 tsp desi ghee. […]
Eggless Desi Ghee cake recipe indian style
Posted at 18:21h, 02 November[…] 7. Then add 1/2 cup desi ghee. […]
Authentic Dal Makhani recipe restaurant style
Posted at 23:06h, 10 April[…] the pressure is releasing, let’s prepare the tadka/tempering of daal. And for that add 2 tbsp desi ghee in a […]
Gur Gatta recipe | Jaggery Honeycomb recipe
Posted at 20:28h, 01 January[…] 6. When jaggery melts, add desi ghee. […]
Gond (edible gum) biscuits recipe - Bless My Food By Payal
Posted at 17:31h, 30 November[…] a pan add desi ghee and gond in […]
Badam barfi | Almond burfi recipe
Posted at 16:00h, 15 October[…] DESI GHEE: This fact need not to be mentioned that Indian sweets are incomplete without ghee. Although you may skip ghee but this is highly recommended. We have used homemade desi ghee. […]
Panchakjjaya Prasadam | Panchakjjaya recipe
Posted at 23:00h, 30 August[…] GHEE : We have added homemade desi ghee and you know when it is an Indian sweet, desi ghee has a vital role to […]
Instant kalakand in microwave
Posted at 19:53h, 20 August[…] homemade condensed milk, milk powder, rose water, desi ghee and […]
Methi Seviyan without milk | sweet vermicelli
Posted at 15:21h, 08 July[…] GHEE – Desi ghee makes this dessert so rich and […]
Eggless ghee residue cake recipe
Posted at 17:15h, 28 May[…] malai from the boiled milk, storing it in refrigerator and then making ghee from malai is very regular task at our […]
Ajwain Atta Cookies | Ajwain cookies recipe | bless my food by payal
Posted at 21:22h, 27 April[…] : Butter provides a fat content to the cookies. You can replace butter with desi ghee but don’t try with […]
Navratan Pulao Recipe - Bless my food by payal
Posted at 12:52h, 07 March[…] recipe uses only 3 ingredients which are dairy and i.e. desi ghee/clarified butter, Indian cottage cheese/paneer and […]
Jammu special Sasrut recipe | Dogra wedding recipe sasrut
Posted at 13:46h, 02 November[…] 1 tsp of desi ghee in a non stick pan and put on low […]
how to make suji ka halwa in microwave oven | suji ka halwa in microwave
Posted at 14:46h, 11 October[…] or suji halwa, is an Indian sweet dish made with Primarily 4 ingredients i.e. semolina (suji/rava), desi ghee, sugar, and water. However few likes to use milk instead of […]
vermicelli kheer with custard powder | how to make semiya custard
Posted at 23:28h, 12 September[…] desi ghee in a heavy bottomed […]
Authentic mathura ke pede recipe | Bless My Food by Payal
Posted at 19:03h, 27 August[…] 2 tsp of desi ghee and keep cooking & […]
Bawe wali Barfi Jammu special | Famous Barfi of Bahu Fort Jammu
Posted at 20:32h, 23 August[…] a tray or steel thali with desi ghee and keep […]
Besan Nankhatai Recipe | Besan Khatai Recipe | Bless My Food
Posted at 12:39h, 20 July[…] Now start adding desi ghee in parts and keep on binding the […]
Green moong dal recipe without tomato - Bless My Food By Payal
Posted at 19:21h, 24 March[…] not vegan, put a dollop of desi ghee/clarified butter over the hot dal while serving and this is purely a […]
Coconut cookies without eggs | crunchy coconut cookies | eggless coconut biscuits recipe - Bless My Food By Payal
Posted at 12:59h, 08 June[…] Desi ghee/clarified butter can replace butter & […]
Layered Gujia recipe | baked Gujia recipe | how to make mawa gujia without mould - Bless My Food By Payal
Posted at 19:16h, 04 March[…] desi ghee in a pan & add mawa in it. We are using the instant mawa which gets ready in less than 5 […]
Jammu wale naan | how to make chole wale naan | jammu street food naan - Bless My Food By Payal
Posted at 13:47h, 03 January[…] done, return back & remove naan from tawa. While the naan is hot, apply butter or desi ghee on […]
Lata Lala
Posted at 11:00h, 16 DecemberWhat a fabulous and easy recipe for making homemade ghee without the tedious process of making makhan first and then ghee from it.
Would love to try this sometimes as we don’t use full fat milk anymore.
Lived the detailed recipe with lots of helpful tips to make it perfect way.
Thank you for sharing.
blessmyfoodbypayal
Posted at 12:07h, 16 DecemberHappy to see you really liked it. Thank you heaps for the comment.
Khoya matar makhana recipe | khoya matar makhana curry | khoya matar makhana using leftover desi ghee residue - Bless My Food By Payal
Posted at 13:35h, 13 December[…] residue. Yes, it sounds awkward to many but this is the fact that the residue left after making desi ghee at home is very healthy and full of nutrition. It is also named as khoya or mawa. You can make […]
jammu special sund | sundh recipe | sund panjiri recipe - Bless My Food By Payal
Posted at 14:24h, 07 December[…] a big pan of heavy bottom & place it on low flame after adding desi ghee in […]
Oats khoya Ladoo | oats laddu with ghee residue | oats Ladoo recipe - Bless My Food By Payal
Posted at 13:02h, 04 December[…] ghee in a pan on low […]
7 cup barfi recipe | 7 cup cake recipe | 7 cup burfi - Bless My Food By Payal
Posted at 07:51h, 04 November[…] add rest of the ingredients i.e. desi ghee, coconut, milk, sugar and mix […]
10 recipes using leftover desi ghee residue | desi ghee residue recipes | how to use ghee residue
Posted at 15:34h, 03 August[…] per Wikipedia, Desi Ghee is a class of clarified butter that originated from the Indian subcontinent. It is primarily used […]
Dalia Ladoo | Broken Wheat Ladoo - Bless My Food By Payal
Posted at 14:05h, 18 April[…] half of the mixture and Knead it with finger tips by adding desi ghee in it spoon by […]
suji ka paratha | sooji paratha | rava paratha - Bless My Food By Payal
Posted at 14:02h, 15 April[…] Cook suji Ka Paratha from both the sides until turn golden brown. Fry with oil and ghee. […]
custard flavoured paneer barfi from leftover ghee residue | paneer barfi | custard burfi - Bless My Food By Payal
Posted at 14:48h, 09 April[…] Take a plate or small box (we used cake tin) and grease it with ghee. […]
jammu chocolate | jammu chocolate recipe | how to make jammu chocolate at home - Bless My Food By Payal
Posted at 17:35h, 07 April[…] desi ghee in a wide pan/Kadai and place on low […]
gur wale chawal | gur ke chawal | jaggery rice recipe - Bless My Food By Payal
Posted at 14:46h, 07 April[…] desi ghee, bay leaf, cinnamon, cloves, green cardamom, almonds, cashews and coconut and saute for few […]
khoya paneer | khoya paneer recipe | how to make khoya paneer - Bless My Food By Payal
Posted at 12:24h, 13 March[…] must be knowing that after making desi ghee from malai, there’s something brownish coloured stuff remains which is named differently. some call it […]
coconut and cornflakes parantha | nariyal aur cornflakes ka parantha - Bless My Food By Payal
Posted at 19:47h, 08 March[…] – 1/4 cup Cornflakes – 1/4 cup Salt as per taste Red Chilli Powder as per taste Oil or Ghee as per need Water as per […]
thekua | thekua recipe | bihari khasta thekua recipe - Bless My Food By Payal
Posted at 17:47h, 06 March[…] ghee residue – 1/2 cup (If making without ghee residue, add 3 tbsp of desi ghee) […]
Tiranga Kesri Halwa | Rava Kesri recipe | Indian Semolina Pudding
Posted at 18:22h, 11 February[…] Desi Ghee– 1 tbsp […]
Shahi Tukda
Posted at 18:19h, 11 February[…] 8 slices* Desi ghee 4 […]
Kaja | khaja sweet | madatha kaja recipe - Bless My Food By Payal
Posted at 18:16h, 11 February[…] Desi Ghee (clarified butter) or melted butter – 2 tbsp […]
Amul Butter Recipe
Posted at 14:44h, 11 February[…] Desi Ghee* (Melted/Preferably made of Cow’s milk) – 1/2 Kg or about 2 cups Turmeric** – 1/8 tsp Salt- 1 tsp Baking soda a pinch (optional) Ice cubes 10 – 12 […]
Dry Fruit Madra - Sugar free dessert
Posted at 14:34h, 11 February[…] Desi Ghee/clarified butter – 1 tbsp […]
Mughlai Shahi Paneer Korma
Posted at 19:24h, 10 February[…] Desi ghee – 2 tbsp […]
Louki Aur Nariyal Ki Barfi - Bless My Food By Payal
Posted at 18:18h, 10 February[…] Desi Ghee/ Clarified Butter – 2 tbsp […]
Doodh peda | milk peda recipe - Bless My Food By Payal
Posted at 17:29h, 10 February[…] dulce de leche or Condensed milk – 1 can/400 Gms Milk powder – 1.5 Cups Desi Ghee / clarified butter – 2 tbsp + just a bit to grease the hands Cardamom essence or Powder […]
dates laddu | dates ladoo recipe | khajur laduu | dates and nuts laddu recipe - Bless My Food By Payal
Posted at 19:42h, 08 February[…] – 2 cup Desi Ghee – 2 tbsp Poppy seeds/ khas khas – 2 tsp Almonds – 1/2 cup Cashews – 1/4 cup […]
kaddu ka halwa | pumpkin halwa recipe - Bless My Food By Payal
Posted at 18:51h, 08 February[…] – 1 kg Sugar – 1 cup Fennel powder – 1 tbsp Cardamom powder – 1 tsp Desi ghee or vegan butter – 2 tbsp Dry fruits of your […]
methi puri recipe, methi ki puri, how to make methi puri, methi poori
Posted at 18:48h, 08 February[…] Desi ghee – 2 tbsp […]
farsi puri recipe | gujarati farsi puri | how to make farsi puri | farsi poori - Bless My Food By Payal
Posted at 18:21h, 08 February[…] 2 tbsp Cumin seeds – 1 tsp Black pepper (crushed) – 1 tsp Carom seeds – 1/4 tsp Desi ghee – 2 tbsp Salt -1/2 tsp Oil for frying Water as per […]
Rajasthani Khoba Roti Recipe
Posted at 18:10h, 18 January[…] wheat flour 1 and half cup* Desi ghee (clerified butter) 2 tbsp** Salt 1/2 tsp*** Chilli flakes 1/2 tsp (optional) Cumin seeds 1/2 tsp […]
Meethe Chawal
Posted at 18:07h, 18 January[…] 1 cup Desi Ghee 4 tbsp Piece of Cinnamon 1 inch Cloves 3 Green Cardamoms 4 Cardamom powder ¼ tsp Sugar ⅔ cup […]
hydrabadi veg dum biryani | veg dum biryani | hydrabadi biryani - Bless My Food By Payal
Posted at 17:48h, 18 January[…] desi ghee – 2 tbsp 7. oil – 1 tbsp 8. cumin seeds – 1 tsp 9. cinnamon – 1 10. bay […]
Lehsuni palak | lehsuni palak ka saag | dhaba style lehsuni palak recipe - Bless My Food By Payal
Posted at 12:45h, 15 January[…] desi ghee/ clarified butter (oil for vegans) – 1 tbsp cumin seeds – 1/2 tsp dry red chillies – 2 garlic – 12 cloves […]
gajar ka halwa with khoya | gajar ka halwa with mava | gajar halwa without milk - Bless My Food By Payal
Posted at 19:07h, 07 January[…] – 1 kg Desi ghee – 3 tbsp Jaggery or sugar – 1 cup Khoya – 250 gm Green cardamoms – 3 Dry […]
gajar ka halwa with milk | gajar ka halwa | gajar ka halwa without khoya - Bless My Food By Payal
Posted at 19:00h, 07 January[…] Desi ghee – 2 tbsp […]
gajar ki barfi with desi ghee residue | carrot Barfi | gajar burfi recipe - Bless My Food By Payal
Posted at 13:52h, 26 December[…] – 1 kg Desi ghee – 2 tbsp + 1 tsp for greasing Milk – 250 ml Ghee Residue – 1 cup […]